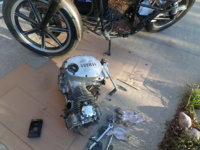
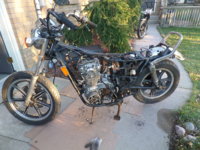
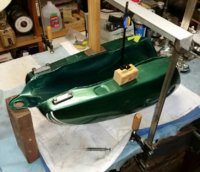
What have you done to your XS today?

Hey peanut, I am using the stock 750 petcocks. I cleaned and rebuilt them but have not tested them yet. I suspect they will work as well as any other Yamaha petcock that is to say, barely adequate.

That cap is awesome but a bit beyond my fabrication skills. I used the 750 cap but used the tumbler from my 650 so I could keep the same key.
What are you doing for a seat? Rear fender?

Ha !... yeah its beyond my skills too
Good to hear that the locks will switch so I can keep the existing key.
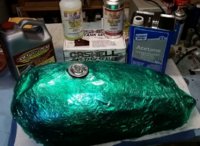
I haven't had a chance to inspect the tank properly yet so I don't even know if the cocks are vacuum or not .
I shoved it into the garage quickly when it arrived so that the Boss didn't see it. ...'what's that ? why do you need another rusty tank cluttering up the place etc etc '...:) actually shes real good about my little purchases

I did think about buying a Tig welder and learning to microweld but I can't see it happening any time soon. It would be real useful to weld thin car body panels too.
I have a standard xs650 side hinged seat stored somewhere and I'm hoping I can make it fit the existing hoop somehow with a little brute force and jiggery pokery but I haven't offered them up the frame together yet.
How much longer is the 750 tank than the 650 ? perhaps it might be possible to reposition the seat hinges on the seat
 
Ha !... yeah its beyond my skills too
Good
I have a standard xs650 side hinged seat stored somewhere and I'm hoping I can make it fit the existing hoop somehow with a little brute force and jiggery pokery but I haven't offered them up the frame together yet.
How much longer is the 750 tank than the 650 ? perhaps it might be possible to reposition the seat hinges on the seat

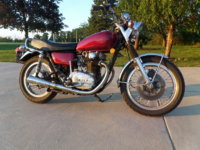
Mine is a Special so the seat is a different than a Standard but it still was side hinged. The last I checked the tank was about 1 1/2" too long for the seat to fit. This is with the tank mounted far enough backward it is still protected by the steering stops.
 
Mine is a Special so the seat is a different than a Standard but it still was side hinged. The last I checked the tank was about 1 1/2" too long for the seat to fit. This is with the tank mounted far enough backward it is still protected by the steering stops.
thanks Jim 1.5" doesn't sound a deal breaker ...or should I say a ball breaker lol
Mine is a Special model too its a 79 Special ll with a side hinged seat. The standard seat is also from a 79 model so should fit ok but it sounds like I would have to shove the hinges back a bit . Not sure how that would look until I do a quick mockup
xs650 rear view .JPG
 
Last edited:
Took advantage of 15C weather here in SW Ontario to start up the red '76 and putt putt down the road a ways and then back. Really must put that starter back on; don't know why the po removed it and left all the wiring. He must have hated the Yamaha grind!

Don't be oblivious to the obvious! Just because that modern fuse looks good, change it anyways before you get all sweaty kicking!!
 

Attachments

  • SAM_6032.JPG
    SAM_6032.JPG
    266.2 KB · Views: 190
Old Guy Switches Motor in One Hour!!
Gotta thin the herd, so I choose a fairly complete 80 that I bought some years ago, lit had been left outside and forgotten after someone had pulled out the motor. After applying for and getting an ownership (title for US members) it sat some more while I invested in a couple more Standards. Found a mystery motor (good compression, vague provenance) so the plan developed.
Late August under the maple tree, I did a bit of prep for the switch, now 3 months later it was time, (supposed to rain tomorrow and floor space in the garage is a bit cramped). Worked outside in the lee of the garage where the waning rays of the sun gave a bit of warmth. Thought I would put the clock on this job, so at 3:15, the donor was in place on a double sheet of cardboard. While upright, I removed the nuts from the mount bolts and pulled most of them out. Laid the bike down and finished removing all the mounts and with only a bit of jiggling, stood the bike up and wheeled it away from the motor. Brought the 80 up and laid it down over the motor. I had only installed a motor before into a bare frame, no forks which was a piece of cake. However, with all the accessories, the 80 was a bit heavy and cumbersome to move the frame around to line up the holes, so I put it up on the centre stand and lifted the motor into it.
Lift with your legs and you are good. Once you have the bottom centre mount lined up, hold the motor in place with a long screwdriver, (or even the bolt if it is really well lined up) and then tip it back into the rear frame mount. Hold it there with a long screwdriver as well and carefully work the bolts in. Consider whether you want all the bolt heads on one side of the motor - I recommend that - there may even be some best practices set out in a book some place for which side the nuts should be on - and you have it beat. Install the other mounts and go find that set of carbs I cleaned before I moved.
I have some wiring to fix, plus the old glass fuse box to replace with modern ones and the starter may be making an awful noise before too long.
No fins were broken in the making of this post, but some cardboard was sullied.
Last picture at 4:17
Cheers
 

Attachments

  • SAM_6236.JPG
    SAM_6236.JPG
    271.9 KB · Views: 186
  • SAM_6536.JPG
    SAM_6536.JPG
    273.2 KB · Views: 202
  • SAM_6540.JPG
    SAM_6540.JPG
    289.3 KB · Views: 176
  • SAM_6541.JPG
    SAM_6541.JPG
    260.4 KB · Views: 178
  • SAM_6545.JPG
    SAM_6545.JPG
    305.4 KB · Views: 180
  • SAM_6547.JPG
    SAM_6547.JPG
    341.4 KB · Views: 168
Last edited:
Good job lakeview! Yes with a bench on the right side that closely matches the frame engine height sliding them in and out isn't too bad. A hydraulic motorcycle lift with some plywood affixed works. A pad on top of the frame, you can use your biceps and not your back to lift!
 
Old Guy Switches Motor in One Hour!!
Gotta thin the herd, so I choose a fairly complete 80 that I bought some years ago, lit had been left outside and forgotten after someone had pulled out the motor. After applying for and getting an ownership (title for US members) it sat some more while I invested in a couple more Standards. Found a mystery motor (good compression, vague provenance) so the plan developed.
Late August under the maple tree, I did a bit of prep for the switch, now 3 months later it was time, (supposed to rain tomorrow and floor space in the garage is a bit cramped). Worked outside in the lee of the garage where the waning rays of the sun gave a bit of warmth. Thought I would put the clock on this job, so at 3:15, the donor was in place on a double sheet of cardboard. While upright, I removed the nuts from the mount bolts and pulled most of them out. Laid the bike down and finished removing all the mounts and with only a bit of jiggling, stood the bike up and wheeled it away from the motor. Brought the 80 up and laid it down over the motor. I had only installed a motor before into a bare frame, no forks which was a piece of cake. However, with all the accessories, the 80 was a bit heavy and cumbersome to move the frame around to line up the holes, so I put it up on the centre stand and lifted the motor into it.
Lift with your legs and you are good. Once you have the bottom centre mount lined up, hold the motor in place with a long screwdriver, (or even the bolt if it is really well lined up) and then tip it back into the rear frame mount. Hold it there with a long screwdriver as well and carefully work the bolts in. Consider whether you want all the bolt heads on one side of the motor - I recommend that - there may even be some best practices set out in a book some place for which side the nuts should be on - and you have it beat. Install the other mounts and go hunt for a set of clean carbs.
I have some wiring to fix, plus the old glass fuse box to replace with modern ones and the starter may be making an awful noise before too long.
No fins were broken in the making of this post, but some cardboard was sullied.
Last picture at 4:17
Cheers

Dang Lakeview - you da Man!!!

That is absolutely excellent work! Congrats!!

Dammit - I’m comin’ over!

Pete
 
Nice work 2M!
Hey, this is cool! Is that your calendar girl?
I would love to see a thread that detailed a home paint job from start to finish.
 
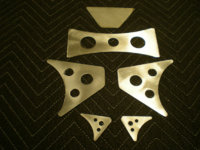
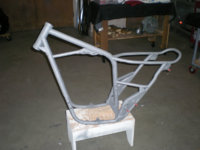
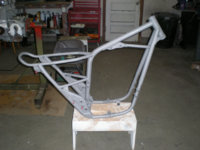
Perfect day for the initial sand blast. Tomorrow I`ll remove all the factory welding slag and tack the new gussets in place. Still need to make seat & coil mounting tabs and a grab rail for the rear loop. Lots to do but it beats the Hell out of yard work.
scrambler build 001.JPG scrambler build 003.JPG
 
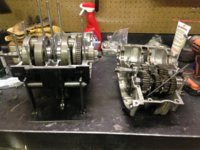
I finally realized that if my engine was going to get built, i was going to have to do it. I built a simple holding fixture and got the cases split and the crank set into the new upper case. Tomorrow, I will start tackling the transmission. not totally sure what I am doing but I am taking my time and shooting lots of pictures.
 

Attachments

  • IMG_1556.JPG
    IMG_1556.JPG
    197.6 KB · Views: 200
Back
Top