What have you done to your XS today?

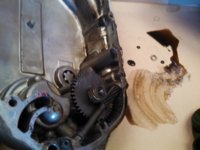
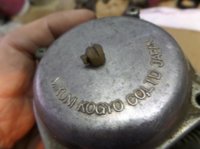
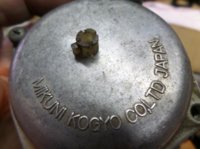
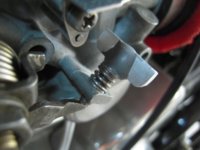
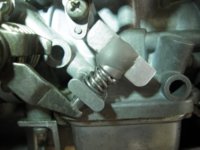
Went over to a buddy`s house and re-cleaned and synced the carbs and wholly smokes,
its like riding a whole different bike, I knew it wasnt getting all the power it seemed like it should have and I knew it had to be somewhere in the carburation, but I never imagined the difference would be as much as it was.
Turned out there was a diaphragm that was kind of crinkled and he just sort of reshaped it, stretched it, stuck it back in and now there is no hesitation, no back firing, nothing.
So now its like riding a completely different bike.
 
Cleaning a late set of BS38 carbs and I saw a plastic cover on the low speed jet. I did not think those were mandated until the BS 34's.
 
Cleaning a late set of BS38 carbs and I saw a plastic cover on the low speed jet. I did not think those were mandated until the BS 34's.

Hi lakeview,
that's the brass slow speed jet inside the carb bowl with it's passage parallel to the mainjet passage?
And the "cover" is a top hat shape black plug?
Look inside the float bowls.
If there's a raised nubbin inside to keep that plug in place the plug is most likely supposed to be there.
On the carbs that are supposed to have those plugs the slow speed jet is fed from the main jet's passageway. Look up the jets bores to see if there's a mebbe 1/8" diameter passage drilled slantwise between them.
If so, if the plug ain't there she'll run real rich.
 
Thank you for the explanation. I had a spare set from a box of parts buy, did not notice it till I was dismantling same. It would be interesting to know how they got to Canada. Pictures attached. (EPA now waiting for me at the border, eh?)
All cleaned and reassembled now, waiting for the rain to melt the ice we got last night.
 

Attachments

  • SAM_2654.jpg
    SAM_2654.jpg
    44.7 KB · Views: 130
  • SAM_2655.jpg
    SAM_2655.jpg
    41.4 KB · Views: 128
  • SAM_2656.jpg
    SAM_2656.jpg
    56.1 KB · Views: 132
Hello Fred, no black top hat, just clear plastic yellowed by time.
When took the bowl off, it was half full of powdery residue, by the time I had the body almost clean, I had a void about the size of a pencil lead through to the exterior, pictured, just inside the gasket surface, but had enough time in it that I mixed up some JB weld and patched it instead of discarding the body.
 

Attachments

  • SAM_2654.jpg
    SAM_2654.jpg
    44.7 KB · Views: 134
  • SAM_2658.JPG
    SAM_2658.JPG
    282.6 KB · Views: 355
Last edited:
That little plastic piece is what gggGary was describing...it's to help keep the mixture screw from turning with the vibrations of the motor. They aren't critical and most bikes I've seen have had them removed.
 
Hi,

When I first start my bike, after shutting the choke if needed, my bike idles too slowly. It won't illuminate the lights properly, especially the headlight and sometimes stalls when I first start out. I've tried turning the idle up a little when cold but then it is too hard to turn it down accurately once its warmed up.

I was looking at it yesterday and thought it would be nice to have a small knurled wheel around the 5mm screw head but then thought about an easier way for me who doesn't own a lathe. I have some 1/8" thick AL and made a little paddle/thumb handle. I filed both sides of the middle down and cleaned the screw head up well with a small file and lacquer thinner. I used the regular PB weld epoxy binding the paddle into the screw head slot, let it set about fifteen minutes, applied some masking tape and then assembled it. I had to keep flipping it over since the epoxy is runny but I was reading a book at the time and just flipped it every few minutes for an hour or so, then in a vise and flipped it every ten minutes or so until it setup. I haven't tried it on a ride yet but from the saddle it seems like it is going to work real well.

Glenn
 

Attachments

  • DSCN4737.jpg
    DSCN4737.jpg
    152.1 KB · Views: 121
  • DSCN4738.jpg
    DSCN4738.jpg
    157.1 KB · Views: 149
First start this spring: A Special that I will offer for sale this spring after a bit of a refurbishment, thought I would pull it out of the cold garage where it sat all winter before I switch in my freshly cleaned carbs, and to show off to my wife that these old bikes are worthwhile items to spend time on, hooked up the power box and the test tank, electric start grumbled and complained and it started up and ran, just like the p.o. said it would.
 

Attachments

  • SAM_2691.JPG
    SAM_2691.JPG
    283.9 KB · Views: 152
I got around to getting the front brake calliper out and seen what it will mount up like and how to go about running a new brake line for it. I got a new master cyl ordered from 650 central along with sprockets and chain and ez pull clutch and cable. I put my brake in a vice and pumped the handle bar lever and it moved the pistons out but Im thinking I want to take it apart and refurb it. Have to wait and measure for a stainless steel brake line after I get the master cylinder on. Mike suggested I use a new short metal line up to where the support/stay is on the lower tube. Then go from there up to the master cyl. Also waiting on a new timing light to come early this week so I can time the xs. I loaned the light out last summer and went to use it the other day to set the timing and it would not work. I did put a volt digital gauge and a rpm gauge on the volt gauge works but the rpm just says 0. I wired in a 1Mohm resister in line. I have a pamco and e advance. I hooked it up to the green wire for the pamco. I wanted to read up more on it before I try the red wire on the pamco. I dont have a speedometer so I really like to have a tach.

Then I cheated on my xs and worked on the Vulcan the rest of the day. Made great progress on it.
I had the fenders and tank repainted over the winter. Put all that back on and changed the windscreen.
 
Last edited:
Yesterday, perfect sailing weather in the Whitsundays (North Queensland Australia), today, much the same but some relaxation on doing some exhaust repairs.
Had a leak that required some attention, so I decided to make a shim to fit inside the join between header and muffler.
First one cut was only just a little too big (thickness), so a second one was cut using brass shimming material I had leftover from a rebuild on an old tractor engine. Needed two brass pieces but it did the job. All sealed up and not leaking anymore, maybe, just maybe, a little more back pressure will give some more HP :)

Please note that it was not my handy work with the steel wool....

I'll post just one picture of Langford reef to, people come from all over the world to visit the Islands, I am fortunate enough to be able to sail around these babies all year around.....

Pipe

shim.jpg


Shimming material the brass is what was left after making two pieces to fit

shim%201.jpg


Langford Reef

Langford%20Reef%201.jpg
 
Laid the side cover to drain overnight. Started removing the gasket when I noticed the washer. So today I'm looking for a nut.
 

Attachments

  • IMG_20160328_111924_186.jpg
    IMG_20160328_111924_186.jpg
    136.8 KB · Views: 128
Did the clutch bolt mod and used bolts that were a hair too long and locked the clutch up tight. Now I'm grinding the bolts down!
07585d10e03478e484941ca8ca40ab2f.jpg
 
Thank you for the explanation. I had a spare set from a box of parts buy, did not notice it till I was dismantling same. It would be interesting to know how they got to Canada. Pictures attached. (EPA now waiting for me at the border, eh?)
All cleaned and reassembled now, waiting for the rain to melt the ice we got last night.

Hi lakeview,
Oh, that thing.
I thought you meant the slow running jet inside the carb.
That's the limiting stop for the slow running needle.
Toss it.
And sorry for the confusion. I finally remembered that your carbs ain't the same
as the carbs on my '84 so my description of their innards don't apply.
Yeah, dry roads, sunny and +5ºC here today but I don't trust it to stay that way.
However, hope springs eternal and tomorrow I'll see if the bike will start.
 
Timing light came today so I set the timing, fixed the unused petcocks bungs with yellow thread tape, synchronized the carbs, had to cut a half inch off of the sleeve of my throttle cable to make the inner cable long enough to hook into the carb boy what a job that was cutting all the stainless sleeve without nicking my cable and then to get each coil off the cable but I got it done and now for the first time I have a throttle. And I was brave enough to kick it over to start it. Starts easy but Im glad I left the electric start in as well. Pulled the plugs and they are black and sooty. Also when idling my electrical system reads 13.3 volts when I rev it it will go up to 13.8 or more seen it go as high as 14v.
I checked everything out. Have .5ohm between each white alternator wire, nothing to ground, Each white wire is putting out about 15v ac tested by 2 white wires at a time. And 30 some v ac when revved up. And the rectifier ohm out good. Does that sound proper? Any way it was a good day with the xs. It sounds real good. I have to get some pipes added on to my headers and will deal with adjusting the carbs for the black soot after I get that done. Just chain, brakes, clutch and a rear light mount and may be a rear fender. Also worked on the vulcan changed my oil and took it for a short ride.
 
Beat on my float bowls a bit - gently, mind you - and it would seem that this effort un-stuck the float that was causing the wonky revs and other lean-condition symptoms.

Rode to the auto parts store, got some Sta-Bil ethanol stabilizer, dumped an ounce and a half in the tank, filled it up with 91 premium (ugh, California...) and prayed to the mechanical gods that it'll protect me from the evil ethanol goop gremlins with continued use.
 
My son did his XS650's springtime initial startup last week.
Charged the battery but it was still hard to start.
I pulled the battery and all it had for fluid was mebbe a 1/4" at the bottom.
" I've never thought to check that " he said.
A new battery later and she fired right up.
Today I thought to myself "perhaps I should check mine? " I found it was only ~3/4" below the minimum fill line.
Topped it up from my jug of snowmelt, charged it up and I too achieved instant start.
Rode the rig around the block.
Noticed the sadly bald tires.
Got a spare front wheel with good rubber on it so did a front wheel swapover.
Got a spare rear wheel too.
It's tire has lotsa tread and lotsa sidewall cracks as well so no joy there. Ah well.
 
Sent my crank off to HHB for rephasing. Canada Post charged me $57.00 for its cheapest service to Hugh, but it came with tracking and $100.00 insurance. On the other hand, the weak Canadian dollar equivalent of his charge is $500.00! Damn OPEC and its attempt to starve out competition by flooding the market and killing our dollar.
 
Back
Top