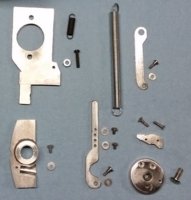
What have you done to your XS today?

Thx Bob KOOL !!! Lol yes, im hopping over the Columbia to WA to join in on the city madness with this new job.. nicer more modern living. Garage was priority #1 .. Planned for her , well I've been needing some slight electrical help which reading thru threads has me fairly ready.. the tuning is very close. It really needs fluid changes and a good ride ! Go from there. Hopefully on those new roads to find & explore. I've been told up by Mt. St Helens is a great place to find curves.
 
Years ago I lived in Port Townsend,Wa. just across the bay from seattle on the Puget Sound.
that's ware I had my first Motorcycle repair shop/garage..... there are allot of good roads on that side of the bay
but that fog is a Killer talk about COLD ! a face shield is worse than useless in fog.... and sunglasses too dark....
yellow Night glasses work fantastic though !!!!!
if you can plan a weekend and go to port Angeles and try to find a road into the Olympic park
some of the best unspoiled wilderness in the US hides in that place ! ....they have Moose and Grizzly Bears in there ! LOL
....
take warm clothes though !
.....
Bob...........
 
swapped out #15 pilot jet to #25 bike finally started after 25 kicks-got it to a nice idle but still stalling when I pull in clutch-going to pull right cover tomorrow and take a look at clutch
 
Last night I put shrink tubing on the unused connectors. Rebuilt the off-run-off switch and installed it in a RT switch housing. Made a few more wiring connections.
 
Yesterday did 2 jobs that have been hanging for ages: 1st I fitted TTR250 front master cyl ordered a braided hose to suit. It will be a 1-piece hose so the junction can be removed.
The best one though was, thanks to my mate Bri & his tig welder, getting the 2 snapped-off sump plate bolts out. Couldn't turn them out with pliers, tried cutting a slot for a flat blade screwdriver with a dremel but stupid soft metal wouldn't hold together. So, Bri tig welded a washer over the bolt stub & turned that out with pliers. Genius, if scary (& of course bike has to be laid on its side). He also removed a snapped bolt from the master cyl top using this method. Those bolts are so small that drilling out was unlikely to work.
I still have a carb problem & need to remove them from the bike. Struggling to get the rear 2 cross-head screws out of the butterfly-shaped plate though. Frame gets in the way & just can't get a driver into the screw at a good angle.
No need to remove the butterfly plate. Just remove the carbs together as a unit. They come out with only minor gymnastics.
 
View attachment 106524 I finally got all my engine castings delivered to finish line coatings in Portland. The forrest fires in the Columbia Gorge had highway traffic seriously affected. They will coat them with a heat disapating, satin black, ceramic coating. Kinda curious as to how this whole thing is going to turn out.
Well I picked up my castings. they really do first class work however this job made me realize that I think I am going to end up with the most expensive $1500.00 motorcycle in the country.
 
Been making parts again.
XSbooster-Dev04.jpg

I must be out of my mind...
 
Sorry, I meant mig welder, not tig.
Regarding carb removal - this forum's technical section says to remove the butterfly plate but it looks as though I'll have to try without doing that. Will fit allen screws all round before they go back on.
Have loosened the clamps right off & had a quick go at waggling the carbs but little sign of any movement yet.
Jimbo,
I've removed many sets as a pair. Try spraying a bit of liquid silicone spray at the boot joint with the carb, it will ease them out. Wiggle carbs up and down a bit, and pull hard towards the back of the bike. Then remove out the right hand side. Helps to remove the cover nut from the cam chain adjuster.
 
Jimbo W, on my XS SH I find the best way to remove the carbs is to remove the following
  • Filter/air boxes
  • Oil dip stick (plug the hole with tissue so nothing falls in)
  • The big domed nut on the cam chain adjuster
  • Left side cover to get clutch cable out of way
  • Breather pipe
  • Obviously the throttle cable/fuel line.
Seems a lot of work but opens up lots of room for removing the carburetors. Also, now that I have Allen screws holding the float bowl in place it is very easy to adjust the fuel level with the carbs left in place. Just made an adjustment yesterday and it was a breeze.
 
Speaking of removing carbs, I pulled my BS34s out yesterday to clean. I completely disassembled them and decided, while they were apart, to paint the body, polish the caps and bowls, and add some brass screws. I also received a set of custom stacks from Steel Dragon Performance. They turned out great!
IMG_4860.JPG

Now I'm just gonna get them synced :bike:
 
About a month ago I left the house on my red ‘76 Standard (the infamous Lucille) and she started fine and idled OK - but as soon as I pulled out of the driveway, she was missing and stumbling and I knew something was wrong. I had just installed a PAMCO w. E-advancer and it had been performing great with instant starts and a steady idle. I had put around 250-300 miles on her with the PAMCO and all seemed well. I turned back and parked Lucille and took Sylvia (2007 ST1300) instead.
Hmmmm....what the heck was wrong with her...ignition? ...carbs? Dang it - I wanted to ride! Well, life has intervened over that month and today was the first time I had a chance to dig into it. I checked over all the PAMCO wiring and everything looked OK so I assumed that it was more likely the carbs. In my experience solid state electronics works for a few minutes - or forever.

When I resurrected the bike in the winter of 2016, I cleaned the carbs with solvent and compressed air and made sure that all of the passages were free of crud (and there had been plenty of crud in there). The first start-up went fairly well and after that, she started pretty easily and ran better and better to the point where I have put nearly 4000 miles on her (some it at pretty high speeds actually). She was always easy to start, idled OK and every time I looked at the plugs, they were a pleasing brownish colour. In my haste to get her going, I neglected several key details including checking that the correct jets were installed and cleaning the enrichener plungers. I also will ashamedly admit that I have not yet synchronized the carbs - she ran so well, it simply didn’t seem necessary.

I also failed to install fuel filters (cue horror movie music here).

Anyhow, this morning, following the excellent and comprehensive XS650 Carb Guide (thanks guys - sure wish I had had this the last time!) I pulled the carbs and got right into them. Here is what I found:
- the jets are correct for the year (122.5) and the left one was crudded up a bit;
- both jets had buggered-up slots indicating that someone has been in there before and they were naughty with bad screwdrivers (I have found that just about every part of Lucille has been “previously enjoyed”);
- the pilot jets also look to be correct and one was clogged;
- there was crud in both float bowls (surprise!);
- the left hand needle holder would not come out of the bore of the carb slide. This seemed odd. The little plastic disc got stuck about halfway up and no matter what I tried, it wouldn’t come out. So, I just wiped off the needle, made sure that the second hole in the slide was clear and put the assembly back in;
- I tested the slides and diaphragms as per the Guide and all is well with them;
- the float heights were way off - likely around 27 mm or maybe even a bit more - versus the required 24 mm;
- the enrichener plungers were both cruddy - so I have replaced them with new ones plus I greased the spots where the rotating choke linkage passes through the carb bodies.

My other key goal was to install fuel filters on this raunchy old gal and so I had bought those conical type filters and thought I had come up with the world’s cleverest idea to fit them into the incredibly crowed mid-body area of my XS650. Let me say that there is a LOT of stuff between the rear side of the cylinders and the frame just ahead of the battery box. You’ve got to fit in the carbs, throttle and clutch cables plus some electrical wiring - plus the bulky airbox assembly. Finally, the petcocks are nearly on top of the carbs with very little real estate for filters plus, it isn’t easy to sort it out so that the hoses don’t have a loop in them (which would impair reliable fuel flow).

The problem is that the filters are actually fairly long so getting the hoses routed isn’t easy. Here is what I came up with (pretty damned smart eh?). To give more length to the fuel lines, I’ve got the LH carb feeding off the RH petcock and the RH carb....etc.
0EE1E8CA-80AD-48F1-B8D2-FA808A69AEEF.jpeg

Well.....it doesn’t damn work, I’m afraid. The filters are simply too big to go between the frame tube and the carbs - no way / no how.

At that point, I ran out of steam - any thoughts on putting fuel filters on one of the things - would be most welcome. I guess I’ll go look for smaller filters tomorrow.

Pete
 
Last edited:
About a month ago I left the house on my red ‘76 Standard (the infamous Lucille) and she started fine and idled OK - but as soon as I pulled out of the driveway, she was missing and stumbling and I knew something was wrong. I had just installed a PAMCO w. E-advancer and it had been performing great with instant starts and a steady idle. I had put around 250-300 miles on her with the PAMCO and all seemed well. I turned back and parked Lucille and took Sylvia (2007 ST1300) instead.
Hmmmm....what the heck was wrong with her...ignition? ...carbs? Dang it - I wanted to ride! Well, life has intervened over that month and today was the first time I had a chance to dig into it. I checked over all the PAMCO wiring and everything looked so I assumed that it was more likely the carbs.

When I resurrected the bike in the winter of 2016, I cleaned the carbs with solvent and compressed air and made sure that all of the passages were free of crud (and there had been a lot in there). The first start went fairly well and after that, she started pretty easily and ran better and better to the point where I have put nearly 4000 miles on her (some it at pretty high speeds actually). She was always easy to start, idled OK and every time I looked at the plugs, they were a pleasing brownish colour. In my haste to get her going, I neglected several key details including checking that the correct jets were installed and cleaning the enrichener plungers. I also will ashamedly admit that I have not yet synchronized the carbs - she ran so well, it simply didn’t seem necessary.

I also failed to install fuel filters (cue horror movie music here).

Anyhow, this morning, following the excellent and comprehensive XS650 Carb Guide (thanks guys - sure wish I had had this last time!) I pulled the carbs and got right into them. Here is what I found:
- the jets are correct for the year (122.5) and the left one was crudded up a bit;
- both jets had buggered-up slots indicating that someone has been in there before and they were naughty with bad screwdrivers (I have found that just about every part of Lucille has been “previously enjoyed”);
- the pilot jets also look to be correct and one was clogged;
- there was crud in both float bowls (surprise!);
- the left hand needle holder would not come out of the bore of the carb slide. This seemed odd. The little plastic disc got stuck about halfway up and no matter what I tried, it wouldn’t come out. So, I just wiped off the needle, made sure that the second hole in the slide was clear and put the assembly back in;
- I tested the slides and diaphragms as per the Guide and all is well with them;
- the float heights were way off - likely around 27 mm or maybe even a bit more - versus the required 24 mm;
- the enrichener plungers were both cruddy - so I have replaced them with new ones plus I greased the spots where the rotating choke linkage passes through the carb bodies.

My other key goal was to install fuel filters on this raunchy old gal and so I had bought those conical things and thought I had come up with the worlds cleverest idea to fit them into,the incredibly crowed mid-body area of my XS650. Let me say that there is a LOT of stuff between the rear side of the cylinders and the frame just ahead of the battery box. You’ve got to fit in the carbs, throttle and clutch cables plus some electrical wiring - plus the bulky airbox assembly. Finally, the petcocks are nearly on top of the carbs with very little real estate for filters plus, it isn’t easy to sort it out so that the hoses don’t have a loop in them (which would impair reliable fuel flow).

The problem is that the filters are actually fairly long so getting the hoses routed isn’t easy. Here is what I came up with (pretty damned smart eh?). I’ve got the LH carb feeding off the RH petcocks and the LH carb....etc.
View attachment 107061
Well.....it does damn work, I’m afraid. The filters are simply too big to go between the frame tube and the carbs - no way / no how.

At that point, I ran out of steam - any thoughts on putting fuel filters on one of the things - would be most welcome.

Pete
Pete,
I successfully installed the same filters on my '76 in the same place that you positioned them, but used even shorter lengths of hose on the lower ends nearer to the carb inlets. You might also consider the 90 degree filters which I used in my post regarding the install of the Mikes' petcocks (not the peacocks) for the later models. Keep at it, you'll make it work !
 
I used the same style of filters but, they had a 90 built in. Not too many cycle shops had them and I have seen them on ebay. Would that help? No room to put the filters closer to the petcock? I feel your pain. I switched from a single petcock Special tank to a twin petcock Standard tank on the SG. No room. At least I only had to feed a central fuel point.
 
Indeed. My Special to Cafe bike will use an XS750 tank feeding a single point (the engine has BS34 carbs which have a joiner pipe) so I think one of those filters will work there - but I clearly need different hardware for the always-challenging Lucille.

Tomorrow, I’ll try Dude’s idea of shorter hose segments and if that doesn’t work - I’ll search for smaller filters.

Bloody hell - who would have imagined this would be such a challenge.
Like you said, tomorrow's another day. Best approach to the situation.
A good cold beer tonite, and success tomorrow. :)
 
Back
Top