XS650 Scrambler Build

I`ll polish both sides of the front and rear fenders. You just never know when someone might look at the underside and there I`d be with a unpolished fender. I`d never live it down? Besides what if I laid it over? Everyone would see the substandard work as it just laid there with me bleeding on it. :doh:
 
Well, it's a scrambler you are building...correct? Everyone knows that a scrambler will have mud and dirt on
the underside of it. So you're covered if rescuers can't see that you didn't polish the bottom of the fenders when
and if you crash in the mountains..errr, the hills.
 
Today I tackled the rear fender. Other than the tab on the rear hoop that`s as far as I got since the fender hit the seat where it curved down along the hoop. The only solution I could see was to cut the fender to match the curve in the seat and weld in a flat aluminium piece which I will also use to mount the fender to the seat pan. The front of the fender will mount to the splash guard. Wasn`t nuts about cutting a hole in the new $70 fender but it all seems to fit. Still have to make a tail light mount and a combination grab rail-carrying rack is on the back burner. We`ll see.
View attachment 114350 View attachment 114351 View attachment 114352 View attachment 114353 View attachment 114354 View attachment 114355 View attachment 114356 View attachment 114357 View attachment 114358


what is once well done is well done forever....how do you do that ?
 
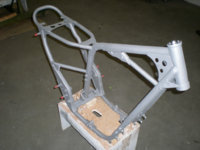
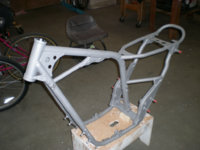
I detailed the frame and did the final sandblast. Powder Coater Mon. for sure. Tomorrow I`ll re organize the shop to start assembling.:D
frame 001.JPG frame 002.JPG
 
I`m going to have it done in Gray Hammered Finish. Same as the other two XS`s. Good contrast for the polished aluminium and chrome.
 
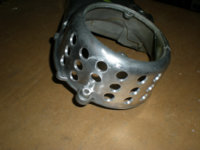
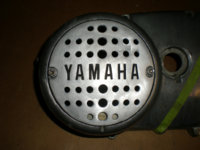
Today I cleaned up and re organized the shop. Now I have less room and more stuff! Drilled some water and dirt inlet holes in the side cover. If it doesn`t rain I`ll be at the powder coater with the frame first thing in the morning.:)
Holes 001.JPG Holes 002.JPG
 
Holy sidecovers Batman.... ;)
 
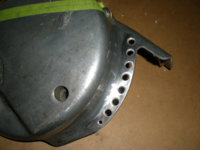
The frame is at the powder coater.:thumbsup: Drilled a few more holes.
cover 001.JPG
 
Great reply! Now why didn`t I think of that?? The holes are just cosmetic and have no usable purpose at all. I do have another cover that I will use to ride with. (no holes). Just challenging to lay out and drill. There are plenty of functional things I need to do the the motor besides this but once you get started it`s hard to stop.
 
I just enlarged your photo of the holes in the alternator cover and to my amazement they are absolutely perfect!! In fact F'ing perfect! Just how do you do that with Aluminum? When I try drilling Aluminum the drill drifts about, so please share your secrets.
 
When I try drilling Aluminum the drill drifts about, so please share your secrets.
Not sure how Phil does it, but I use a lathe centering bit in a drill press to start the hole.
615Vx74GZAL._SY355_.jpg

These puppies won't walk on ya...:)
 
Back
Top