-
Enjoy XS650.com? Consider making a donation to help support the site.
XS650.com receives a small share of sales from some links on this page, but direct donations have a much greater impact on keeping this site going.
You are using an out of date browser. It may not display this or other websites correctly.
You should upgrade or use an alternative browser.
You should upgrade or use an alternative browser.
Aussie Cafe build
- Thread starter phil1rowe4
- Start date
staggers
XS650 Enthusiast
Hey Phil,
Have you had a crack at that brembo hydraulic clutch setup yet? I too am keen to hear about your progress! As I might do the same to mine. I've just picked up a complete front and rear brembo brake assemblys off a ducati 996 and thinking of getting the clutch also, that way I'll have matching levers too
Have you had a crack at that brembo hydraulic clutch setup yet? I too am keen to hear about your progress! As I might do the same to mine. I've just picked up a complete front and rear brembo brake assemblys off a ducati 996 and thinking of getting the clutch also, that way I'll have matching levers too

phil1rowe4
XS650 Addict
Hi Staggers,
No, I haven't been playing with clutches yet, I'm still knee deep in painting. While I've done some automotive painting before, it was years ago and I'm certainly learning as I go (read lots of mistakes, but hopefully I'll cover them up ok!). This whole rebuild is meant to be a learning experience otherwise I'd just farm the whole thing out to a shop to do.
Getting the slave and master from the same bike is a good idea as they should match up to provide a good combination (depending on the clutch pushrod movement requirements of the original bike).
The slave I have is (from what I can measure) a 30mm diameter cylinder and the master is a 13mm so that should produce a 4:1 ratio between the two, based on area. So, 4mm of master cylinder movement should be 1 mm at the slave. I'm looking for about 2 - 2.2mm at the clutch pushrod, so that would be about 8 -8.8mm movement at the master cylinder. The master seems to have a full stroke of length of about 15mm so that should be plenty. I may even have to build a lever stop to prevent too much pushrod movement.
Do you guys want to see in progress painting pics or wait for the final reveal?
Show the pics! I'm about to do a custom tank (for another project) and am always looking forward to seeing paint progress pics.
phil1rowe4
XS650 Addict
Hi Brassneck,
I dont know that you'll learn too much from my paint progress pics but I'll post some up tonight anyway.
A couple of things I've learnt or remembered that might help you, or someone else:
- Preparation stages are vital (I had the etch primer fail on the tank and had to be redone)
- Pre-paint preparation saves heartache, always use grease remover & tack cloth before painting.
- Use a block for sanding/shaping; hand sanding just makes the bumps smooth. (I probably didn't do this enough)
- Base coats are fairly delicate until clear coated (don't ask how I know this!)
- Always test your spray gun settings on a test area before spraying parts.
- When you think the previous coat is dry .... wait a bit longer.
- Don't paint red over white again! (Red slurry from some light wet sanding of red bits tried to stain the white parts pink. Not the look I was going for!)
- Keep the missus happy while spending days sanding and painting.
- When you add up all the costs, its probably similar to getting a professional to do it for you, but nowhere near as much fun/frustration/accomplishment/patience testing/satisfaction.
Cheers,
Phil
Great list, Phil. If I may, I'd like to add a few.
- Chrome cannot be reliably painted, unless it's from accidental overspray. Then it's permanent.
- Wet sand outdoors, in your swimtrunks.
- A couple drops of Dawn dishwashing soap really helps in wetsanding.
- But don't use the dishwasher.
- Avoid painting outdoors, at night, under strong lighting. Unless you want 2-lb rhinocerous beetles to become part of the finish.
- Resist the temptation to fondle your newly painted part until it's fully cured. Say, after a week, or three...
phil1rowe4
XS650 Addict
Thanks TooMany,
Some more helpful tips:
- Don't spray outside, upwind from the neighbours washing/ car/ prized possessions...
- or your own.
- Your workshop will be covered in overspray, don't even try to stop it.
- Substitute 2-lb rhinocerous beetles with moths or other flying bugs as appropriate.
- Finger prints are not a feature.
...so here's some in progress pics
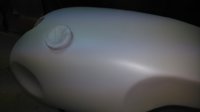
The colour scheme is pearl over white.
Here's the pearl effect.
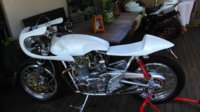
and fitted up to the bike...
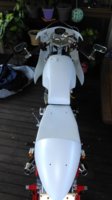
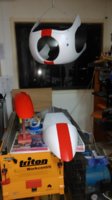
The red stripes being applied. I don't suggest using newspaper as it can be porous, but I used multiple layers of thicker grade paper.

and finished product before the clear.

Some more helpful tips:
- Don't spray outside, upwind from the neighbours washing/ car/ prized possessions...
- or your own.
- Your workshop will be covered in overspray, don't even try to stop it.
- Substitute 2-lb rhinocerous beetles with moths or other flying bugs as appropriate.
- Finger prints are not a feature.
...so here's some in progress pics
The colour scheme is pearl over white.
Here's the pearl effect.

and fitted up to the bike...


The red stripes being applied. I don't suggest using newspaper as it can be porous, but I used multiple layers of thicker grade paper.

and finished product before the clear.


phil1rowe4
XS650 Addict
Then I played with different pin striping ideas ...

Still not quite sure what to do with the sides of the fairing yet. I might just leave it simple. Sometime less is best.
Anyway, that gives you a pretty good idea of what the finished color scheme will look like.
By the way, this is a reminder of what I started with, so its come a long way from there.

Then I played with different pin striping ideas ...
Oh, yeah! The pinstripes really make it pop!

Still not quite sure what to do with the sides of the fairing yet. I might just leave it simple.
You'll need room there for the decals and sponsor stickers...
Thanks for the tips... I've been playing with an airbrush for a model I got over the holidays and the same painting process seems to apply. 
Great pics, thanks for posting. I like the pin striping a lot... as TwoMany pointed out..really makes it pop! Are you going to add a Yamaha script or badge of some sort? Just curious, not sure it needs it.
Great pics, thanks for posting. I like the pin striping a lot... as TwoMany pointed out..really makes it pop! Are you going to add a Yamaha script or badge of some sort? Just curious, not sure it needs it.
phil1rowe4
XS650 Addict
Hi Brassneck,
Yep, I have some gold and black Yamaha decals for the sides of the tank to match some gold and black pinstriping going on.
Your right that the red and white looks really flat until the pinstriping goes on. It's amazing what a difference it makes.
The first clear coats are going on at the moment to be followed by a light wet sanding, decals/pinstriping and then final clear coats, so almost finished.
The last job will be to cut the fairing bubble back to a more aggressive profile.
While this is not intended as a show bike, there is a small twilight bike show in Brisbane on the 16th, so if all goes to plan, I will try to display the bike at that show, for its debut.
There are many magnificent looking machines on this site and this is definitely another one. Well done, the end is in sight. Please post some photos of the completed bike.
staggers
XS650 Enthusiast
I might have to come down and check out your bike at this show. Good ol Harry's diner 

phil1rowe4
XS650 Addict
Hey Staggers, I'll see you there.
Thanks Signal.
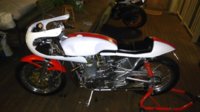
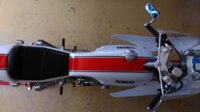
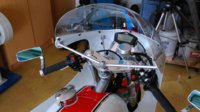
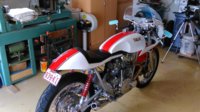
So painting is finished and I'm just fiddling with some minor bits and looking to trim the screen a bit (hence the tape on the screen).
Here's some pics of the 99% finished bike. (Just the hydraulic clutch mod to go)
here's the pinstriping detail.



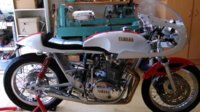
Cheers,
Phil
Thanks Signal.
So painting is finished and I'm just fiddling with some minor bits and looking to trim the screen a bit (hence the tape on the screen).
Here's some pics of the 99% finished bike. (Just the hydraulic clutch mod to go)
here's the pinstriping detail.


Cheers,
Phil
Last edited:
staggers
XS650 Enthusiast
Mate, that looks very very nice Phil!! You've done very well on that project  bet it looks even better in person! Good stuff mate

 bet it looks even better in person! Good stuff mate

Absolutely love it! Looks like it came off the factory floor like that. Would love to see a vid of it running down the street.
Great work!
Great work!
Paulrxs650
XS650 Enthusiast
Beautiful bike and some quality work! Well done!
phil1rowe4
XS650 Addict
Thanks for your kind comments.
Staggers, I hope to meet you at the bike show on Sat.
Brassneck, Thanks I'll try to get a video of it running up in a few weeks.
Paul, Thanks, I followed your cafe build with great interest and it was an inspiration.
Staggers, I hope to meet you at the bike show on Sat.
Brassneck, Thanks I'll try to get a video of it running up in a few weeks.
Paul, Thanks, I followed your cafe build with great interest and it was an inspiration.
Airwolfie
XS650 Guru
That is beautiful! I would be proud if that were mine!
Well done!
Love the colour combo BTW!
Well done!
Love the colour combo BTW!


![as_received_1[1].jpg as_received_1[1].jpg](https://www.xs650.com/data/attachments/53/53410-4dee314aeeebaa84f2ec2fa0a1c3c3ab.jpg)
![as_received_4[1].jpg as_received_4[1].jpg](https://www.xs650.com/data/attachments/53/53411-302f64926a4530c59896b63a04605182.jpg)
![650_at_150913_(2)[1].jpg 650_at_150913_(2)[1].jpg](https://www.xs650.com/data/attachments/53/53412-13d897431ed73594a462eedce41c420a.jpg)
![xs650[1].jpg xs650[1].jpg](https://www.xs650.com/data/attachments/53/53413-9357a295644cc1d8cc5e10605d4c78c3.jpg)