Fuel Petcock Deduction...Sound Right?

79XStLouis

XS650 Enthusiast
Messages
64
Reaction score
53
Points
18
Location
St Louis
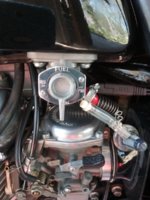
So I completely rebuilt both vacuum operated petcocks on the 79 SF Special. The one on the left trickles fuel out the end in the 'on' and 'reserve' positions. I was meticulous with the rebuild and have come to a theory.the inner spring must be weak. If I disconnect the vacuum line to the intake, and blow slight pressure into it, the added pressure stops the fuel dripping. If I suck on the vacuum line the fuel flows outfull blast. So do you think stretching the inner spring or adding a spacer will fix it? Anyone have thoughts on this fix / theory?
 

Attachments

  • 20180429_104637.jpg
    20180429_104637.jpg
    167.4 KB · Views: 107
That might work, but did you change the o-ring on the plunger and clean/dress/polish the "seat" in the petcock body that it pushes into? It might need that instead.
 
Nice to see the use of a 90 degree filter on that - it must make the line routing easier.
 
That might work, but did you change the o-ring on the plunger and clean/dress/polish the "seat" in the petcock body that it pushes into? It might need that instead.
The rebuild kit was all the rubber bits that could go bad. I had no pitting in the metal, so no I didn't polish any metal other than using brake cleaner to clean it. I will do as you say, but the air pressure thing made me think 'weak spring'. Would adding a stretch to the spring, or fix it with a spacer added, or should I find a suitable replacement spring. I'd like to keep the vacuum action operational and skip the on/off valve replacement. Thoughts?
 
Last edited:
Nice to see the use of a 90 degree filter on that - it must make the line routing easier.
Yes the 90 degree filters are perfect, the only way to make the turn and they are completely hidden from view by the side covers.Heavy duty plastic, and I think these are made in the USA.
 
gggGary's guide includes some great tips to get the most out of these things. I'm rebuilding an earlier, non-vacuum set, but the principles remain the same.

The polish gives a smooth surface to which the new rubber bits can seal. This face seals against the four-hole whizzer valve.

IMG_20171111_222357952.jpg
 
Problem solved. I took the dripping rebuilt Petcock apart again. I discovered the diaphram O-ring was not completely closing off the fuel flow in the 'run or reserve' position by blowing through the inlet pipe while simulating the spring pressure wth my finger on the reverse side of the diaphram. The seat in the valve body was clean but I polished with the Dremel anyway...no difference. Gotta be a defective O-ring, right? So off to the store fore a new metric O-ring. Everything was either too small or too fat to allow the plastic plate to seat up properly. So, I put the rebuild O-ring back in... and of course it rolled it's way on the stem, tried it again and it sealed. What the hell? Could the O-ring have simply been inside out. I guess that was it. I added some washers behind the spring for added tension to seat the O-ring and put it all back together. Runs great at all speeds and no dripping out of the Petcock at rest with the engine off...as it is supposed to do. Thanks to all for your guidance. Hope this helps someone, and I suppose from here on out I better make sure tiny O-rings seat outside out!
 
The trick is a good diaphragm, one that's big enough to allow full movement and that doesn't dissolve or dry out and leak. You can hold it in a closed postion while you tighten the flange screws to help insure there's enough travel. 4g has a good piece on here about rebuilding vacuum petcocks. I don't like them because when they start leaking it's an emergency.
 
Back
Top