My '80 xs650 engine rebuild

Your thread is invaluable to me!

Thanks!:thumbsup:

shoot me a PM if you have any particular questions about things I didn't picture. I've tried to be pretty detailed in my documentation and save some of the more mundane stuff from the board.
 
I know its too late, but the valve stem seals come with the athena gasket kit.

OH HELL! Well, I'll try to sell them here or something. I wish there was a menu from which you could order rebuilt kits for redoing a complete engine to make it easier not to double order things you don't need. live and learn,.
 
The description for the complete engine gasket kit does say it includes valve guide seals. I don't know what more you want.
 
little update: got the cam guide from UK today! just waiting on my big box from Mikes. Got the rake for my buffer wheel and will keep working on that. Took the valve cover to a machine shop a friend referred me to (which is right across the street from a motorcycle shop). man... if I could be let loose in there.

Anyway, it's interesting... his opinion on lapping valves. He drew a little picture and talked angles and blah blah about how lapping is old school because he can grind all 4 for $75. I know it won't cost me that to lap, but if I am trying to get the compression back up and the pistons and cams are pretty good shape (I will get them measured) is it worth getting them ground while I've got the whole thing apart?
 
He just wants your $75. You still lap a little bit with fine compound after grinding to get the final finish. As far as those angles go, you already have what's called a 3-angle valve job, it came that way from the factory. There's a high performance 5-angle valve job but apparently they aren't of much benefit to our old twins.

Usually you have a valve ground if it's really, really badly pitted, so much so that simple hand lapping won't fix it or just take forever. Many times, seats are cut, not ground. That's where the angles are. The seat is considered one of the angles and the approaches on either side the other two. The seat should be a specified width to properly seal and transfer heat from the valve to the head. Sometimes through wear or too much lapping, they get too wide. Then one or both of the approach angles need to be cut to narrow the seat back down again.
 
I figured as much. Lap myself, I shall! Actually, the valves look very clean and hardly have any carbon on them.
 
Bummer.

Took the cylinders and pistons in and the machinist showed me that one of them had gone out of shape and rubbed against the cylinder wall. Gave him the measurements and he'll be getting back to me to see what needs to be done with regard to boring. He said they'll do it and hone for $150. Now I need to buy 2 new pistons (can't just replace 1) which run $54 at Mikesxs for a kit with the pin and clips. NUTS. But at least I guess I now know what caused the low compression.

On a more exciting note, seeing the head they'd already glass beaded and put a clear coat finish thing on looked amazing. I'm going to keep the whole thing that unfinished aluminium finish.

Side covers will be mirror finished, at least to the best of my ability.

Oh, also on the valve cutting cost, I was wrong. He told me that he would do the whole head, AND cut the valves (and check to make sure they don't leak) for $75, not just the valve cutting for $75.
 
Got my parts back!! Ok, for those keeping track, I sunk $150 into having all these glass beaded and a clear coat applied, INCLUDING the valves ground, cleaned. I can't believe how amazing these parts look.

full


full


full


full


I left the jugs at the machinist as it needs the bore. 1st size overbore pistons and rings just ordered from Mikes and should be here sometime next week!
 
how fun is this? Daughter Lucy and I got started on reassembly while I'm waiting for my new pistons to come in from Mikes.

full


First question. this is the starter gear. Should it look this worn? It's pretty symmetrically rounded at every tooth, so something tells me it just might, but I don't have a close up to refer to. Does it need to be replaced?

full


Next question has to do with the gears that transfer torque from the starting engine to the crank. They fit on "shaft 1" and as far as I can tell, it's just a sort of fit together. No circlips, no nothing. Anyway, my question is that it seems this shaft can wiggle in and out about 1/4" in the crank case, AND the little gear has obvious play in it (see pictures showing both position). Is this right?

This is the big gear showing how there's play:

full


full


here's the small one with play in the shaft:

full


full


One more thing... how easy should it be to turn the starter gear assembly when it's all oiled up?
 
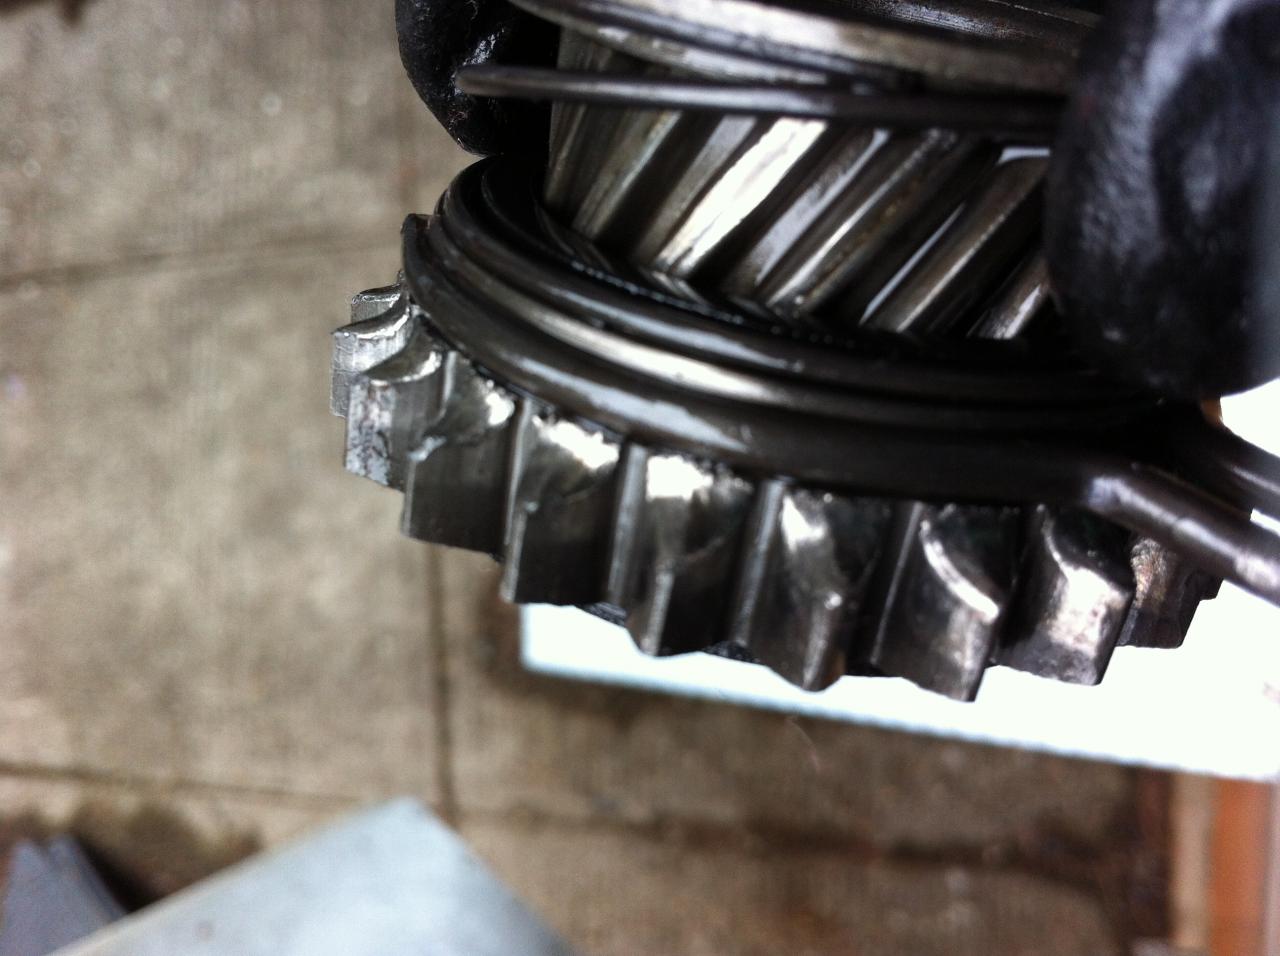
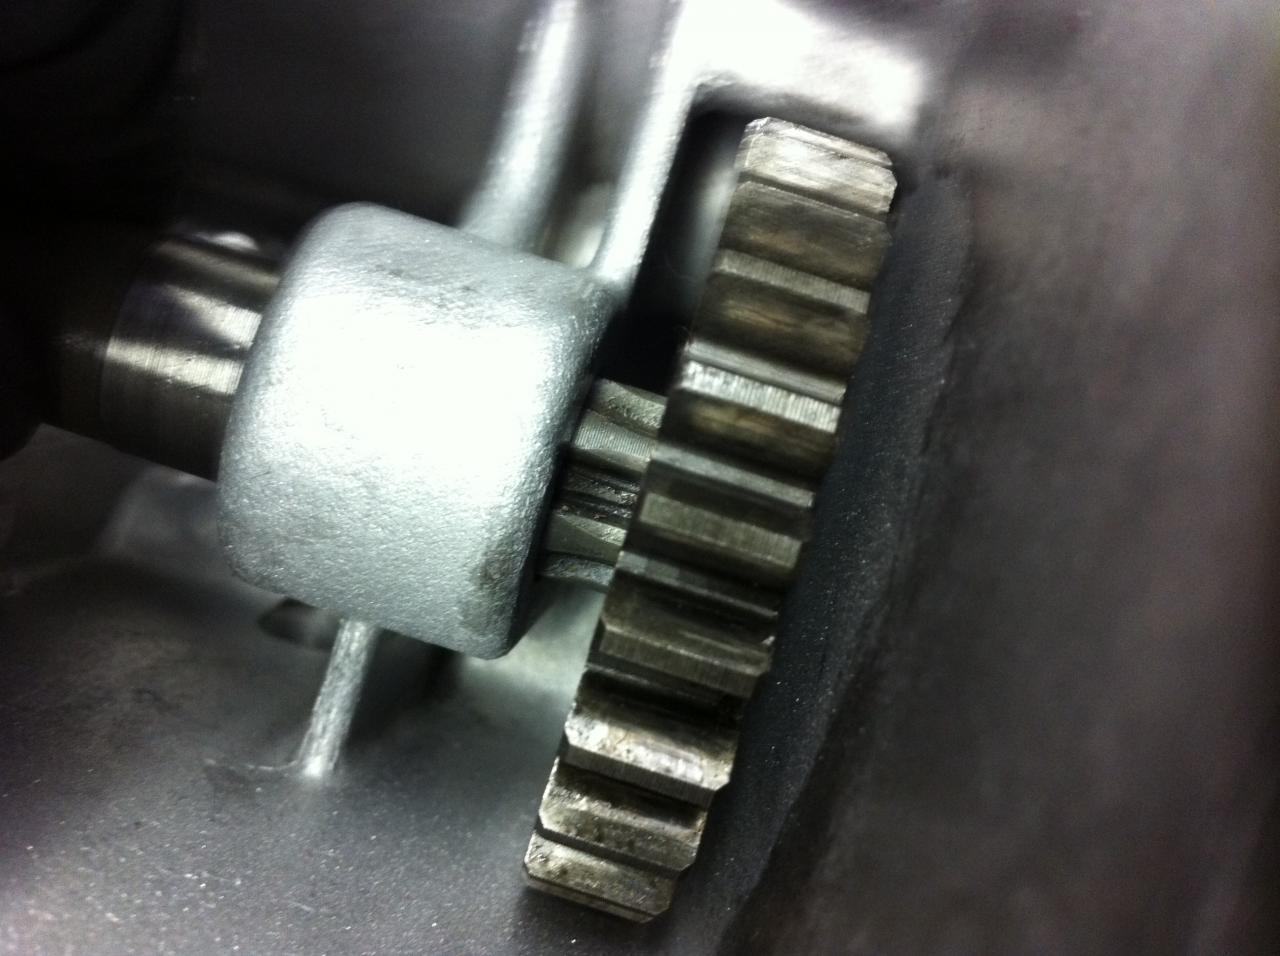
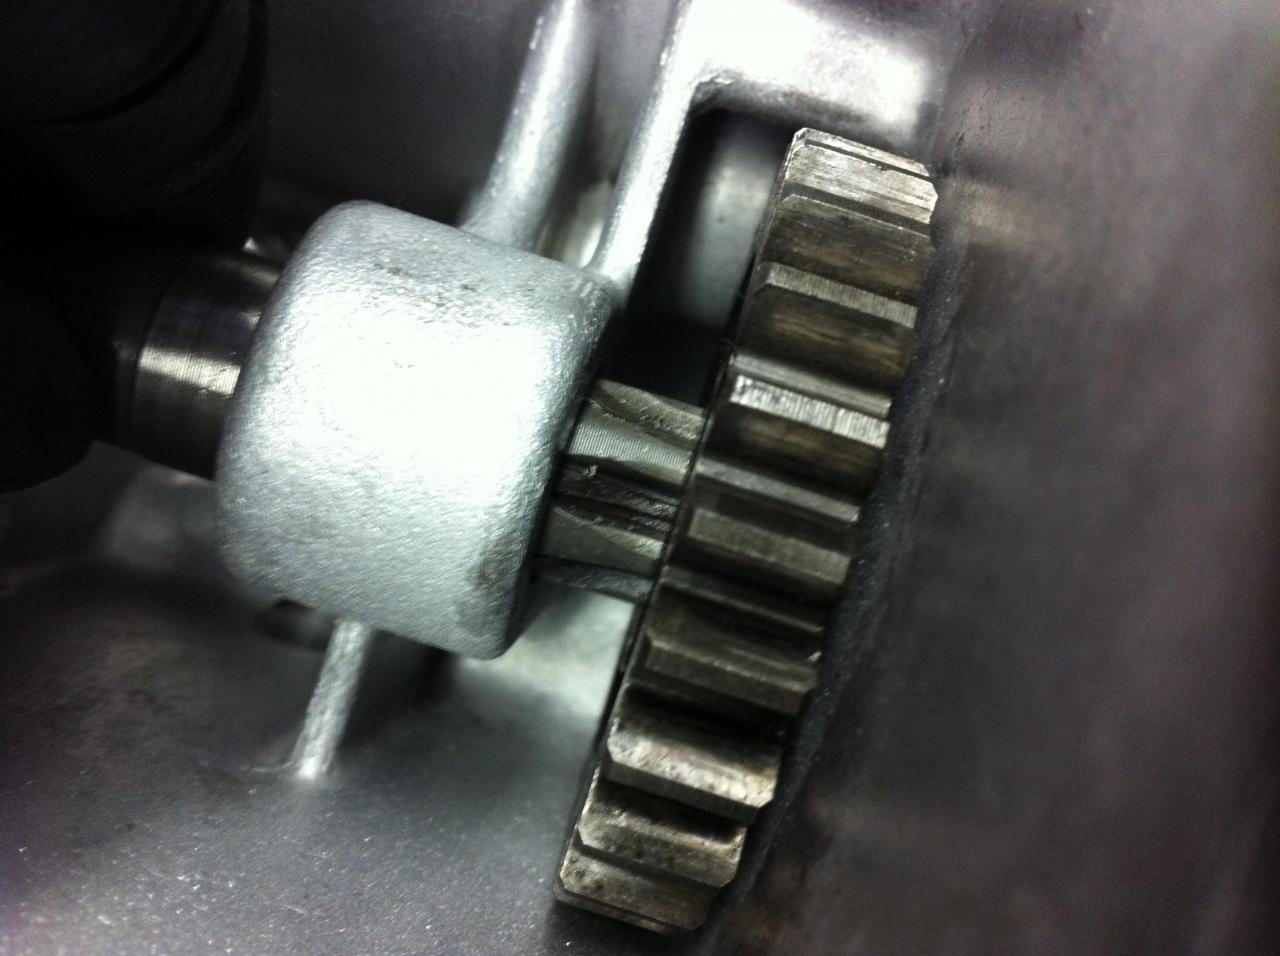
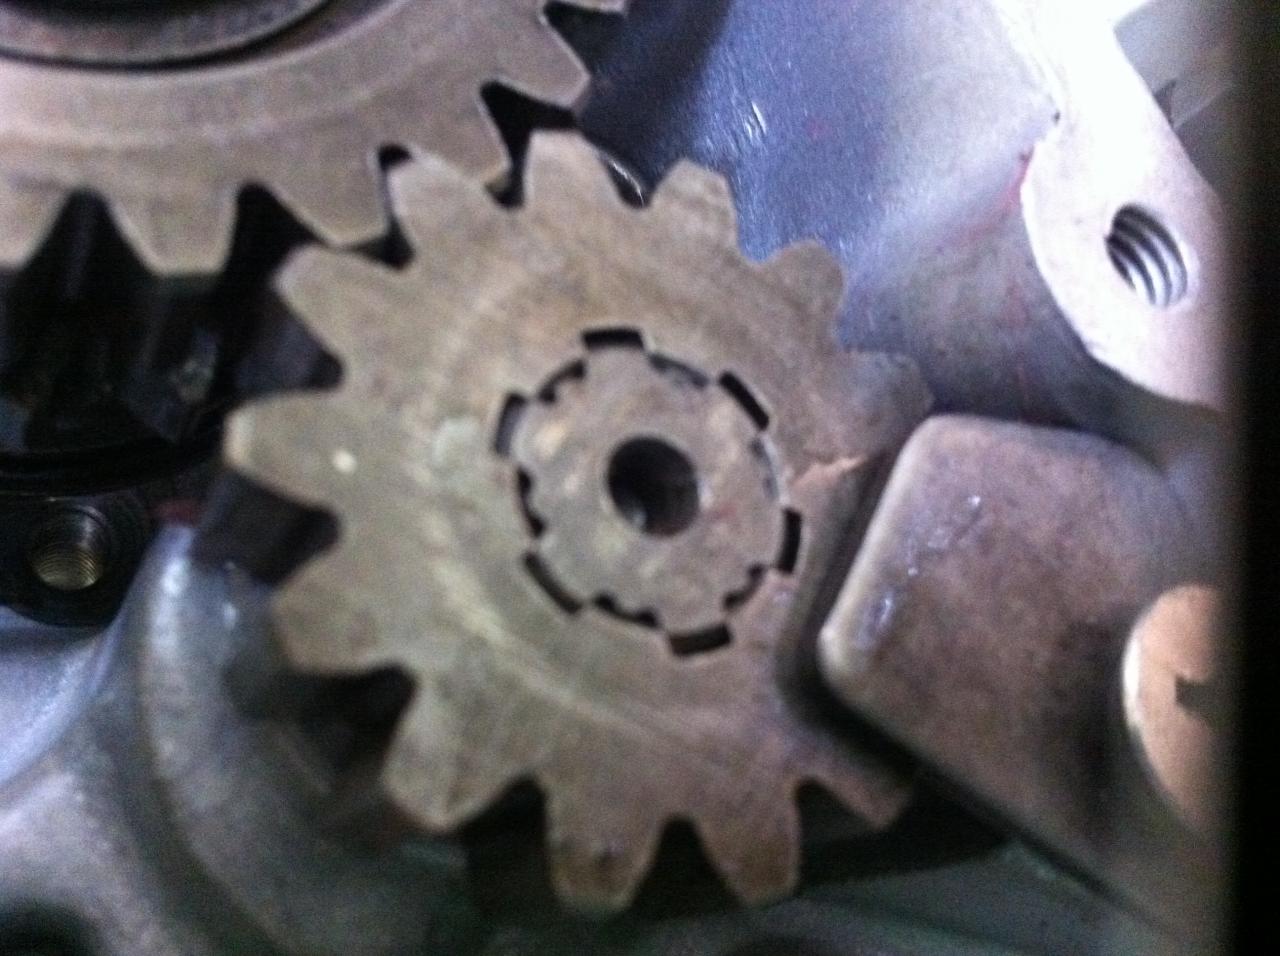
The worn gear is your #4 starter gear. It may still work OK but you'll need to bend the drag clip tight again. It's loosened up and that's why the gear was grinding (and wearing). Instructions are here .....

http://en.650wiki.org/index.php/12.08._Electric_start_problem_fix

Excellent, thaks as always. Just to be sure, we're talking about the funny shaped clip with the approximately 1/4" loop in it? I'm not sure why it is if that puppy squeezes #4 tighter thatll engage the gear better... So that's why I want tobe sure I get what part needs to be retightened.
 
Back
Top