I encountered the same thing years ago when I got the MikesXS Allen bolt kit. The aluminum spacers didn't fit in the stock springs. But it wasn't a problem because I was replacing the springs anyway and the spacers did fit the new springs. I actually didn't even realize there was a fit problem for several years because I didn't try fitting the spacers to the old springs during that initial install. Some time later, when I had it apart for one reason or another, I did try the stock spring fit on the spacers and discovered they didn't fit. So, it seems this has been a long time problem. Most folks are probably like me though, they fit new aftermarket springs along with the Allen bolt kit and everything fits OK.
-
Enjoy XS650.com? Consider making a donation to help support the site.
XS650.com receives a small share of sales from some links on this page, but direct donations have a much greater impact on keeping this site going.
You are using an out of date browser. It may not display this or other websites correctly.
You should upgrade or use an alternative browser.
You should upgrade or use an alternative browser.
On the road again at 40.............the bike that is
This very odd - I got those same spacers and SHCS fasteners and they fitted my springs to a tee.
Perhaps I had aftermarket springs.....
Perhaps I had aftermarket springs.....
Thanks for that info 5twins,.
The CSK14 springs I ordered are still a week or two away so I will see how they fit when they get here and put that upgrade on the to do list.
Might do it this winter when the engines on the bench although I would like to test the clutch as it is now with the new needle bearing. Haven't road tested, due to worn out chain, but clutch operation does seem a little smoother just on the centre stand. Tipping it over and doing this upgrade in the future wouldn't be a big deal.
I noticed a couple of weeks ago when going to adjust my chain again that it is badly stretched, and kinking up. I have kept it well lubed but it's done so I haven't run it since. I realize the chances of something happening if I didn't push it too hard are probably slim, but didn't want to take the chance of a failure and blowing out the left case or worse.
Waiting for a new D.I.D chain to arrive. New 17/33 sprockets here already.
Great Robin - NEXT year is going to be awesome!
Pete
Pete
Yes sir! Can't wait Pete.
It's possible Mike's Allen bolt spacers do fit the later clutch springs. I never tried them in those, only the early springs. Yamaha changed the springs around 1980 when the clutch pack changed from 7 to 6 friction plates. The new springs were a little longer than the old ones and are marked with medium blue paint .....

More great info 5twins. Thanks.
Ahhhhh - and the clutch I put the new aluminium spacers and SHCS fasteners on was a....1981.
Good to know. Thanks 5T
Good to know. Thanks 5T
Yes, maybe the later clutch springs have a slightly larger I.D.? A little tip for anyone replacing their springs - measure and record the free length of the new springs. Then in the future, if you're in there again after a few years or a few thousand miles, you can check them to see if they're sacked at all. I ran into this problem with the generic MikesXS springs. After a few thousand miles, they had sacked a couple MM. They still seemed to be working OK but I figured it was only a matter of time before they sacked more and failed. I replaced them with a brand name aftermarket set. But come to think of it, I haven't checked those replacements in years, lol. Something to put on the "to do" list for the next time I'm under that cover I guess.
Last edited:
I just couldn't resist getting out to test my reassembled clutch with the new needle bearing.
Took a chance on that old chain so went for some short rides around the neighborhood streets yesterday and today. Wasn't going to risk highway speeds, plus it's too cold and I'm not as tough as gggGary.
I am amazed. After the starter gear fix this is the single most significant improvement to this bike. So far.
One finger clutch pull, maybe always could, just tried, and I don't know if this bearing would affect that.
Totally smooth operation. Just gotta think neutral and it's there. The ever so slightest tap or nudge and it just snicks into neutral or into gear no heavy resistance, no clunk. Clutch engagement pulling away from a stop is super smooth and linear, no jerkiness, no 'there it is' spot.
Like I had mentioned, I thought I had my clutch setup up pretty well but now, wow.
I don't know if this can be attributed to one of the rollers being missing and jammed behind the old bearing or if it's due to the new mega roller part. Probably a bit of both. Dressing the steel plates has likely played a big part in contributing to smoother action as well.
I'm obviously happy I found this problem before serious damage was done, but truly feel this was about the best $23.95 I've spent to date.
So with 2” - 4” of snow forecast for Thursday/Friday, today may very well be the official end of the season. It's been a fun one, but at least I squeezed in a few more clicks.
One big project on the board for over the winter, and more upgrades scheduled for the spring.
Can't wait for next year!
Great! Get the clutch and starter fixed, then the weather gods attack "Haha, watch this!".
Same down here. Get the bike all cleaned up, then cold/wet/rainy...
Same down here. Get the bike all cleaned up, then cold/wet/rainy...
Ya, and you sure did a great job 2M. Maybe needs a new name? Lol.
And, Congratulations!
And, Congratulations!
Thanx, robinc.
Whowoodathunk the "Green Slug" would get a calendar chance.
A new name?
Probably should wait 'till I pull the engine and do a few things...
Whowoodathunk the "Green Slug" would get a calendar chance.
A new name?
Probably should wait 'till I pull the engine and do a few things...
Probably should wait 'till I pull the engine and do a few things...

Oh boy.........now what have I done?

Actually came out a lot easier than I thought it would. My biggest concern was getting the exhaust crossover tube apart so I had been liberally spraying the joint with PB Blaster every time I had it running for the last couple of weeks and it twisted apart easily.
Used retiredgentlemans idea of 2 pipes and 2 guys. Slick idea, worked great and easy on the back. If you ever happen to read this in the future RG, thank you, what a great idea. I know one man with a chain lift or hoist would also be easy, but my hat's off to anyone who can bear hug and wrestle this lump out of the frame. Easy work for two guys but for one you'd better have your Chiropractor on speed dial. Well, if you're an old fart like me with a bad back anyways.
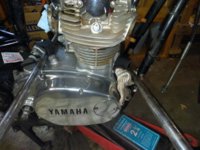
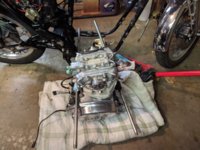
It's obvious from the above pic that the push rod seal is leaking, so that's on the winter work list. Must have been getting progressively worse over the season. Checked my log and I was last in there on Aug 28th and didn't notice this, or didn't make note of it. There has never been any oil on the ground or garage floor on this side.
I am wondering if you guys can tell from the following pictures if the other seals are leaking.

It looks like oil behind and below the sprocket, or maybe just chain lube fling?

And oil behind the stator/rotor. Hard to say how fresh any of this is. Maybe just 40 years of accumulated crud?
Should I do these seals while it's on the bench this winter? Or, clean it up, monitor after reinstall, and do them if needed when the engines back in the bike?
Some valve pictures.
These first 2 were originally taken and posted in my thread on July 21st. when top end job diagnosis was given.
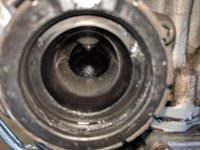
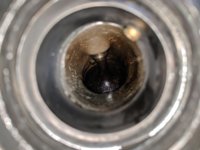
And taken today, after running with hotter plugs 2400 miles later.
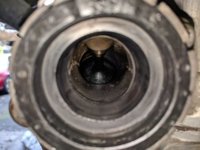
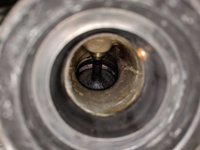
Again, taken today.
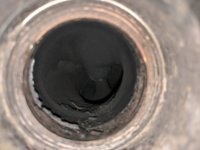
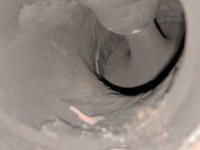
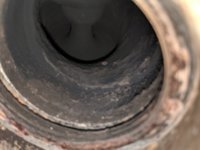
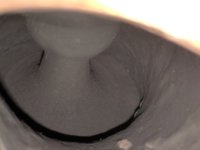
Tach drive has been leaking all summer as well. Sure wish I had had the seal and o-ring to fix that when I had the right case off a couple of weeks ago. Would have been a lot easier. So that's also on the winter job list.
So, that's where we sit. Gonna do a bunch of cleaning before I get any tools out again to pop the top. But wanted to post these pics inside the left cover before I clean up in there.
Thanks again for any suggestions or advice guys.
Actually came out a lot easier than I thought it would. My biggest concern was getting the exhaust crossover tube apart so I had been liberally spraying the joint with PB Blaster every time I had it running for the last couple of weeks and it twisted apart easily.
Used retiredgentlemans idea of 2 pipes and 2 guys. Slick idea, worked great and easy on the back. If you ever happen to read this in the future RG, thank you, what a great idea. I know one man with a chain lift or hoist would also be easy, but my hat's off to anyone who can bear hug and wrestle this lump out of the frame. Easy work for two guys but for one you'd better have your Chiropractor on speed dial. Well, if you're an old fart like me with a bad back anyways.


It's obvious from the above pic that the push rod seal is leaking, so that's on the winter work list. Must have been getting progressively worse over the season. Checked my log and I was last in there on Aug 28th and didn't notice this, or didn't make note of it. There has never been any oil on the ground or garage floor on this side.
I am wondering if you guys can tell from the following pictures if the other seals are leaking.
It looks like oil behind and below the sprocket, or maybe just chain lube fling?
And oil behind the stator/rotor. Hard to say how fresh any of this is. Maybe just 40 years of accumulated crud?
Should I do these seals while it's on the bench this winter? Or, clean it up, monitor after reinstall, and do them if needed when the engines back in the bike?
Some valve pictures.
These first 2 were originally taken and posted in my thread on July 21st. when top end job diagnosis was given.


And taken today, after running with hotter plugs 2400 miles later.


Again, taken today.


Tach drive has been leaking all summer as well. Sure wish I had had the seal and o-ring to fix that when I had the right case off a couple of weeks ago. Would have been a lot easier. So that's also on the winter job list.
So, that's where we sit. Gonna do a bunch of cleaning before I get any tools out again to pop the top. But wanted to post these pics inside the left cover before I clean up in there.
Thanks again for any suggestions or advice guys.
DanielBlack
XS650 Junkie
If it were me, I'd replace every seal in it while you got it out. They're 40 yrs old... how much longer do you want to run em...
Ah Dadgummit Jim.............ya.
Kinda hard to see, but your front sprocket looks like my old one. Compare to the pics in here:
http://www.xs650.com/threads/sprocket-manufacturers.47862/
http://www.xs650.com/threads/sprocket-manufacturers.47862/
Yes I think you're right 2M. Sorry, my bad, should have also mentioned this. New D.I.D. non o-ring chain ordered, waiting on delivery, and new 17/33 combo sprockets already in the new parts box.
Similar threads
- Replies
- 15
- Views
- 2K
