XS650 Clutch Worm Actuator experiment & tidbits

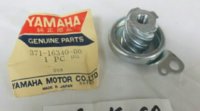
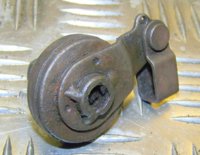
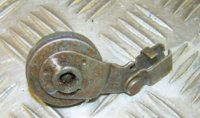
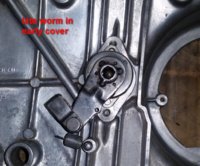
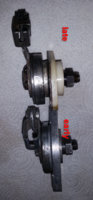
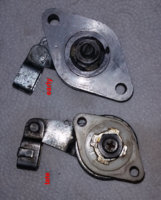
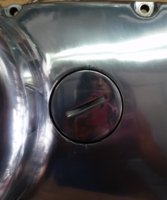
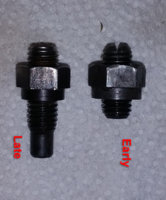
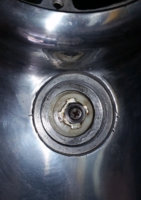
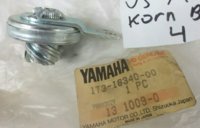
Probably as good a spot as any for this. I have a 70 on the lift and the "early three spiral nylon worm" is cracked. Apparently they "all" cracked over time, see this pic of an NOS with crack, LOL. I guess the nylon shrinks with age and the steel spindle doesn't. I found an ebayer making a steel 3 finger worm for a yamaha dirt bike that "might be right" but he values his work rather highly. About $125. Will have to check If I can just sub in a late model worm but will have to check mounting bolt spacing, something nags that it changed.

worm gear.JPG replacement worm gear.JPG
lh cleaned.jpg

Would like to keep this bike as correct as possible but want to ride it too!
 
Some pics The later worm has much closer hole spacing. I can make brackets and a spacer ring to hold it. There are some clearance issues to the screw on early cap also, nothing that can't be worked around.
 

Attachments

  • xs15.jpg
    xs15.jpg
    136.2 KB · Views: 292
  • xs14.jpg
    xs14.jpg
    93.8 KB · Views: 298
  • xs13.jpg
    xs13.jpg
    111.4 KB · Views: 282
  • 20150824_100712.jpg
    20150824_100712.jpg
    97.4 KB · Views: 252
  • xs12.jpg
    xs12.jpg
    89.6 KB · Views: 268
  • xs11.jpg
    xs11.jpg
    92.5 KB · Views: 280
if you are referring to just the clevis pin itself , it is a generic part used in thousands of different applications . You can purchase a clevis pin from any source that stocks the size you need. All you need to know is the diameter which I believe is 6mm and the length which you can measure from your old part .
http://www.amazon.com/s/ref=nb_sb_noss?url=search-alias%3Daps&field-keywords=6mm+clevis+pins&rh=i%3Aaps%2Ck%3A6mm+clevis+pins

Reasons that the push rod might not push through could be a seized ball bearing in the shaft perhaps ? or an original short push rod not removed and still in there ? or a bent shaft catching on the clutch push rod bush ?
Make sure that you have the thinner end orientated towards the worm gear
 

Attachments

  • 1T3-ClutchWorm.jpg
    1T3-ClutchWorm.jpg
    154.1 KB · Views: 242
Turns out I actually have one, from my recently acquired 500 parts bike. I didn't even notice the different offset when stripping it down. Now, where did I put that thing, lol .....

vg1N2DZ.jpg
 
Last edited:
I think that may be mis-labeled and actually be the "371" lever for a TX/XS500. Could this be the ready-modded worm we seek?

http://www.ebay.com/itm/YAMAHA-TX50...d199f4e&pid=100005&rk=4&rkt=4&sd=401011482573

Amazing. Sure looks like it. That same high volume seller has this '371' version listed at half the price.
To me, they look identical.

http://r.ebay.com/FN9mgU

Edit: The nylon worm body is common among many bikes.
I'm also finding these 'different offset' levers with 278 and 1L9 prefixes.
Suspecting different worm-to-lever indexing, but the pics look the same...
 

Attachments

  • 371-ClutchWorm.jpg
    371-ClutchWorm.jpg
    72.2 KB · Views: 218
Last edited:
looks like the XS400 had the same cranked arm too
 

Attachments

  • xs400 worm cranked.JPG
    xs400 worm cranked.JPG
    242.3 KB · Views: 200
  • cranked xs400 worm.JPG
    cranked xs400 worm.JPG
    270.6 KB · Views: 209
I read most of this thread (maybe finish later if I find time) and saw it mentioned a couple of times about the adjustment changing with temperature. Somewhere there is a thread about this, but 3 or 4 years ago I made a 1 piece aluminum clutch pushrod that has a steel insert at the end where it mates with the actuator, seal and bearing. This has completely cured this problem, I never feel the need to adjust as temperature changes. I also dimpled both ends.
 
Hey, dps650rider! Welcome back.

Deja vu'?

Based on your experience with your 1-piece 6061 rod, I've been running a 1-piece 7075 rod since last year.

So far so good, virtually no clutch adjustments needed...
 
Yup, lots of miles on the pushrod and no problems. The first one I tried didn't have the steel end and after a while wore around the seal and bearing. With the steel it's perfect.

Interesting points made about bending the actuator lever. Out of necessity I bent mine rather crudely compared to what you did to clear my belt drive front sprocket never thinking about the benefits of moving the point of pull closer to the pivot point. I'm going to take another look at that...
 
Back
Top