XS6502F / XS650SK mash up?

It looks as a beginners Yuppie color I would rather keep a stock rusted tank
upload_2021-7-19_10-54-44.png
upload_2021-7-19_10-57-0.png
upload_2021-7-19_10-59-54.png


I'm still not near the place I have to decide.
 
One way forward could be getting samples ..Long time since I was into cars but small cans of touch up paint
most likely exists
That can be put on a piece of sheet metal and held up under different light conditions
 
image.jpg image.jpg
I’m told these foot rest assemblies are 1975. They don’t fit the ‘79 frame. There was recent conversation on this. Is what I have ‘70 to ‘73? These are very nice. Too bad I can’t use them.
 
I don't mind that colour. Add some metal flake and a candy base. Could look nice with a gunmetal grey Yamaha emblem in-bedded in the paint.......

upload_2021-7-18_15-26-29-jpeg.195052
 
Did you get the torque inserts for the head? .....

X6lOanj.jpg


They're supposed to help get back some of the low and midrange power a large headpipe like this loses.
 
If I was mounting these, I think I would change the order of things like I did with my "homemade" inserts on my '78. I stuck the insert into the head 1st with some Yamabond then placed the gasket and pipe on top of it .....

1rc0sYU.jpg


This will fill in more of that step machined into the port for the stepped end of the stock headpipe to fit into. But as you can see in the insert pic in the previous post, it doesn't fill the step completely, and that left over groove is said to be detrimental to flow. My homemade insert didn't fill the step completely but I was able to add a pipe ring to finish the job .....

vkoaWPS.jpg


OGYLZGG.jpg


You can't do this with the gasket installed first because there's no way to know how much it will compress when tightened down, so you can't determine the thickness of the filler ring needed.
upload_2021-7-22_20-26-14.png

I snipped the above from the 650 Central site in the exhaust section. I'm wondering if this is what you're doing or something entirely different. :umm:
 
Yes, I guess it is, but I didn't set out to. I was simply trying to get the headpipes to mount into the head better and seal up really good. Those pipes are MACs and as you can see by the pic, have hardly any sealing lip at all. It kept sliding off the seal ring as you tightened the pipe down and they leaked like crazy. I was looking for a way to center the pipe in the port and hold it on the seal ring. These cut-off ends from old stock headpipes did the trick. In the process, I was apparently making my own AR inserts, lol. They worked out great and the bike ran so much better. I attribute that mostly to sealing up the pipes but the AR insert part of the deal probably doesn't hurt either.
 
How does it fit if you put it in 1st, then the gasket on top of it? The object here is to try and fill in that step machined into the head. Putting the TPO in 1st will fill more of it, maybe all of it.
 
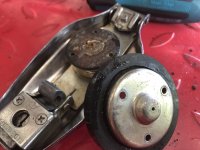
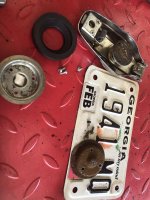
Time to restore the fuel cap.

855631A1-3991-40B4-97B7-38C541FF86A1.jpeg
Out with the old. In with the new.

B02D6646-F4F1-4751-AE38-8C800A4DAF1A.jpeg
My seal appears to be in perfect condition. I lubed it thoroughly.

CF75C279-6532-4815-9545-9BE7302F9D17.jpeg
Installed on replacement center piece. Thanks Jim!

45D337B5-AC34-4155-9E36-3D29CA6646B4.jpeg
OE glued the filter in place. I did not. I used a piece of Scotch-Brite to make a filter.

69B972F1-BC3E-4799-8944-9D1EA421F8AA.jpeg
Bag it and tag it! Another piece of the puzzle ready to go.
 
Last edited:
How does it fit if you put it in 1st, then the gasket on top of it? The object here is to try and fill in that step machined into the head. Putting the TPO in 1st will fill more of it, maybe all of it.
73F7F16D-C99C-444A-AE41-871DFB2A5EAD.jpeg
4C7FF4D7-3A1D-4C64-985D-A7EB7085BB13.jpeg


It appears to be bottomed against the step. Smooth transition.
 
The 954 denotes the piston is 74.954mm in diameter. Yes, that was used at the factory the match pistons to sleeves. If you look on the bottom of a sleeve, there'll be another 3 digit number..... .015 for example. Means the factory measure the bore at 75.015mm.
Since the parts now have wear, those numbers are meaningless, but they do indicate OEM parts.
 
Well then, that's how I'd install it. A bit of sealer on the TPO, stick it in the port, then put the gasket and pipe on top of it. I'd also do a bit of port clean-up with my Dremel, smoothing out the lumps and bumps. The stock ports are crude at best. They resemble the lunar landscape, lol .....

yaHx9rC.jpg


QzaWAum.jpg
 
I put two cups of phosphoric acid in my fuel tank full of water. I gave it an 18 hour soak. I looks great where I can see. More pieces of old liner are coming out. I used MEK to dry it out. I quickly learned more liner was in there because that MEK made very short work of it.
I should have started with the MEK in retrospect. I’m inclined do all the process over again as I believe the MEK may have exposed more rust. So, it goes.
704177D9-2774-44B2-B911-D1AA9661C47D.jpeg
 
4CF62A35-1D85-4ADA-84CE-1B0B05507354.jpeg
My fuel tank now has the appearance of being lined with glass. I removed all of the rust and followed with CASWELL Gas Tank Sealer. For care, the instructions say to avoid fuel additives that contain Methylene Chloride or Mineral Spirits. I don’t remember that the last time I used it. For better or worse, it’s done. I expect no issues with the fuel I get around here.
 
Back
Top