2003 Royal Enfield 500 Deluxe

. . . when the jig is laid down, the flat surfaces are vertical so I think that will guide the drill?
Don't think I explained that very well.

Never mind, probably leave the job till the engineer in Gala has fitted the extra mudguard brace, then open 'er up and see just how many special tools can do without/worth investing.

The list of special tools goes like rotor puller, front sprocket extractor, clutch locking tool, clutch extractor, box spanner for gearbox sprocket nut. But you can lock the clutch with a well-placed piece of wood . . .

The bike is dropping hints to bring the work forward, so I place a drip tray underneath now.
 
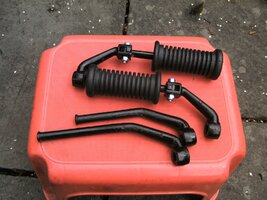
Not a pair of Eighteenth century duelling pistols:

PICT0247.JPG


Bullets have rigid footrest mounts. Well, old-style, iron-barrel ones do, not sure about the recent UCE ones? Curbs one's enthusiasm on the approach to a tight bend - the thought of an unyielding footrest digging in sets the mental safety margin quite a bit wider.

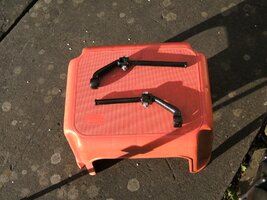
Took a look on-line to see if anybody has addressed the issue and found these. Apparently, Madras supplied some export bikes - maybe for specific markets - with hinged peg mounts. Second-hand and described by the seller as need to be painted - proves some people are a lot fussier than me. Hinged to fold back and up, claimed to be helpful for storing the bike.

Helpful on the approach to a bend too, I'll warrant.
 
I've just read through the entire post, very interesting I must say. I looked at a Bullet as a project, but then I saw the GT Continental single with the 535cc motor and fell in love. Then RE bought out the 650 Interceptor and Continental to very favourable reviews. In the end I decided against both, simply because I can't ride anymore and it was a lot of money to spend on something I'd never use, and of course there is very little you could do to the 650 and absolutely nothing you could do to the 535 to improve it. So, I guess I'm stuck with my cheapy TX650.

I noted in earlier posts someone referred to the 71 Triumph as being very tall, I had a 71 OIF back in the late 70s, lovely bike that handled extremely well. After many complaints Triumph lowered the seat rails for the 72 model by something like 25mm. I also had an 82 OIF, not as good as the 650s but a good seat height, even for a shorty like me.

I rewire all my bikes, bin the original and make a new one, much simpler than modifying or messing around with a factory harness, plus its a lot simpler to fault find something you designed and made yourself.

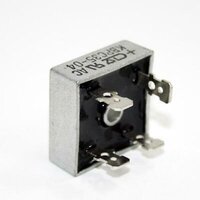
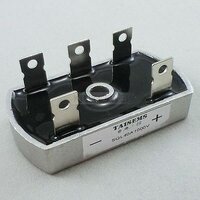
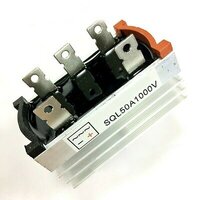
If you are inclined to ditch the BB, you can get rectifiers on ebay very cheaply, I'm talking under $5. I used two single phase ones on both my 71 and 82 Triumph and the three phase unit on my TX before converting to a PMA. I now use a combined rec/reg with the PMA, you can also get these very cheaply on ebay, I think I paid $25 for mine.
 

Attachments

  • s-l400.jpg
    s-l400.jpg
    10.6 KB · Views: 44
  • s-l400 (2).jpg
    s-l400 (2).jpg
    23.9 KB · Views: 41
  • s-l400 (1).jpg
    s-l400 (1).jpg
    22.1 KB · Views: 45
Thank you. Toglhot. I like the 535 GT too. It's bizarre how some of us end up with the bikes we do end up with. Mrs thinks I should buy a Classic 350 - for under £4,500 I would have a brand new reliable economical bike in a very similar style to the Bullet. Instead, I perversely buy a bike first brought to the market in approximately this form in 1948 and then spend my time dealing with the, uhm, issues. As you have read, have pretty much fully rewired the bike so I feel it will be more reliable and more susceptible to me being able to find faults that arise. No immediate plans to ditch the Boyer but thanks for the suggestions.

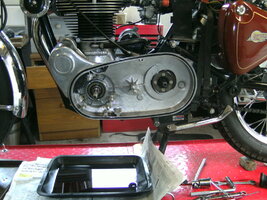
Yesterday, started out on replacing the inner chaincase and had a surprisingly successful day considering I haven't splurged out on the necessary special tools.

PICT0251.JPG


Remove brake lever, footpeg, outer chaincase. Then the alternator stator and pull the cables out. Ah, but next you need to put bike in gear and apply rear brake to lock the engine. Hmm, small block of wood under the tyre sufficed. Able to undo the rotor nut and to my surprise & delight the rotor pulled off by hand, extractor not needed this time.

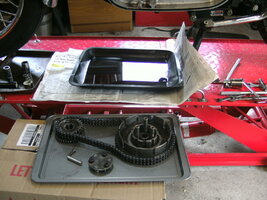
Dismantled the clutch springs and plates and similarly able to loosen the centre nut without a locking tool - the small block of wood jammed in the primary chain was enough.

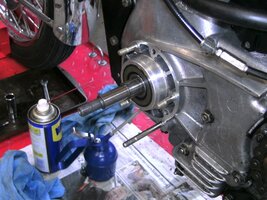
Wiggling the crankshaft sprocket and clutch basket gave me hope that these might not put up too much of a fight. With no clutch puller, I used the clutch cap, which normally retains the springs. Put a screw inside the hollow gearbox shaft to protect the end, placed a piece of sawn off bolt that was in me box of hardware bits'n'pieces to take up the distance, wound the three clutch cap screws in and the clutch basket pulled out with no drama, along with crankshaft sprocket and primary chain.


PICT0250.JPG


So those bits in the tray are the special tools what got me this far. At which point, quit while I was ahead.

Today, see how the inner chaincase comes out. Then will have to face drilling holes in the crankcase. Hmmmm.
 
I'm guessing the Indian bullets don't leak?
This one does. Reason I've brought forward the inner chaincase replacement job is a few drops, seems to be coming from the joint between crankcase and primary. Not a lot, yet, but ain't going to get any better.

Otherwise, hasn't been too bad - a little misting where the oil lines for the valve gear attach to the pump. The one time the bike left a small pool of oil in the backyard seems to have been the breather drain tube - got one of those gland-like ends you pinch to release anything that's gathered and I hadn't.
 
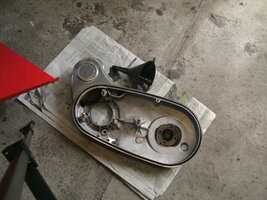
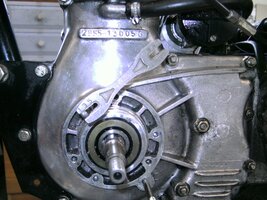
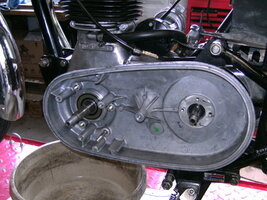
Removed three countersunk Allen screws and pulled the inner chaincase off.

PICT0252.JPG

Reassuringly filthy around the gearbox sprocket. The starter motor gears, including the infamous sprag clutch, make the old chaincase a heavy lump.

PICT0253.JPG


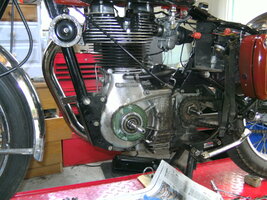
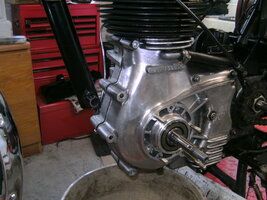
Shorn of the starter, the big single looks very imposing


PICT0254.JPG


Will do some cleaning but then can't put off much longer drilling the crankcase for the mounting holes . . .
 
Thank you. Toglhot. I like the 535 GT too. It's bizarre how some of us end up with the bikes we do end up with. Mrs thinks I should buy a Classic 350 - for under £4,500 I would have a brand new reliable economical bike in a very similar style to the Bullet. Instead, I perversely buy a bike first brought to the market in approximately this form in 1948 and then spend my time dealing with the, uhm, issues. As you have read, have pretty much fully rewired the bike so I feel it will be more reliable and more susceptible to me being able to find faults that arise. No immediate plans to ditch the Boyer but thanks for the suggestions.

Yesterday, started out on replacing the inner chaincase and had a surprisingly successful day considering I haven't splurged out on the necessary special tools.

View attachment 215361


Remove brake lever, footpeg, outer chaincase. Then the alternator stator and pull the cables out. Ah, but next you need to put bike in gear and apply rear brake to lock the engine. Hmm, small block of wood under the tyre sufficed. Able to undo the rotor nut and to my surprise & delight the rotor pulled off by hand, extractor not needed this time.

Dismantled the clutch springs and plates and similarly able to loosen the centre nut without a locking tool - the small block of wood jammed in the primary chain was enough.

Wiggling the crankshaft sprocket and clutch basket gave me hope that these might not put up too much of a fight. With no clutch puller, I used the clutch cap, which normally retains the springs. Put a screw inside the hollow gearbox shaft to protect the end, placed a piece of sawn off bolt that was in me box of hardware bits'n'pieces to take up the distance, wound the three clutch cap screws in and the clutch basket pulled out with no drama, along with crankshaft sprocket and primary chain.


View attachment 215362


So those bits in the tray are the special tools what got me this far. At which point, quit while I was ahead.

Today, see how the inner chaincase comes out. Then will have to face drilling holes in the crankcase. Hmmmm.
Nice work Raymond; still learnin' new things, even at our youthful time of life.
 
Bob, the carb is an Indian Mikarb - copy of a Mikuni. Yes, I believe they would originally have had Amals and RE suppliers will sell you an Amal if you fancy one.

Adam, yes we're still learning things. One thing I already know is that I hate any job that requires skill or competence or a good mechanical knack for it to go well. Don't trust meself. Drilling holes in the crankcase falls into that category.

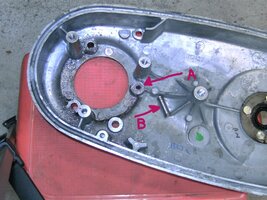
You are supposed to use the new inner chaincase to mark up where the holes are needed. Then drill straight in wiv a 6.8mm tapping bit - not provided - then tap with the M8 tap, which is provided. So I followed the procedure, marked the centres of the holes, ding wiv a centre punch. So far so good. Started the first hole, using my wooden guide to keep the drill straight. No bloody use - the drill bit wanted to wander. They always want to wander. You cannot drill a hole straight and where you want it with a hand-held drill. Well, maybe some people can . . .

Tend to compensate for a lack of competence by devising a method that won't require skill. After a bit of thought came up with using a metal tube, fitted inside the new cover, and drilling through that. The box of bits'n'pieces came up with a hollow threaded bolt, originally an XS650 turn signal mount I fink, a fairly good fit in the chaincase. But too small for the 6.8mm bit. The largest bit that fitted was 6mm - that'll do fine. Wrapped some masking take around my length of threaded tube so it's a closer fit, put the chaincase in place and drilled. Oh, another bit of tape on the drill bit to show 18mm depth - go past 20mm and you risk breaking through.

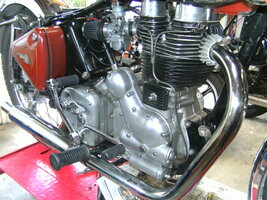
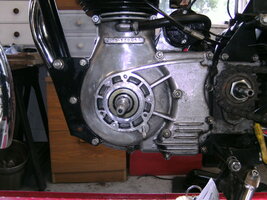
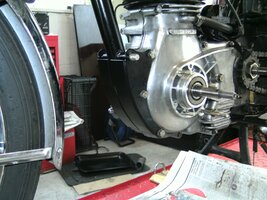
A shows the guide tube in one of three positions. B is the remaining bit of hollow turn signal mount. Second picture is the post-op engine.

InkedPICT0256_LI.jpgPICT0255.JPG


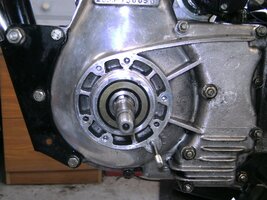
The holes don't look very central to the cast bosses, but that's correct for the chaincase centres. Tomorrow clean up the mess, tap the holes and slap it all together. Slow progress, but at least it feels like progress.
 
Nice bit of shade tree engineering Raymond! After you’ve run your tap in as far as it will go, you will likely find that the threads don’t go all the way down the hole. You can then grind the end of your tap down and make it a bottoming tap. All it will cost you is that one tap, but then you’ve got a nice little bottoming tap in your tool box! 😉
 
Thank you all, I blush. Bob, I don't have any means to grind down a hardened tap under my shady tree.

I don't have a proper tapping tool either, but my funky spoke key gives the feel and control needed:

PICT0258.JPG

Three holes all tapped and cleaned up:

PICT0259.JPG


And at last the three studs are in, with a drop of loctite:

PICT0260.JPG


So glad this part of the job is over. Plenty potential for it to go wrong, but should be onwards and upwards from here on.
 
Bling alert. For no good reason other than they will look better and perhaps more like a 1940s Redditch Royal Enfield, sourced some curved engine plates.
I know, I know, but sometimes you got to.


PICT0265.JPG


They're not tightened up yet and can't do that until the exhaust goes back on - took it off to remove the old engine plates. Pictures available earlier in this thread of the flat, squared off ones that were there before.

And while the bike's in this state of undress, good opportunity to fit the hinged footpeg mounts. Fitting the engine plates was a little bit of a struggle, none of the fasteners wanted to line up until I explained to them. But the footrest mounts?

A Tale of Two Rubbers

Knew it would be a struggle to remove the rubber footrests from the old mounts. Made up some detergent & water, coz that can help with tyres and tubes. Tried holding the metal mount in a vice and pulling/wiggling the rubbers - nothing doing. Looked up on-line. Oh yes, you just need to slide a long, thin screwdriver down between the rubber and the shaft. Please, do try not to snigger. And squirt WD40 down the gap, to make sure everything is well lubricated. I give up, snigger if you must.

Nothing doing. Pulling, twisting, jamming in a vice to hold while struggling. There just has to be a method.

Indeed there is - this works:


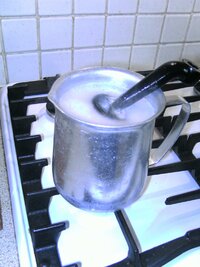
PICT0263.JPG


Ten minutes in boiling water. The froth is due to the detergent and WD40, I guess. Pair of leather gloves, grasp the rubber in one hand and the mount in the other, twist and pull. In fact, while it's still hot why not rush out to garage and shove the still warm footrest onto the new mount?


PICT0264.JPG


I offer this to the World, free of charge, no patent - to remove classic rubber footrests from their mounts, simply boil in water for ten minutes. Probably a good idea to have some detergent or WD40 or thin oil in there too.
 
Great work Raymond, you’re gonna have the nicest old Enfield around! Removing that starter from the front of the motor is going to improve the looks dramatically!

By the way, no boiling old footrests on the Mrs. stove for me. I’ve been banished from working on motorcycles in her kitchen after I smoked up the house baking jugs in the oven! 😄
Yeah, mine banned me when I was heating VW timing gears.
 
Ten minutes in boiling water. The froth is due to the detergent and WD40, I guess. Pair of leather gloves, grasp the rubber in one hand and the mount in the other, twist and pull. In fact, while it's still hot why not rush out to garage and shove the still warm footrest onto the new mount?


PICT0264.JPG


I offer this to the World, free of charge, no patent - to remove classic rubber footrests from their mounts, simply boil in water for ten minutes. Probably a good idea to have some detergent or WD40 or thin oil in there too.


:laugh2:

Well played Raymond.


I use engine oil to remove handlebar grips. Tried detergent, thin oil, etc, no go. Failing that a good sharp Stanley knife. Mind you, Stanley knives aren't much good for putting the rubbers on.
 
Back
Top