Aussie Cafe build

Hey everyone,

Ok, so life's distractions (job, kids, house etc.) are temporarily sorted, allowing me a bit of time to do the important things like the 650 restoration!

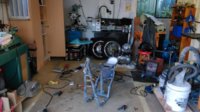
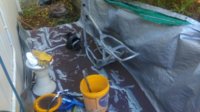
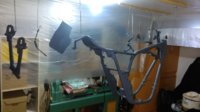
Current status is that the frame is stripped down and I've started some back yard sandblasting of the frame and swing arm. I'm also adding a few tabs on the frame to support the rear wheel splash guard and under the seat-bubble section to eventually store the battery and electrics. I also bought a lithium battery to power the beast!

Should take a couple of weekends to finish off the frame mods, cleaning and painting before turning the corner of the project and starting to put things back together again.

I'll update with some pics soon.

Cheers,

Phil
 
Hi,

I'm still working of finalising the frame after sandblasting it, buying the paint and finishing up some customisations. Nothing major, just the rear indicator and stoplight mounts, rear splash guard, under seat tail and footpeg mounts.

Hopefully I'll have them all done this weekend and might even get to undercoat it. I'm planning on making a makeshift spray booth in the garage to keep the dust/contaminates down to get a better result that doing it outside.

I was going to use a POR15 matt silver frame paint but the paint shop guys recommended a gloss silver topcoat and 2 pack clear, so I'm going that way. I did think about powder coat but it's less flexible if I need to make any changes or repairs, and I'd rather do it myself anyway, cause that's all part of the fun!

I've finally taken some pics of the sandblasting and last weekend's frame mods.

frame.jpg
sandblast.jpg

I'll need to make some decisions about what to do with the motor soon. I'd kinda like to rebuild it with a 277 degree crank, performance cams and 750 bores etc., but looking at quite a bit of cash when the motor has been rebuilt by the previous owner and should be in fairly good shape. It needs a tidy up and repaint anyway, so it will get that as a minimum, although I'd rather paint it when in pieces than as a whole unit. Will be a satin aluminium engine enamel all over except for polished side covers.

Anyway, I hope you enjoy the pics....

Cheers
Phil
 
Hi Phil,
looking good so far and yeah, I'd also think twice about spending the big rephase money on a motor that already ran good.
Another tip from your safetynagger, the dust filters in your breathing mask that kept the sandblasting debris from giving you black lung disease need to be swapped for organic volatiles filters so the paint solvents don't destroy your liver when you fizz the frame over.
 
Hi,

Been working on the various bits and pieces along with cleaning up the frame ready for priming. Finished making the footpeg mounts and welding them onto the frame.

Here's a pic of the various frame bits after applying the etch primer.

primer.jpg

I've recently been working on setting up the garage as a temporary spray booth. It's something I've wanted to do for a long time, so worth some effort. Wouldn't I so like a dedicated spray booth in my back yard !?!
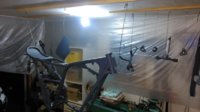
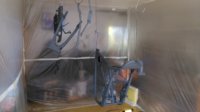
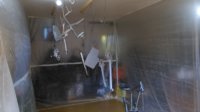
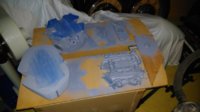
So, I've fixed some electrical conduit to the ceiling (the type with the snap on cover) and then fitted some plastic disposable drop sheets into the conduit before snapping on the cover to hold it in. This allows me to create a disposable ceiling and four walls with the addition of a filtered air extraction and clean air input (filtered fan) to keep the air circulating. Also bought a full face mask/respirator with organic vapour filters to keep the lungs healthy!

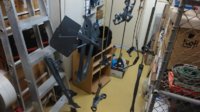
Here's a few pics of the bits hanging in the spray booth getting ready for the upcoming spraying weekend. Note that I haven't extended the plastic drop sheets to the ground level yet.

spray booth2.jpgspray booth1.jpg
 
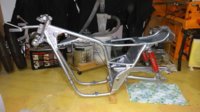
Frame painting is done !

The spray booth worked really well and will be easy and cheap to setup again for the body work.

Here's the before and after shots in the booth and a shot of the frame starting to be reassembled. :)

spray booth3.jpg spray booth4.jpg spray booth5.jpg
 
Excellent & nice paint booth...gives me ideas on what I can do for my winter projects. :)

Good to see movement... so now it's the fun part of getting it all back together!
 
Thanks Brassneck & XSnin0,

Yep, the project's turned the corner towards reassembly, but still a long way to go...

I still have quite a bit of bodywork to finish off with the seat, front guard and fairing preparation for painting, so I'll keep going on the frame reassembly while I also work on the motor and bodywork.

I've bought a 750 kit for the motor and just looking to do a mild street cam and port cleanup. Still tempted to go rephase, so stay tuned...

I'm just making a rotating motor stand so I can work on the engine a bit easier. It will be a copy of a design from this wonderful forum. More pictures when the stand is finished.

Cheers,
Phil
 
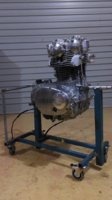
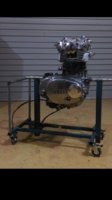
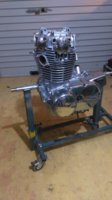
Just finished the engine stand, based on a design by 5Twins. Its not as nicely painted as his but works well and is very stable.

It should make working on the engine much easier! The casters make it very easy to move it around the workshop too. I was a bit worried about the working height being too low, but the workshop stool is just a good height.

engine stand.jpgengine stand2.jpg

Cheers,
Phil
 
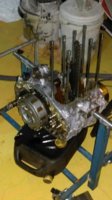
The engine has now been stripped to the bottom case, parts cleaned up, painted and now getting ready for re-assembly. A 750 kit, new cam & springs, new inlet valves to match the PO's new exhaust valves, plus a few other replacement bits going back in.

I've done a mild clean up of the ports and a bit of work port matching the inlet manifold. I couldn't believe how bad the casting around the inlet manifold was from the factory!

I've also tightened up the starter gear spring to hopefully improve the gear engagement noises.

Lots to do and polishing other bits while waiting for parts to be shipped. :)

engine stripped.jpg
Engine stand is working really well.

engine undercoat.jpg
Parts undercoated. Using Dupli-color engine enamel.

engine mockup.jpg
Engine parts together for a mockup. Side covers polished.
 
Hi Steve from Cairn's driving down to Brissy in Oct. & bringing my 750 rephased special down, be neat to meet & admire you build. Hope to here from you. Steve 0414709951
 
Hi Steve,

I've sent you a message.

Always happy to talk bikes and compare notes or stories.
Maybe we should organise a shed day in October to sync with Steve's visit. Any other Brisbane XS650 owners interested?

Phil
 
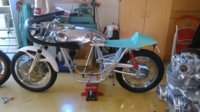
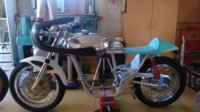
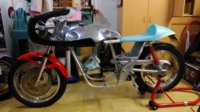
Been working on putting bits back onto the frame and waiting for engine parts to arrive. Have now made the top fairing stay and mounted the front guard, but looking to trim it down a bit. The engine parts are now here so looking forward to rebuilding the motor this weekend, and maybe getting it back into the frame.

Here's the bike and engine as it stands now.

bike1.jpg
bike2.jpg

Cheers
 
Thanks Signal, not as good as your build quality but hopefully close.

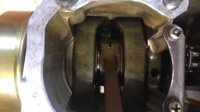
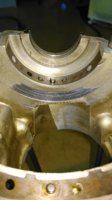
I was just checking over things before starting the top-end engine rebuild and found the LHS conrod's big end float was Way too much, so reluctantly I'm now splitting the cases and having to get the crank re pressed together :(

Crank1.jpg

It's a shame as I was hoping to have the engine buttoned up and back in the frame this long weekend. Just glad that I checked it before going ahead with the rebuild!
 
Ended up spending the rest of the weekend doing lots of little jobs and getting the electrical stuff ready by mounting the battery, starter relay, regulator & coil. Also finished the rear mounts for the tank and seat/tail. Painted the front guard Red to experiment with the intended colour scheme and really happy with how it turned out.

Progress Oct.jpg
 
Back
Top