My glass bead is super-fine, like flour dust, gets into everything. Even a larger grit will break-down into a dust. Using my bead, I would have to really seal it well. Then the sealing would have to survive the bead-blast, the blow-clean blast, the pressure wash, and not stick to the sealing edges only to later fall into something...
-
Enjoy XS650.com? Consider making a donation to help support the site.
XS650.com receives a small share of sales from some links on this page, but direct donations have a much greater impact on keeping this site going.
You are using an out of date browser. It may not display this or other websites correctly.
You should upgrade or use an alternative browser.
You should upgrade or use an alternative browser.
How to blaster cylinder?
- Thread starter BigBoreSwede
- Start date
YL82
Perpetual Restorationist
So irrespective of sealing efficacy, some grit will get where it shouldn't and hot soap & water soaking/cleaning is advised to ensure its all removed, correct? No problem.
Would it be best if remove steel parts such as rocker arms, rocker arm shafts, valves, springs, etc., prior to glass bead blasting (to prevent getting wet) or is that necessary? In the case of the rocker arm shafts, I'm wondering how well those hidden parts can be dried...
Would it be best if remove steel parts such as rocker arms, rocker arm shafts, valves, springs, etc., prior to glass bead blasting (to prevent getting wet) or is that necessary? In the case of the rocker arm shafts, I'm wondering how well those hidden parts can be dried...
Whenever I've glassbeaded (not just bike parts, I have other hobbies), I've always stripped down the parts completely, because what I was doing involved/required full teardown anyway. In your case, trying to just clean without teardown (possibly because you're not doing complete refurb), is something I've never done, and am not comfortable doing. Knowing how this stuff gets into everything (including my nose, which is in a mask and not in the cabinet), makes me want to caution you that it probably isn't worth the risk, knowing how you are normally quite meticulous about your machines and procedures.
You could probably do this block-off and mask method, followed by thorough cleaning, and get away with it, but Murphy's law would bite me in the butt....
You could probably do this block-off and mask method, followed by thorough cleaning, and get away with it, but Murphy's law would bite me in the butt....
YL82
Perpetual Restorationist
I have to agree with you!
Just ordered a Performance Valve Spring Compressor (W89409) from Summit Racing. Having that specialty tool should ease my spring removing phobia created by use of my home-made valve-spring part howitzer.
I'm fabricating my head hole covers from a clear Spectar plastic, so that should let me know if/when anything is getting inside. I'll provide some pics after I'm done fabricating.
Thanks for giving it to me straight, 2-Many!
Last edited:
That valve spring compressor may or may not work well. I have one similar to it and the problem is getting that spring holder down onto the top of the spring on bike motors with recessed assemblies (like the 650). There's not much room around the spring for it to fit down in there. I'm sure I told you a while back, the c-clamp version from Mike's in the red box is the best I've ever used, and I've tried several types.
If your block-off plates are wood, no gasket is needed. The wood compresses down and acts as one. I've upgraded many of my plates to 1/8" aluminum. With that, I use rubber sheet to make gaskets. Simple to cut out with scissors and reusable. You can see it sticking out here on this Suzuki head .....

If your block-off plates are wood, no gasket is needed. The wood compresses down and acts as one. I've upgraded many of my plates to 1/8" aluminum. With that, I use rubber sheet to make gaskets. Simple to cut out with scissors and reusable. You can see it sticking out here on this Suzuki head .....
YL82
Perpetual Restorationist
I'll bet you're absolutely right about the clamp I ordered. I'll be calling Summit shortly.
Thanks, 5twins.
Thanks, 5twins.
Last edited:
YL82
Perpetual Restorationist
5twins,
Here's the damning proof that you did advise me on the compressor tool from MikesXS.
")
From Thread: Tips on Valve Keeper (Collet) Installation
I just ordered this set from Ebay. Looks like same tool with same 5 tip offerings. I'll let you know when I get it if I'm a happy Ebay customer. Hopefully, this will be a good set for half the price of MikesXS in addition to saving ~$15.41 (to TN) on shipping.
http://www.ebay.com/itm/Motorcycle-...-XS-550-750-tool-/330696033066#ht_2232wt_1399
Here's the damning proof that you did advise me on the compressor tool from MikesXS.
From Thread: Tips on Valve Keeper (Collet) Installation
If you compress the spring enough, the keepers will drop right in. Many times, the spring cocks to one side when you tighten it down. I drop one keeper in the loose side then work it around to the tight side by rocking the spring compressor and spring over a bit. That lets me spin the keeper around to the tight side (now looser) with a pick of some sort. It gets trapped in place when I release the side pressure on the compressor. Then I drop the second keeper in the loose side. You have to get the spring compression amount just right so the keepers go in enough to catch and lock into that groove in the valve stem.
This is why I like that c-clamp style spring compressor from Mike's in the red box. It's infinitely adjustable so you can get just the right setting you need. Since all the parts snap together, stuff doesn't go flying all over the shop if you move it or rock it a little.
I just ordered this set from Ebay. Looks like same tool with same 5 tip offerings. I'll let you know when I get it if I'm a happy Ebay customer. Hopefully, this will be a good set for half the price of MikesXS in addition to saving ~$15.41 (to TN) on shipping.
http://www.ebay.com/itm/Motorcycle-...-XS-550-750-tool-/330696033066#ht_2232wt_1399
TwoJugs
Excess XS
Yes - I realize this is an old Thread - but, hey, I'm doing Searches...
So, even though plates are in place to keep glass beads out, you recommend the parts be given a bubble bath? Not disagreeing, but in my case, I've got rocker arms in place in the cover and valves installed in the head. I plan to (temporarily) bolt cover and head back together and make covers for all openings. I just don't want to remove all those steel parts again.... With the cylinder block, I likewise am planning to make a cover for top (using gasket as template) and seal off barrels.
Sounds like the importance of removing all bead residue from these parts is of greater import than getting steel parts wet (which can be dealt with via drying and oiling).
Any need to install gaskets along with the fabbed covers? Not sure I want to put pricey gaskets at risk to keep beads out.
Thanks!
I made block off plates from fiberglass panels I had. Then I made gaskets out of the soft foam material they sell to line tool box drawers with. i think I bought a roll at harbor fireight. Trace out your gasket and cut with a scissor. I doubled it up but that might not be needed. I use it to cover the openings while washing the open motor with soap and water. it works perfect. Check out
I use the same HF cabinet shown here. Well worth the money. Wear a respirator! It is designed to use with a vacuum recovery setup but I plugged mine and yes it leaks fine glass dust everywhere. Without the vacuum you are putting 90 psi into a sealed box. It has to come out somewhere. If I had room I would ad the vac setup and probably be able to reuse the beads sucked out? With time you will get the art of blasting down. A fast way to make old stuff look new again. I even pull the nozzle and hose out of the cab and stick it into a 5 gal bucket of blasting sand (dried) and use it outside to do my frames. Paid for itself many times over already.
YL82
Perpetual Restorationist
Thanks, TwoJugs.
Very helpful and instructive video. I love the stand too.
Do you also bead blast the upper and lower case assemblies with your engine buttoned up in the same manner (as cleaning)? Perhaps done outside of your cabinet...?
Here is what surely is a dumb question: Where were your piston connecting rods when you placed your fiberglass plate over the engine cavity? Can these be pushed down into the engine to get em' outta the way or do they have to be removed somehow?
Last edited:
Yes, that's the valve spring compressor I'm talking about, and that's a terrific price. It appears they also sell the cam chain riveting tool for a very good price as well .....
http://www.ebay.com/itm/New-Motorcy...ool-/390658276153?vxp=mtr&hash=item5af50c3b39
Where were these guys several years ago when I was buying this stuff, lol.
http://www.ebay.com/itm/New-Motorcy...ool-/390658276153?vxp=mtr&hash=item5af50c3b39
Where were these guys several years ago when I was buying this stuff, lol.
YL82
Perpetual Restorationist
Yep, that looks like the same chain tool (35-0111) that I recently paid MikesXS $60 for plus the $15 shipping. Even MikesXS less expensive kit (35-0112) (supposedly just for cam chains) is $53 + the high shipping.
Capitalism....
Capitalism....
YL82
Perpetual Restorationist
I will be able to use an industrial bead blasting cabinet at my worksite.
My Glass Bead Options are as follows:
Mesh Size Description
#8, 60/100, Medium
#10, 100/170, Medium-Fine
#13, 170/325, Fine
Recommendations on which size to use for my cylinder (cover, head, block & maybe upper and lower case)?
I was able to feel the #8 material - pretty small stuff.
My Glass Bead Options are as follows:
Mesh Size Description
#8, 60/100, Medium
#10, 100/170, Medium-Fine
#13, 170/325, Fine
Recommendations on which size to use for my cylinder (cover, head, block & maybe upper and lower case)?
I was able to feel the #8 material - pretty small stuff.
YL82
Perpetual Restorationist
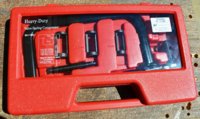
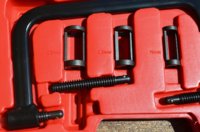
Mysteriously, the valve spring compressor that I got on eBay is now listed for $39.50 instead of $25.50.
http://www.ebay.com/itm/Motorcycle-...-XS-550-750-tool-/330696033066#ht_2232wt_1399
Got this set today from TheAlphaMoto on Ebay. Seems like a well-made set.
http://www.ebay.com/itm/Motorcycle-...-XS-550-750-tool-/330696033066#ht_2232wt_1399
Got this set today from TheAlphaMoto on Ebay. Seems like a well-made set.
Attachments

Last edited:
TwoJugs
Excess XS
Thanks, TwoJugs.
Very helpful and instructive video. I love the stand too.
Do you also bead blast the upper and lower case assemblies with your engine buttoned up in the same manner (as cleaning)? Perhaps done outside of your cabinet...?
Here is what surely is a dumb question: Where were your piston connecting rods when you placed your fiberglass plate over the engine cavity? Can these be pushed down into the engine to get em' outta the way or do they have to be removed somehow?
The rods rotate into the crankcase, no removal needed. I don't blast the crankcase, just wash well with scotcbrite pads, mineral spirits, brake cleaner, soap and water before paint.
YL82
Perpetual Restorationist
Thanks, 2XJugs.
When I got home yesterday I quickly found that I could easily rotate the rods out of the way. Then I had to secure my timing chain so it wouldn't fall in the dark abyss.
Just started work on a cover plate for the top of crankcase that has the front nipple (where oil fitting goes).
When I got home yesterday I quickly found that I could easily rotate the rods out of the way. Then I had to secure my timing chain so it wouldn't fall in the dark abyss.
Just started work on a cover plate for the top of crankcase that has the front nipple (where oil fitting goes).
Last edited:
YL82
Perpetual Restorationist
I don't blast the crankcase, just wash well with scotcbrite pads, mineral spirits, brake cleaner, soap and water before paint.
Prior to sealing off the crankcase like you did, I still need to remove the rotor (awaiting tool from eBay purchase). I plan to replace the crankshaft seal while I'm at it. I bought a roll of the solid rubber liner from HF. Great stuff!
While I do plan to (re-) paint the upper case (no plans to blast since surface is pretty darn smooth), I'll clean/prep as you suggest.
I do not plan to paint the lower case, however. Perhaps a clear coat, but I'm iffy on whether I want to do that.
Since I'll have case sealed off so I can use soap & water, etc., would you have any reservations about soda-blasting (out in the open)?
I have a small compressor, so I bought a 1L abrasive blast gun from HF to do spot blasting (blast & wait, blast & wait).
http://www.harborfreight.com/1-liter-abrasive-blast-gun-92857.html
I assume water would wash/dissolve away any residual soda and, in my case, I've got neighbors who won't give a shit if I turn my driveway white (which I've done before).
TwoJugs
Excess XS
Not sure if you can replace that seal without splitting the cases?
I would stay away from clearcoat, especially on the lower. It will chip easier with road debris. Once it turns bad on ya then its lots of work to redo. If you use anything other than 2 part clear it might get messed up by the gas and oil that gets on it.
Same paint as the upper might be the way to go.
I never tried soda blasting? I might some day soon looking for that frosted aluminum on a set of aluminum rims, the way the motocross ones come out. I think they use an anodizing process.
YL82
Perpetual Restorationist
Not sure if you can replace that seal without splitting the cases?
Appears that you can. Check out "Crankshaft Seal" Thread (started by bluexs650h) that includes a nice "how to video" from I Am Carbon.
I would stay away from clearcoat, especially on the lower. It will chip easier with road debris. Once it turns bad on ya then its lots of work to redo. If you use anything other than 2 part clear it might get messed up by the gas and oil that gets on it.
Same paint as the upper might be the way to go..
I think I'll forgo clearcoating bottom and just clean well (may try soda blasting) and leave plain. As you and others have said, lower case will just get road blasted anyway.
Thanks for your input, TwoJugs!
Similar threads
- Replies
- 68
- Views
- 9K
- Replies
- 4
- Views
- 1K