Pamco Electronic ignition vs. high output?

Oak,

The difference between the positive plug wire and the negative plug wire is there even with a stock TCI system and is accounted for when you do a carb sync.

There are other differences between the two cylinders as well, so that is all taken care of if you do a good carb sync.

Basically, the engine is two one cylinder engines on the same crankshaft, but they are not identical in other respects as well.

1. Compression
2. Valve timing.
3. Cooling air flow.
4. Positive and negative spark plugs.
5. Carb jets.
6. Carb sync.
 
Hello, Pete!
Thanks for all your good advice, I bought a set of ignition components from Mike's XS(shamelss plug!) on the recomendations you've given me here, and am waiting to install them on my "76 650. PLEASE, answer this question for me as soon as possible- According to the instructions forinstallation, you have to use a timing light and time the beastie AFTER installation of plate, coil, wires, etc. I don't have access to a timing light, won't even be able to afford one until the first of April(if even then...bills and parts, ya know!) Can i install these parts and run it without timing it( until i get a light) or should I stay with the points system in the meantime, as it runs and starts well so far(one kick start when warm) until i can get a light and time the beast? What your outlook? would love to install the PAMCO parts, but don't want to burn something up, or ruin the motor! HELP, Please! Thanks, and Take Care!:shrug::D
 
Where the hell is Whitehall, IL? Damn, that's far south. I was going to tell you to just come on over and we could install and time your PAMCO, but the gas you'd spend riding here would cost more than a timing light!

You might be able to loan one from a place like Auto Zone. Or just ask a local mechanic or someone to borrow one for an hour. It's not an uncommon tool to have. I bet if you asked around you'd be able to find one to borrow.

I'd wait until you have a light to install it since your bike is running good enough for now.
 
Hello, Pete!
Thanks for all your good advice, I bought a set of ignition components from Mike's XS(shamelss plug!) on the recomendations you've given me here, and am waiting to install them on my "76 650. PLEASE, answer this question for me as soon as possible- According to the instructions forinstallation, you have to use a timing light and time the beastie AFTER installation of plate, coil, wires, etc. I don't have access to a timing light, won't even be able to afford one until the first of April(if even then...bills and parts, ya know!) Can i install these parts and run it without timing it( until i get a light) or should I stay with the points system in the meantime, as it runs and starts well so far(one kick start when warm) until i can get a light and time the beast? What your outlook? would love to install the PAMCO parts, but don't want to burn something up, or ruin the motor! HELP, Please! Thanks, and Take Care!:shrug::D

I would suggest that you stay with the points until you have access to a timing light, but then again, even running with points that have not been timed properly is risky.
 
Whitehall is about 45 minutes south of Jacksonville! Thanks for the info, I'm gonna stay with the points until i get a light, then go at the beastie hammer and tongs! Tahnks for the speedy response! Shiny Side Up!:bike:
 
Hello! Thanks for the speedy reply! I pretty much figured that's what you'd say, but wanted just to check and make sure. I checked the points gap and stuff per my Hayne's manual that i got with my last order of parts, and everything was within spec( had to clean the contacts and gap them, but other than that, all was good!) I'll probablly be asking a WHOLE lot more questions over time from you and the other folks on this forum, just giving you fair warning!LOL! Thank you SO much for the input, I'm getting to really like this beast, lots of fun and,well...I'm 53, so it's an old bike for an old guy! What more could I ask for!?! Take Care, let's keep'em rollin'! :thumbsup::bike:
 
Has anyone who has switched over to "batteryless" experienced dim headlamps at an idle. I'm thinking about a '68 XLCH Harley (with magneto) that I owned having a dim headlight while sitting at a traffic signal. Correct me if I am wrong, but capacitors are not capable of (or designed for) supplying current to operate lights. Is that a non-issue with the modern systems?
 
Has anyone who has switched over to "batteryless" experienced dim headlamps at an idle. I'm thinking about a '68 XLCH Harley (with magneto) that I owned having a dim headlight while sitting at a traffic signal. Correct me if I am wrong, but capacitors are not capable of (or designed for) supplying current to operate lights. Is that a non-issue with the modern systems?

I have gone to a batteryless system and I can tell you that at idle, which I have set just below 1000 rpm's, my headlight and tail light are not as bright and they also seem to have a slight pulse to them but once the bike gets to about 1100-1200 rpm's they are nice and bright and steady.
 
I have gone to a batteryless system and I can tell you that at idle, which I have set just below 1000 rpm's, my headlight and tail light are not as bright and they also seem to have a slight pulse to them but once the bike gets to about 1100-1200 rpm's they are nice and bright and steady.

Thanks for your reply. It appears that the same issue (however slight) persists. I guess I'll have dim light bulbs at idle.
 
I would suggest that you stay with the points until you have access to a timing light, but then again, even running with points that have not been timed properly is risky.
Hello again! Got another question...I have the #14-0911 kit installed on my "76 650, and am wondering what to do with the 2 orange and 2 gray wires AND the black ground wire that are loose when I removed the old stock coils and condenser. I followed theinstructions that are on the website for installation of everything, and see that on the coil installation page, the second photo shows the wires connected to the old mounting plate for the old coils. Is this acceptable, or should I just tape the ends of these wires up and leave them alone? The coil I have is the #17-6903 high output coil(obviously, to you, but I just wanted you to have that bit of info!). I REALLY don't want to ruin anything by having something connected wher it shouldn't be. As of the moment, I have 1 orange and 1 gray wire(from the old coil connections), from each old coil connection,(connected to ring terminals, one pair with the black ground wire from the harness, bolted to the 2 holes on the right side mount plate for the old coil. That's what it looked like in the pic on your site. Is this correct? Any help and guideance will be highly appreciated. Hope this makes sense! Thanks again, and please let me know what I should do! Shiny Side Up!:thumbsup::banghead::bike::shrug:
 
blackleather,

That picture was my old faithful '78/E that always got me home, even when I screwed up, but the wires in the picture are not the old wires from the condensers and coils. You can just tape up those old unused wires or go ahead and remove the condensers.
 
blackleather,

That picture was my old faithful '78/E that always got me home, even when I screwed up, but the wires in the picture are not the old wires from the condensers and coils. You can just tape up those old unused wires or go ahead and remove the condensers.
Hello again! Just wanted you to, once again, say a very hearty THANK YOU!!! for your help and advice on purchasing and installing my PAMCO ignition on my '76 650! I finally worked up enough guts to time the motor(per the instructions on your site) and it went FLAWLESSLY! I'd purchased a inductive timing light from Autozone, and the motor sounds great! Fires right away, and really smooth! I couldn't be happier! Nice to update an old classic with modern parts! Now, if I can just figure out the front turn signal wiring...!(LOL!) Anyway, looking forward to getting this beast registered and on the road(legally!) for several trips to visit friends in nearby states. Man, won't it be fun to roll up to my 35th high school reunion with this baby..I mean, ...well...yeah, i really did just date myself, didn't I?!? Any way...thanks again, will have more for ya later! Shiny Side Up!:thumbsup::laugh::bike:
 
Pete,
working on my tracker build and it will be using one of your ignitions for sure hoping to get Hugh to re-phase me but if not still going to use your ignition.

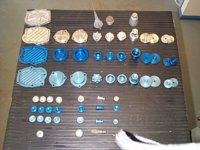
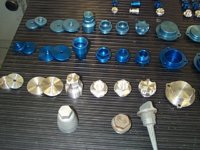
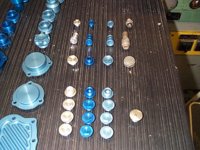
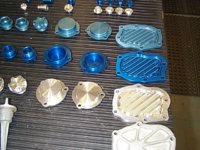
I have a guy who had built a bunch of cam covers, tach plugs, kickstart plugs, starter plugs, cam chain adjusters and other stuff out of aluminum. My specific question is this the cam covers he had made have you remove the cam cover base that is held on by three screws the backing plate for the points if you will. you can see them in the pictures below he says you had to have the type of ignition with a pick up from the crank the TCI Im guessing. Looking at the covers in the pictures below will your ignition work if I remove the base plate and use these covers?

Thanks for your time dude?
 

Attachments

  • 001.JPG
    001.JPG
    137.9 KB · Views: 370
  • 002.JPG
    002.JPG
    139.9 KB · Views: 350
  • 003.JPG
    003.JPG
    148.2 KB · Views: 345
  • 004.JPG
    004.JPG
    149.2 KB · Views: 337
An Update:

At the beginning of this thread I had recommended the so called "Green Monster" coil, but now I wish to update my recommendation to use the 17-6903 "Ultimate" coil instead. That coil is included in the current "High Output" and "Ultimate" kits from MikesXS.
 
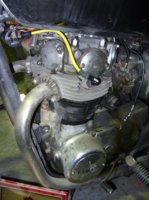
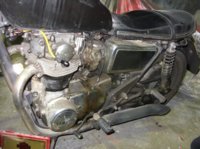
Got my Pamco 14-0911 running this arvo!...being a TX I went looking for those earth clamps... hardware store looked at me funny trying to explain what I wanted, then tried an Electrical wholesaler who showed me an Aussie earth clamp for earthing a house and its a lot simpler and lightweight than its American counterpart, bottom line don't think they're available here in OZ.
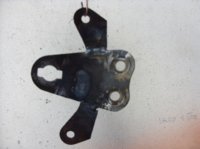
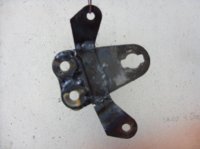
Plan B... mount the coil east west where the horn is /was, removed it and indid the two 13mm bolts that hold the bracket, went looking on my workbench for a scrap of steel to mount to the horn bracket...at the moment Im parting out a Kawasaki GPZ 1100 B1 (1981) So I check the coils and the brackets on them are perfect once I trim em down and weld the horn bracket to it, also done away with the rubber washers the 13mm bolts go thru and metal welded washers in their place.
once it was all welded I cooled it off then painted in etch prime black then satin black and bolted it all up paying attention to earth to the coil mount too.
bolted it all up shortened the provided yellow plug leads to fit neat and screwed them into the coil prior to mounting.
Wired the red green and black wires as per instructions on here, fitting a 7.5 amp fuse.
Check the valves...ok...checked the cam chain tension...ok.....fuel on ignition on kill switch on and kick.....barely had to breathe on the kickstart and she thumped into life, had a big fan going and my timing light on, advanced her up a bit, checked full advance...it was a bit shy of the mark so advanced the base timing a smidgin more.
double check everything then "kick her in the guts! Charlie!"
starts so easy, runs sweet, well around the block anyway.
Got a Poker run on in the morning so Im glad the old girl is up n running starting easy.
Thanks Pamco Pete and Santa Claus 2.45 am here gotta get up at 8am so better sign out.
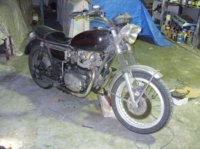
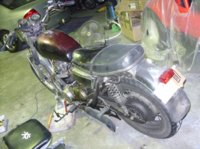
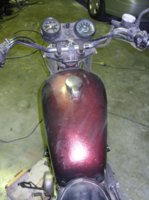
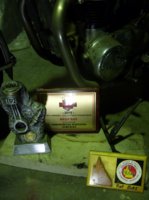
A few pix of what I did, and a few of the bike itself, and a pic of my 3 Ratbike Trophies!!
maybe get another tomorrow/today...ok bedtime
 

Attachments

  • YAMAHA TX650 010.jpg
    YAMAHA TX650 010.jpg
    123.6 KB · Views: 350
  • YAMAHA TX650 007.jpg
    YAMAHA TX650 007.jpg
    92.5 KB · Views: 389
  • YAMAHA TX650 006.jpg
    YAMAHA TX650 006.jpg
    72 KB · Views: 381
  • YAMAHA TX650 005.jpg
    YAMAHA TX650 005.jpg
    69 KB · Views: 369
  • YAMAHA TX650 002.jpg
    YAMAHA TX650 002.jpg
    84.4 KB · Views: 334
  • YAMAHA TX650 003.jpg
    YAMAHA TX650 003.jpg
    84.2 KB · Views: 343
  • YAMAHA TX650 014.jpg
    YAMAHA TX650 014.jpg
    114.9 KB · Views: 351
  • YAMAHA TX650 017.jpg
    YAMAHA TX650 017.jpg
    119.8 KB · Views: 355
  • YAMAHA TX650 021.jpg
    YAMAHA TX650 021.jpg
    110.4 KB · Views: 360
  • YAMAHA TX650 022.jpg
    YAMAHA TX650 022.jpg
    117.6 KB · Views: 334
  • YAMAHA TX650 018.jpg
    YAMAHA TX650 018.jpg
    93.9 KB · Views: 333
  • YAMAHA TX650 012.jpg
    YAMAHA TX650 012.jpg
    84.5 KB · Views: 342
Have purchased the PAMCO kit and there is no schematic to show which Wires are which that go to the coil from the PAMCO electronics ( On the left side of the cam set up). One is Red, one is Green and the other is Black. So if anyone can give me a pointer as to which goes where I would appreciate it...
 
Have purchased the PAMCO kit and there is no schematic to show which Wires are which that go to the coil from the PAMCO electronics ( On the left side of the cam set up). One is Red, one is Green and the other is Black. So if anyone can give me a pointer as to which goes where I would appreciate it...

The installation instructions are available on the web site www.yamahaxs650.com There is an included schematic as well as a written set of instructions for the wires. There should have been a little sticker in the box from MikesXS directing you to the web site, and I am sorry if that sticker was not in the box.
 
That's not a bad idea to where you located the coil. Think I might do it too. It makes a nice layout for the spark plug wires....
 
Back
Top