I'm not fussy like these guys but jump from dico to black buff on a sisal wheel then green or blue buff on cotton call it done. Horsepower matters if you are doing a lot of buffing but a small motor will do the job with patience. (or so I've heard)
I just kept seeing those buffing wheels getting black and didn't know if at a point they would get gunked up and unusable guess that's not the case
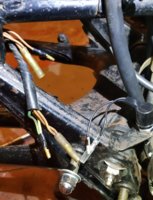
My usual progression goes something like this, if it’s got a lot of corrosion like this,
View attachment 160073 I start off with a blue Dico wheel and that’ll result in this,
View attachment 160074
Then progressive wet sand paper from 400 grit up until, 1500 grit gets to this point,
View attachment 160075
Then hit the buffing wheels,
Some guys like 5T have really nice permanent buffing stations set up. I have a really old Craftsman two wheel bench grinder that pulls double duty as my buffer. It’s not bolted down , I store it in a cabinet and drag it out when needed. My whole buffing set up is just two wheels , a stitched cotton wheel which is very firm that I use a black compound on to make the initial buff, then a soft cotton flap wheel for doing the final buff with, using a white compound.
View attachment 160070
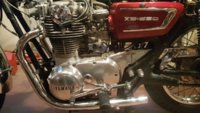
Then everything gets a hand polish with Blue Magic. Note the fork leg on the left has not been buffed yet.
View attachment 160076
View attachment 160071
I found this site on the interweb has a lot on info on buffing stuff I didn't know about (don't take much)I just kept seeing those buffing wheels getting black and didn't know if at a point they would get gunked up and unusable guess that's not the case
Thanks
sounds like outside work to methe wheels do plug up, why you need a wheel rake.
View attachment 160091
Eye and breathing protection needed when buffing!
Keep it up Bob, and you'll be up for another "RobinC Seal of Approval Award". I don't think MamaYama made them so shiny! If I can get "The Basketcase" to the "not ugly" stage, I'll be happy.
You say tomato I say tomoto. Yes, it is the "rear brake pedal switch". It appears from the attached diagram the switch is wired into the brown and green/yellow wires. Do you conquer?There is no "back brake electrical relay" what're you putting in, rear brake pedal switch?
View attachment 160555
Yeah, he's a baron, not a conquistador.I don't conquer but am happy to concur,
Thanks Gary. I've been sick for the past week, so I'm not thinking clearly nor spelling correctly. SeanI don't conquer but am happy to concur,
Yes like in GLJ's pic above, that is correct.
We're just havin' a little fun... at your expense.Thanks Gary. I've been sick for the past week, so I'm not thinking clearly nor spelling correctly. Sean
I may assume that's a good thing, although I know some people who don't think much of J C Whitney.I think of MikesXS as the XS650's JC Whitney.
Thanks for the advice. I am not familiar with the "the throttle shaft seals", where are they? Thanks, SeanRead the carb rebuilding threads in the tech section.
Replace the throttle shaft seals.
I've used the carb kit from Mikes with no problems on my XS2. I did not use the needle that came with the kit. Also used Cruzinimage floats. Most people here will say that genuine Mikuni is the best parts to use and I don't disagree with them. I had my reasons to use what I did and the results have been OK.