My first project.

suthpaw22

XS650 Addict
Messages
248
Reaction score
5
Points
16
Location
Orlando, Florida
Hey guys,

I bought my first xs650 about a year and a half ago. It was a 78 model project bike I snagged of craigslist. I signed up on here and asked some questions and began tinkering. A month or so in I had some personal issues that made me park my project for a while, just short of running, I think... Things have finally started looking up the last month or so and my bike and the direction I want to go with it has been on my mind a lot. Just getting it running is not my goal anymore. I want a real head turner and I think I'm on the way to achieving that. I havent got to spend a ton of time with it yet, an hour or so here and there the last couple weeks, but I'll fill you guys in and post pics. I am very new and learning when it comes to the mechanical side of things, so I welcome all feedback and ideas. Here is a pic from when I first brought my baby home. 78 XS650.jpg
 
Here is a list of what I have purchased so far

1) Clymer repair manuel
2) 15" Ape hangers
3) +5" cables for apes
4) chopper battery box
5) TC bros hardtail
6) stop tail light side mount license plate bracket
7)Stainless Steel engine bolt kit
8) Complete engine gasket kit
9) Used set of Mikuni bs 38's
10) Keyster carb rebuild kits
11) stainless steel carb bolts
12) knurled forward controls
13) stainless steel rocker shaft plugs
 
A good friend of mine is an amazing bike builder here in Va. I am no welder or painter, so he will be taking care of that. I'm hoping to be able to do the majority of the rest myself, but I'm sure I'll be calling on you guys when I'm stumped like I have already.

My thoughts for the build are an old school look. I want to run spoke wheels and white wall tires. I debated back and forth on whether to get the springer kit from TC bros or use my hydralic forks and just shave and shine them up. I decided to go ahead and try and use what I have if I can get them looking right.
 
Anyone seen an ignition switch mounted in the side of the fake oil drum? Been considering that, but I've been going back and forth on how it would look and functionality of the placement.
 
Thanks rflives. I see it has now. I'm definately not trying to reinvent the wheel with my first project, just trying to tweak a few things and make it my own so its not too typical.

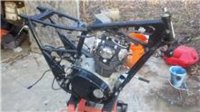
Anyway, I finally got to spend a few minutes with the motor today, so I have an updated pic to share.
 

Attachments

  • motor 2.jpg
    motor 2.jpg
    7.5 KB · Views: 180
Hey there. I am from Va too, I live near Richmond. AM strating my first build myself, I have an 81. Going bratstyle with it. Tearing down and rebuild motor, etc. I ahve a build thread as well. I will def be checkin in on your thread often. Good luck with the build, when we get both done, have to meet up and do some ridin.
 
So I got to spend a little time with my baby today and made some progress, but I'm still in the tear down stage of my motor to clean it up and rebuild. Definately ran into a few minor obstacles that are going to set me back a little time wise, (clutch plate screws and stator screws, both phillips heads, not budging and starting to strip when I try to remove them,) but I'm confident I'll get there soon.

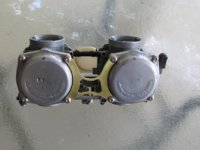
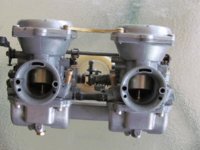
On another note, I've been considering my options with my carbs. I bought a set of mikuni bs 38's last year off ebay. As you can see the carbs are very dull. I'm not a carb guy at all, but upon breaking them open the floats and all look to be in decent shape. The only issue I can see is that my gasket was worn. I bought a set of keyster rebuild kits and all new ss allen head bolts for it. I spent about 2 hours the other day sanding and pollishing the top plates trying to get them looking how I want my carbs to look before I put them on my baby, and I wasn't thrilled with the outcome. My concerns are A) the top plate should be the easiest to shine up with all the nooks and crannies on the body and bowl and I wasn't thrilled with how they looked, and B) I know nadda about carbs, so I started looking for alternatives. I researched the pwk performance carb kit from mikes and found mixed feedback, but decided to get them anyway. I went to place my order to find they are out of stock until sometime this month. I tried to get in touch with an awesome carb guy I'd heard of that does these carbs and haven't had much luck. Any suggestions?:shrug:
 

Attachments

  • carbs.jpg
    carbs.jpg
    6 KB · Views: 360
Save your bucks and learn to tune on the 38's.
They really aren't that hard and you have several here that will help if you need it.
As far as looks go search for some of the threads on soda blasting. It gets them clean.
For shiney, steel wool and elbow grease.
 
Weekendrider and classic, thanks for the tips and encouragement. I soaked them in gas after I stripped them down then and then used medium, fine, extra fine, and then pollished the crap out of my top plates and they didn't look too bad compared to how they looked to begin with.

I will definately look into the gunk cleaner and steel wool as I continue to try and get these things right.
 

Attachments

  • top plates.jpg
    top plates.jpg
    4.1 KB · Views: 163
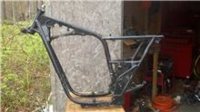
Been a busy past few days at work as well as with my project. I took the frame and hardtail to my bike builder friend and he should be starting on that in a day or so.

I tore down, soaked, scrubbed, and pollished my carbs until my fingers nearly bled the other day and got them looking pretty decent. Even had my fiance scrub on them a bit. They arent perfect, but I was pleased with the outcome.
 

Attachments

  • IMG_0454.JPG
    IMG_0454.JPG
    89.6 KB · Views: 168
  • IMG_0455.JPG
    IMG_0455.JPG
    85.2 KB · Views: 168
  • IMG_0456.JPG
    IMG_0456.JPG
    81.4 KB · Views: 168
So I ran into a speedbump with taking down my motor today. I've been trying to follow the clymer manual closely with this being my first rebuild. Some things seem really well explained and clear, while others are vague and just rushed through it seems. By my understanding, I should be able to open up my crankcase, but lightly tapping it with the mallet isn't budging it so I wanted to post a few pics up to get some different eyes looking to see if I have failed to remove some things that needed to be first.
 

Attachments

  • IMG_0459.JPG
    IMG_0459.JPG
    142 KB · Views: 144
  • IMG_04600909.JPG
    IMG_04600909.JPG
    110.9 KB · Views: 151
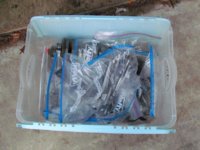
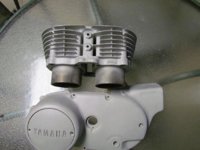
Hooligans pointed out a nut I had failed to take off in the first of the above pics. Thanks for that. The crankcase oppened up pretty freely after that. I have been bagging and labelling parts as I have dissasembled in hopes of making things easier upon the rebuild.The past few evenings after work I have been working on cleaning my casings up. I took them to my builder friends shop last night and he let me use his skatblaster to clean them up. This was a long slow process getting the baked on powder coating off. As you can see in the pics I have only blasted two pieces so far. Tonight I got to spend a little time pollishing my side cover I blasted last night and I'm pretty pleased with the results.
 

Attachments

  • IMG_0478.JPG
    IMG_0478.JPG
    103.2 KB · Views: 171
  • IMG_0479.JPG
    IMG_0479.JPG
    86.6 KB · Views: 176
  • IMG_0481.JPG
    IMG_0481.JPG
    81.5 KB · Views: 180
  • IMG_0515.JPG
    IMG_0515.JPG
    73.9 KB · Views: 188
Back
Top