Started the Special ll refurb

The white light bucket idea is also a great idea. In the garage where light is always an issue, having a white background to work with should be much easier than a nasty old brown or black.
 
Got the frame and swingarm painted and I'm doing a lot of parts cleaning and general fixing where needed. While working on the tach/speedo cluster I noticed one of the two screws that hold the face of the tach in place had come out and was rattling around inside. I spent a couple hours taking the ring off that holds the glass in place and got the screw back in place and the whole thing back in working order. Didn't really expect that one. Hope to be in a place where I can get the motor in the frame in about a week or so. I have relatives coming in a couple days (wife's daughter and grand daughters) and that takes priority (wife's, not mine). It might just be a good idea to take a break anyway.
 

Attachments

  • DSC03014.JPG
    DSC03014.JPG
    273.5 KB · Views: 148
I got the engine in the frame today. I took the advice of the forum and instead of trying to lift the motor into the frame, I took off the left side cover and laid it on it's right side and just lowered the frame over the motor. Worked like a champ and was far easier than I would have thought. I used the cardboard centers from paper towel rolls to protect the frame but really didn't need them as I didn't touch the frame except at the points that the bolts went through.
 

Attachments

  • DSC03019.JPG
    DSC03019.JPG
    238.9 KB · Views: 148
I started to get the wiring harness and components on the bike yesterday. I didn't have my manual yet and the one thing I didn't take good pictures of while taking the thing apart was the exact routing of the harness and I found it difficult to get the routing with all the connectors in places where they didn't interfere with other components, especially the damned air box. When I got the bike, the air box wasn't exactly right to begin with and the parts pictures I find on the various parts sites don't look quite right either but finally I got everything to come together. I'll see in another couple weeks how it works and runs.
 

Attachments

  • DSC03020.JPG
    DSC03020.JPG
    217.8 KB · Views: 120
  • DSC03021.JPG
    DSC03021.JPG
    207.5 KB · Views: 159
I finally got all the electrical components in place and connected, rear fender, side panels, tank, etc. I don't have my new tires yet so I wrapped the rims with duck tape to protect them and now it's sitting in the garage just waiting for tires, front brake master cylinder and front caliper. The master cylinder and caliper were toast at purchase time so I decided not to even try to make anything out of them, it would have been a waste of time in my opinion. I'm also waiting for side panel decals and a battery. I'm not in a hurry as my main ride and backup are ready at any time. My main bike is a 2018 XSR700 and my backup is a 2017 Royal Enfield C5.
 

Attachments

  • DSC03025.JPG
    DSC03025.JPG
    213.5 KB · Views: 174
I had an interesting situation/problem today. Actually when I first applied power to the electrical system a little over a month ago I noticed that the left turn signals wouldn't blink but the right would. At the time I just figured I troubleshoot that little problem later. So, after completely dismantling the entire bike and the wiring system and putting everything back (and having cleaned all connectors) I still had the same problem. The fact that the left signals would illuminate told me they were getting power but they simply would not blink. Obviously the flasher was working or the right side would have the same issue. I started checking bulbs to see what had been put in the units, starting with the fronts first and they were OK, the correct bulbs had been installed. Then I checked the rears and that's where I found the problem. The right rear was the correct bulb but when I got to the left, the wrong bulb has been installed. It's hard to determine who exactly did it, but someone in the past had installed a dual element bulb in the left, rear light. Then upon further inspection, they had also installed the wrong socket, one intended for running/turn signals. I had never expected something like this to be the problem because in my mind, no one would ever do that, no reason to and it never would have worked properly anyway. It just goes to show that when a person is trying to troubleshoot a problem, take nothing for granted. Something that never should have been was in fact the case. All electrical circuits on the bike now appear to be working fine.
 
I got my new tires, battery, caliper and master cylinder last week. After I put the new tire on the front wheel and got it on the bike I discovered the wheel was bent a bit. I never checked the trueness of the wheel before because the front tire was pretty flat and basically worthless to begin with. I've looked for another wheel all over the place and can't find a single one that looks or sounds like it's worth messing with. I've always been worried than trying to lace and true a wheel was more than I thought I could do and make it right, but now I'm thinking it might just be something I should give a try. If I get a new wheel and a set of spokes I'll be se back a couple hundred bucks and if I fail at getting it right I could just have Buchanan lace it and true it for another buck and a quarter or so. Does anyone on here have any experience doing this? Winter is getting close and I was looking at a winter project when I started this bike and I'm way too close to finishing it right now.
 
First one is a challenge but you just keep working on till it you get it right.
My biggest (make it easier) hint is to leave the slight grooves in the hub where the spokes lay. on reassembly they act as guides to the correct position/pattern.
The first wheels I did were redoing a set the PO gave up on, he hadn't got the pattern right, unspoked it, redid till it matched another wheel I used as a guide and all was good. I've done many since and ridden tens of thousands of miles on them. You can do this. It's nice and easier that the XS650 wheels are centered over the hubs no oddball offsets to build in.
If you don't have an extra matching wheel, print out some large photos of the old wheel before you take it apart.
 
When you said the wheel is bent, do you mean the rim is damaged? Or that the wheel is out of true?

If it's just out of true, no need to buy new rim & spokes, just needs careful work to get it straight.
 
First one is a challenge but you just keep working on till it you get it right.
My biggest (make it easier) hint is to leave the slight grooves in the hub where the spokes lay. on reassembly they act as guides to the correct position/pattern.
The first wheels I did were redoing a set the PO gave up on, he hadn't got the pattern right, unspoked it, redid till it matched another wheel I used as a guide and all was good. I've done many since and ridden tens of thousands of miles on them. You can do this. It's nice and easier that the XS650 wheels are centered over the hubs no oddball offsets to build in.
If you don't have an extra matching wheel, print out some large photos of the old wheel before you take it apart.

Hi flyerdon:
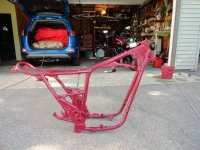
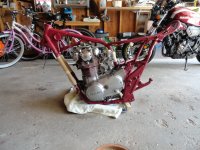
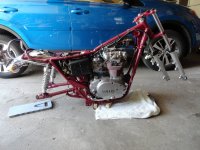
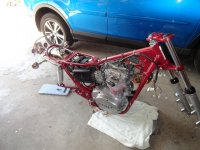
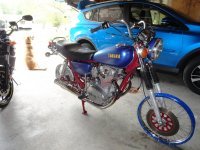
You've got a great looking project brewing there - I don't blame you for being anxious to get it done and rideable.
On the wiring, good grief - what do P/Os think they're doing :wtf:? My 1976 XS650C came with a horribly bodged-up rear turn signal/running light "set"-up (another word beginning with "f" comes to mind actually) AND the clown had used solid copper house wire joined with Marrette twist-on connectors to bring the running light power in. After much troubleshooting and attempted repairs of the butchered turn signal sockets, I eventually ripped out the entire wiring harness and started with a brand new one (around $70 from MikesXS) and two brand new rear turn signal stalks (this was before I had joined the Forum and had so many friends with stocks of parts). The other thing to check in your turn signal system are the spots where the wire to each signal stalk enters the hollow threaded rod that holds the signal stalk in place. The entrance to that threaded rod (at least on my '76) were very sharp and on at least two of them, the insulation of the power wire to the signal had been abraded and that was causing an intermittent short that blew the only fuse on the bike and brought my fun to a silent halt (which was absolutely delightful on a ride - at night).

In the end, I had to disassemble each stalk and spend a few moments with some emory cloth to smooth out that sharp burr on the "entrance" to the hollow threaded rod AND reinforce the wire insulation with shrink-on tubing. Now, 3-1/2 years and more than 10,000 miles later - no problemos.

Now, to your wheel - while it may seem imposing, truing or even lacing a new rim and building a wheel are not really all that difficult a task - as long as you go slowly and methodically. Gary's advice is great and there are A LOT of good videos on the web showing how to do it (a linky is below). I strongly urge you to watch the entire video several times and make certain that you understand what is going on.
The roundness of the wheel is controlled by the tension in the spokes on BOTH sides of the hub and the trueness (i.e. the side-to-side position of the rim centreline) is controlled by the tension on one or the other side of the hub. So, if a certain point on the rim is too far to the left - you must first loosen some spokes on the right side of the hub and then tighten a similar number of spokes on the left side of the hub to "pull" the rim over in that direction.

In other words, don't try to "move" the rim side-to-side to fix a truing problem or adjust a roundness problem using only one spoke. That would result in that spoke being much too tight and thus, prone to breaking under load. You need to find the point on the rim which is farthest out of position and adjust 1-2 spokes on either side of it by decreasing numbers of turns (i.e. furthest away - 1/4 turn, next furthest - 1/2 turn, next furthest 3/4 turn etc.).

When adjusting the rim, be sure to loosen the spokes on one side of the hub FIRST and THEN tighten those on the other side (i.e. do not just tighten to pull the rim - you need to also loosen some spokes to allow it to move). When adjusting roundness, you may need to loosen spokes - just a little - that are 90 degrees away from the point where you need to tighten them - to allow the rim to go from oval to round without overloading any spokes.

Doing things gradually and spreading the adjustments over several spokes will keep the adjustments gradual and ensure that no single spoke is too tight.

NOTE
: if you have a to lace on a new rim, be sure to spend some time staring at the spoke pattern BEFORE removing the old spokes - and note that some spokes go from the OUTside of the hub and others go from the INside of the hub - on each side of the hub. Take photographs and print them out in large format so that you can refer to them while lacing up the new rim.

Here here are some more general pointers and tips:
  • rig up a decent way to hold the wheel (an old swing arm or just a rod held in a vise and running through the centre of the wheel will do); There is nothing more frustrating than wrestling with a rim, a hub, several dozen spokes and nipples and a spoke wrench.
  • get a decent spoke wrench - they are not expensive and make the job MUCH easier than f@rting around with a pair of pliers or a tiny adjustable wrench.
  • using a magic marker - number every spoke hole on BOTH sides of the old hub AND write the same number at every hole on the rim so that you can easily tell which hole is at each end of each spoke.
  • NOW cut or remove the old spokes;
  • Start lacing the new spokes into the hub (both the INside and OUTside spokes on both sides) making sure that you follow the criss-cross pattern of the original spokes - as outlined in the video. Note that some spokes must go "on top of" the other spokes on that side of the hub. The video shows the person tying the pairs of spokes together using little twist-ties that you can "liberate" from your wife's kitchen drawer - this is a great way to keep track of which spokes go "over" which other one.
  • Thread the nipples onto the spokes so that the rim is approximately in the middle of the hub (i.e. the centreline of the rim is over the centreline of the hub) - but do not make the spokes tight at this point;
  • Once each spoke is in place, tighten each spoke the same number of turns - this is a key point! Literally count the turns as you rotate the spoke wrench - that way all of the spokes will be at about the same level of tension.
This process may seem slow - but it will save time in the long run and not allow any spokes to become overloaded. If it seems that the spokes don't want to fit properly, you have almost certainly laced them incorrectly so stop and look again at the photos. Do NOT ever bend a spoke - they must run straight from the hub to the rim.

NOTE
: This initial wheel assembly task is MUCH easier if the axle is vertical - as shown in the video - so that you aren't fighting gravity as well as all of those teeny little spoke nipples.​

Your goal is not to tighten the spokes so that they are tight - but rather to get all of the spokes threaded onto their respective spokes the same number of turns and thus the same level of tension so that the wheel is round AND true AND centred over the middle of the hub. Clearly, there is a lot going on here, but a spoked wheel is an amazingly strong, stiff and robust structure that will work very well nearly forever if properly built in the first place and not abused in service.

BUT - it is crucial that you make changes slowly and only turn the spoke nipples a fraction of a turn at a time and observe the results until you get the hang of it.

Cheers,

Pete
 
Thanks to everyone for their advice and experience. Let me say, the wheel is actually bent. The way it's bent seems to me that at some time in the past the rider may have hit a really bad pot-hole or something that actually flattened the edges of the rim a bit. I didn't notice it until I had a tire on because from the side it's not that evident but when a tire is installed, the area that had the flattened edges allows the tire to seat deeper than at the other points around the rim so it causes and out of round circumference on the tire. The wheel is a bit rusty anyway so I'm just going to get a new rim and spokes and learn how to lace a wheel. Thanks again for all the advice.
 
The wheel is a bit rusty anyway so I'm just going to get a new rim and spokes and learn how to lace a wheel. Thanks again for all the advice.
I have a complete Special II front wheel (and the rear for that matter) that looks pretty good. PM me if you're interested in it and I'll give it a good close inspection.
EDIT: Oops... just checked, mine are the mega spoked heritage wheels... sorry.
 
Last edited:
After trying to get the thing running, I've run into a snag. It's not wanting to run although I can get it to run really rough for about five or so seconds then it quits with a backfire and a little smoke through the left carb. Both cylinders are sparking and getting fuel but both plugs are pretty black. Compression is good in both cylinders and before I tore it down for cleaning and painting she was running like a kitten. I never opened the motor except to check the brushes in the alternator, and never touched the cam chain adjustor. Although I had the entire wiring system disconnected, all connections were labeled and I'm positive they are all back correctly. I checked the resistance on the primary side of the coil and it was 2.0. I'm not sure if that's good enough or not. I couldn't get a resistance reading on the secondary side, I think my old multimeter isn't so multi any more. Any ideas out there?
 
Dang, hope your Special II fires up !
Are you using the e-start or giving it a good kick ? Did you by chance drain the carbs ?
Choke on , no throttle and wait to crack it on
 
I see you've painted the frame. Did you clean the paint off where the grounds from the harness connect? There's the battery ground cable connection of course, and also a ground wire coming out of the harness up around the coils. It usually attaches with one of the coil mounting bolts .....

0rdr6xg.jpg
 
I swear, this damned thing will be the end of me. After taking impedance readings on the pick-ups and coil I got 745 and 755 on the pick-up coils and 2 ohms on the primary side of the spark coil but I'm seeing an open on the secondary side. So...………………..it looks like I have a bad coil. Before I got to checking the resistance of the pickup and the coil, I noticed that when I checked the spark at the plugs, both gave a single spark, no matter how many times I let the motor crank and that spark was the very first revolution, then nothing more. I'll be damned if I've ever seen that before and I've tinkered with a lot of bikes in my time. I'm pretty sure that the TCI is OK but I'm not 100% sure. Some of the stuff I've been reading wasn't quite as clear as I would have liked. In any event, it sure looks like the coil is bad for sure so I guess I'll start there. I hate to put a lot of money into OEM parts only to go with non OEM to get the darned thing working, especially when about a month ago the bike ran like a champ. I've read
the warnings about not cranking or leaving the ignition on without having the high tension wires connected and maybe that's what killed the spark but to tell the truth, I've never run into that before. Anyway, this is what the bike looks like now, I'm waiting for sidecover decals.
 

Attachments

  • DSC03036.JPG
    DSC03036.JPG
    353.2 KB · Views: 155
Back
Top