Special Seat Mod (Work in Progress)

Shelby

XS650 Addict
Messages
150
Reaction score
440
Points
63
Location
Martinsburg WV
Working on an '83 XS 650 Heritage Special that's kind of a barn find -- parked dry in a storage shed for a decade plus. Wanted to try building a sculpted seat. Thanks to Jim for providing the guinea pig for this project!

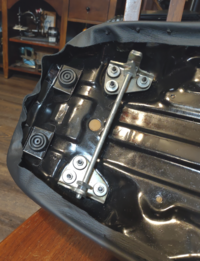
Here's the starting point -- original next to stripped foam base, seat pan, and bottom side of the seat pan (surface rust, as to be expected -- off to Bill to be cleaned and painted)
1710293407146.png
1710293511551.png
1710293481570.png
1710293813973.png
 
Next the foam sculpting. Mind you the last upholstery job we did was on a '79 Vette. After watching a few (dozen) seat sculpting & upholstery videos I abandoned the electric carving knife notion -- to hard to control precisely -- and went with an ancient Ginsu. Yup. Blade's still plenty sharp.

Rough cut, then smoothed out with a large rasp (only took 45 minutes to figure out which corner of the garage that was hiding in!)
You can see I missed my mark at the back (which was when I abandoned the hacksaw method from the videos) and glued a chunk back with spray adhesive. Also had some cracks in the foam mid seat that I sprayed with adhesive and closed back up before getting to work with the rasp. Final smoothing done with one of those big drywall mesh sanding sheets, wrapped around a wood block. One of the videos suggested running an ice pick thru the foam in a few spots to measure the foam depth so I didn't shave too much off. Used this method to check overall reaming thickness. Tailbone on seat pan not the desired final effect. :D

1710294475056.png
1710294501526.png
1710294614730.png
 
Meet Freddie II (Freddie Kruger, the sequel...) He's a Pfaff Industrial walking foot machine, designed to sew thru leather. And just about anything else.. We ran a small business making Civil War military hats years ago. Husband's machine's named Christine...

Pattern's made by turning the seat upside down and tracking around it with a magic marker, then folding the piece in half to make sure the final's the same left and right. First step in making the new seat cover, a muslin mock-up. No pattern for the sides, just ripped to 6" lengths off the bolt of muslin and sewed together with a French seam, sewed to the center front and around the edges to overlap by about 2" at the rear, then stretched over the foam and hooked onto the nasty -- SHARP -- teeth to check the fit. Next the muslin comes off, Will make a pattern from the sides and then wrap the foam (without the seat pan) and attach with spray adhesive. Should strengthen the repaired foam and make the leather easier to work.
More to follow once we get the leather laid out and cut.

1710295313237.png
1710295697863.png

1710295750512.png
1710295822157.png
1710296181271.png
 
Shelby, you might glean yourself a little side business hereabouts......
I'll add that I've always liked a stylish Kepi ever since I visited Gettysburg was a kid.
Thanks! Was fun, though I don't think I wanna do it again any time soon. BIG difference between projects like this at 65 VS 40. Muscles I forgot I had hurt. Hadn't done a seat cover in well over 20 years. Last one was for a good friend who ran off the road and decapitated himself on a phone pole guy wire. Which might have had more to do with the stop at the bar than our seat... still.
 
Back
Top