Supermax vertical mill renovation

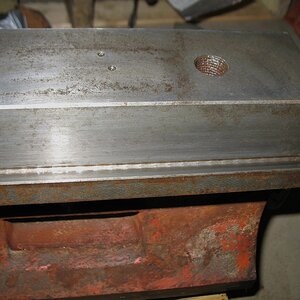
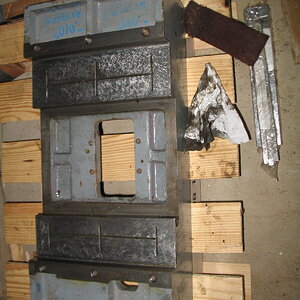
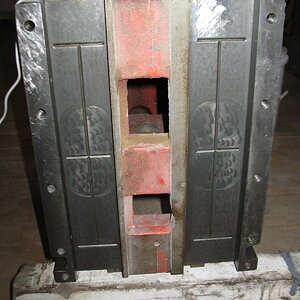
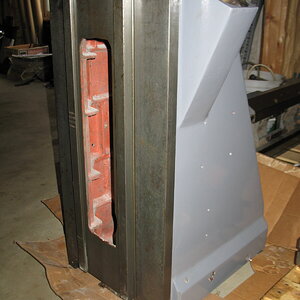
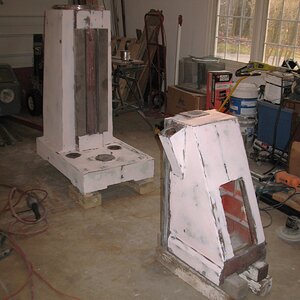
The weather was getting better, so I started stripping off the three layers of paint, the original gray, an ugly blue and a nasty brush painted white that barely stuck to the blue. All the edges were significantly chipped all the way down to bare metal, so I feathered the filler in any of those areas so they wouldn't be built up with filler, which is what caused all the chipping. This was definitely a tradeoff as they won't look as nice as they could but also won't be as prone to chipping. The worst area was the "tray" in the front. At some point, this machine must have run water-based coolant or had water sitting in the tray as there was a fair bit of rust pitting and missing paint/filler, so I ground the tray down do bare metal and painted it with rust converter followed by sanding the surface to bare metal. I actually removed more filler than shown in the photo but I don't have a picture of that so this one is the closest.


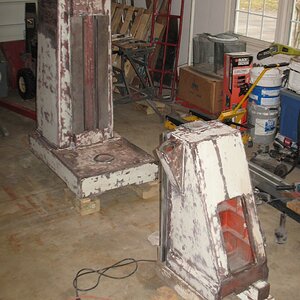
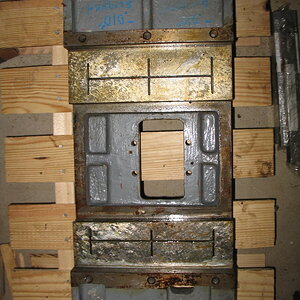
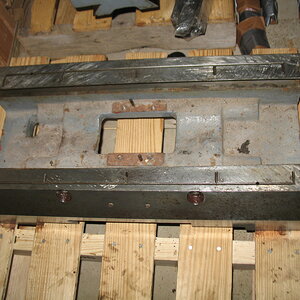
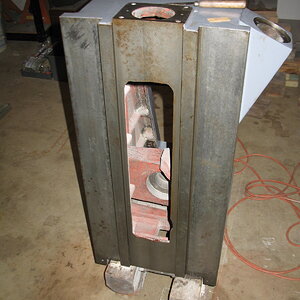
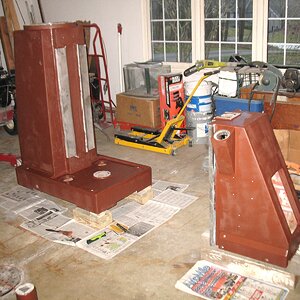
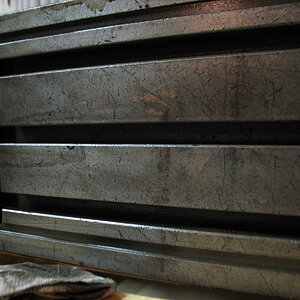
Next came a skim coat of body filler over the base and knee. It took a little over three quarts to cover both parts.


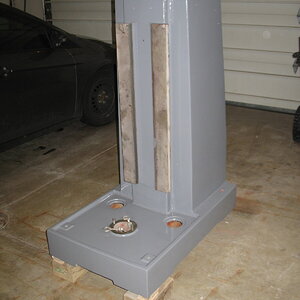
There was still one spot on the knee that wasn't done yet, but it was lunch time and I was hungry. You can guess what came next...lots and lots of sanding. I wanted as little filler left as I could get away with as it was the original chipped filler that made it look so shabby to begin with.


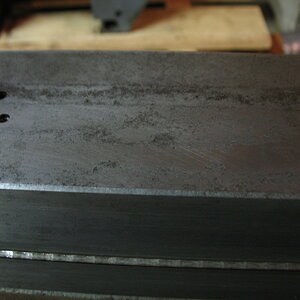
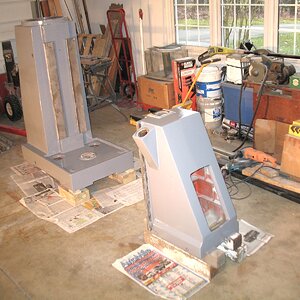
In the above photo, I have about 1/2 off the filler sanding done but didn't take a picture fully sanded. From starting to strip paint to ready for primer has taken about two weeks.
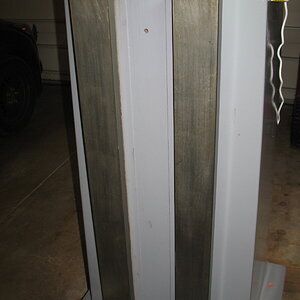
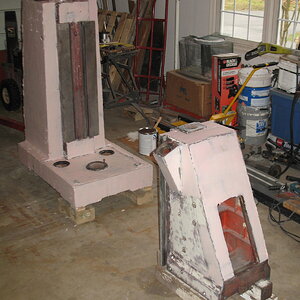
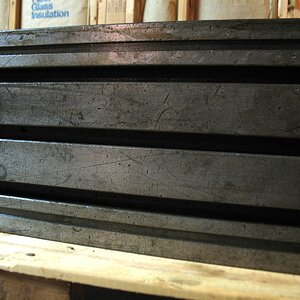
 
After all the sanding, the time had arrived to stick a fork in it and call it done. It's not perfect but will be presentable and, after all, it's a machine tool, not a show car. A little bit of masking and it was finally time for primer and paint.


It's actually coated evenly; the picture was taken right after finishing and it's still drying. I used Rust-oleum oil based rusty metal primer and, since I'm not set up for spray painting, I used a 4" foam roller and a 1-1/2" wide brush in the corners and stippled the brush marks and it turned out more uniform than I expected.

After the recommended 24 hours drying time came the topcoat, which is Rust-oleum oil-based enamel in Smoke Gray. That was the color my friend used when he painted some of the parts nearly a decade ago, so I stuck with that. Even though I used the same color, it will still have a bit of a two-tone effect as the old paint has aged slightly darker than the new. The foam roller didn't cover well at first and I thought I'd have to do three coats but, I went back over the initial coat after it had dried a bit (about 30 minutes-ish) with a lightly loaded roller and that did an excellent job of covering the much darker primer and gave a very even finish. Almost good enough that a second coat wasn't necessary. I came back the next day and did the second coat using the same, lightly loaded roller technique and I'm very pleased with the results.


A significant improvement from where we started.
Looks fantastic 😍 Nicely done!
 
A few more pictures for those who were clamoring for MORE!

(uhmmm...so far, exactly nobody. I just wanted to post some better ones since the one above wasn't that great and I cleaned things up a bit.)


And now we return to our regularly scheduled program...
 
I spent a little time cleaning up the rust and general "crud" on the table today. I saw a couple of recommendations to use a single edge razor blade in a scraper handle and oil to scrape off the R & C. Since I had these things in my possession, I thought it was worth a try. I used a 50/50 mix of ATF and mineral spirits cuz that's what I had handy and in sufficient quantity but most anything would work. As I used the razor blade, some areas had "dings" that caught the blade, so I gave the top a light stoning to knock down the high spots. I may try a file, I think it was called a burr file, at some point. The idea is that you dull the file surface with an abrasive stone to knock off the sharp edge so that it can only cut high spots that stick up between the teeth but can't cut an already flat surface.

Somewhat to my surprise, it cleaned-up quickly and removed 90% of the schmutz! I followed this "shave" with some Old Spice and a hot towel...NO, that's not right! I used medium steel wool and oil and Scotch-Brite and oil to see if one was better. (I couldn't tell any difference.) After I get the whole thing cleaned up to this level, I will try some different things to see if I can brighten it up a bit, although given the "well-used" condition of the table top, it's a bit of a lipstick on a pig situation.


I started on the right side table top, it looked like my friend had done similar work to a bit of the left side and the middle was still untouched. The vertical surface in the before pictures is pretty representative of what the top looked like (minus the part my friend had already done) before I started.

After finishing the top, I tilted it up on its side and did the front edge and dovetail. I'm pretty sure it's the front based on the number of dings in the surface and the T-slot. The dovetail had a layer of something like cosmoline on it and only needed a shave and some mineral spirits to get down to a clean surface.


Not perfect but looking better and, at this point, it would be useable.

I still need to do the other side and dovetail and the bottom. The bottom between the dovetails is pretty nasty looking with flaking paint and some minor to moderate rust. That area, I will knock-off all the loose stuff and clean it up as best I can and then use the same rusty metal primer I used on the base and knee to encapsulate what I can't get off and provide some protection.

Not a lot, but still progress.
 
Great thread, love the details!
:twocents: 
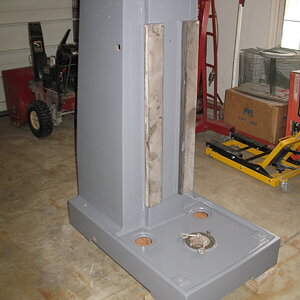
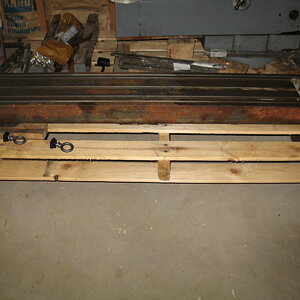
I've cleaned up a couple "neglected/beat up" mill tables
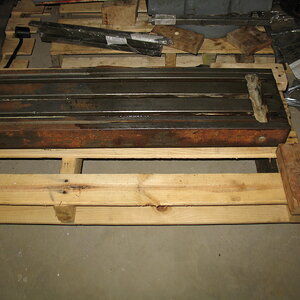
I like a new larger man made stone like 6" long would be great,
1710207472773.png

and (lots of) mineral spirits and or rust buster.
My take is the hardest thing to do is to keep to a uniform overall action not concentrating on any "bad" areas so the process is not creating (or adding to) waves or dishes in the surface.
 
If it weren't for having a walkout basement with a double door, I would probably not be doing this. The heaviest piece is the base at around 1000 pounds and it's still in the garage, so I'll let you know how difficult it was after I get it down there. Right now, the ground is way too soft from all the snow and rain to even think about moving it. When it firms up, the plan is to use my utility trailer to bring the base down and an engine hoist to load and unload it. I'm not sure how heavy the knee is so I'm going to try the two wheeled hand cart, if that doesn't work, (probably too heavy) the trailer will easily move it.

Most of the parts were moved into the basement using the two-wheeler with the exception of the ram/turret assembly that my friend brought down using his tractor and lifting chain attached to hooks on the bucket, and then rolled in on 1-1/4" pipes on 2x4 runners. If we didn't have the tractor, I probably would have separated the ram and turret and moved them using the two-wheeler.

I have read several threads on other websites describing how guys slide a mill down the basement stairs! Now those guys have my R-E-S-P-E-C-T, and then some. Just proves the old adage "Where there's a will, there's a way."
 
Last edited:
Slight detour, I had to take a day and a half off to do some trailer maintenance and upgrades, which was fortunate as I found one of the seals had failed and the inner wheel bearing was starting to go bad.


I can't imagine why after ZERO maintenance for 30 years...

I finished cleaning up the table ends, back dovetail and rear surface.


I was talking to my friend about my lack of progress in removing the "staining" on the table, and he mentioned he had wiped the table down with phosphoric acid before putting it into storage to slow down the rust. I don't know how effective it was for that, but I believe the staining, which I thought was oily rust is probably iron phosphate and not much I can do about it and it's only cosmetic, not functional. I tried white vinegar (did nothing), just to satisfy myself, I may try citric acid and/or Evaporust. Depends on how much it bothers me over time.

I still need to clean and paint the grungy area between the ways on the bottom to finish the table, but I'll finish the rust and crud removal on the other parts (base, knee, saddle) first.
 
I tried white vinegar (did nothing), just to satisfy myself, I may try citric acid and/or Evaporust. Depends on how much it bothers me over time.

Muriatic acid will likely take 'em off... in a hurry. Pour a little on a rag and wipe.
 
Bummer, my first try at Muriatic acid and not much difference. This is the before.


First I cleaned the oil off the surface with brake cleaner and the got a paper towel wet but not dripping and applied it to the area to the right of the tapped holes. I left it for about a minute and them neutralized the rag and surface with baking soda in water.


It doesn't show well in the picture, but the treated area is about a half shade lighter than the adjacent areas, so it did do something. I'm not going to get too hung up on cosmetics at this point. I can always mess around with that later. I'd rather make chips than show quality machine tools anyhoo.

Thanks for the suggestion Jim, do you think I didn't leave it long enough?

I forgot how much that stuff STINKS!
 
Thanks for the suggestion Jim, do you think I didn't leave it long enough?

I forgot how much that stuff STINKS!
Yeah... it's nasty stuff.
Left on a little longer, it'll eventually remove all rust and/or rust stains. But like you said, save the cosmetics such as this for a rainy day.
 
Bummer, my first try at Muriatic acid and not much difference. This is the before.


First I cleaned the oil off the surface with brake cleaner and the got a paper towel wet but not dripping and applied it to the area to the right of the tapped holes. I left it for about a minute and them neutralized the rag and surface with baking soda in water.


It doesn't show well in the picture, but the treated area is about a half shade lighter than the adjacent areas, so it did do something. I'm not going to get too hung up on cosmetics at this point. I can always mess around with that later. I'd rather make chips than show quality machine tools anyhoo.

Thanks for the suggestion Jim, do you think I didn't leave it long enough?

I forgot how much that stuff STINKS!

I use this stuff all the time.

WAY less fumes/smell.

Works great to clean rust. I soak a paper towel with it and let it sit on the stained area. Does take a little time sometimes. 5-10 mins.

I mainly use it for removing rust from porcelain.

IMG_7707.jpeg
 
So, next on the list was to clean-up the ways on the base and the knee. This is an example of what the ways looked like when I started, they looked worse than they really were. Under the layer of cosmoline was a few patches of very light rust here and there which came off easily with the razor blade.


Here's what they looked like after...


Other than final "white glove" cleaning before assembly, all the ways are done. I DID order some Rust911 (similar to Evapo-rust) rust remover and will try that on the rust stains on the back of the table. If it does well, I will do the rest of the machined surfaces. I went with a chelating type cleaner because of the ease of handling, lack of "stink" and that it doesn't harm the base metal (read no etching of the way surfaces). I've never used this type rust remover so I figured it was time to try.

I also had another first. The first chip in the new paint...


I "thought" I plugged all the tapped holes before I put the body filler on but apparently I missed one. This is the oil port for the left side knee ways and when I blew air into the oil outlet, I blew out a plug of body filler with a chunk of paint attached...OOPS! Time for a touch-up.
 
I haven't made a lot of progress lately, mostly trying to find some parts. The importer YCI, that used to support the machines in the USA, went out of business and the manufacturer, YCM, has shifted over to CNC machines and no longer makes or supports their manual machines like mine. (It's only 38 years young!) The trick now is to find other machines that have interchangeable parts and, if there aren't any, which ones are close enough to modify without too much pain and suffering. The one's of most interest now are the lead screw nuts for the table and the saddle, it looks like Bridgeport nuts may work as-is (fingers crossed) or, hopefully, not require too much modification. There is a mill repair/parts dealer about 45 minutes away who has agreed to go through his stock and/or drawings (they also manufacture some parts including lead screw nuts) to try and find something that will work.

I did, however, manage to get a few things done.

After the clean-up of the ways was done, it didn't seem that hard to tip and move the knee. It's heavy but not THAT heavy so I decided to try using the two-wheeler to get it into the basement. No damage and no injuries, I call that success.


Now there's just the base to move. In that vein, I started to get things ready for the big day. First was to find a way to lift it without messing up the new paint and, preferably, to lift it onto the trailer and move it upright and so avoid the time, trouble and paint damage of tipping it on its side and having to tip it back up. First order of business was to cut a piece of 1-1/2" square tube to fit on the "spider" clamping surface, the spider clamps the turret to the base and allows it to rotate and seemed like the best place to lift from. I estimated the center of gravity and made a template of the opening and clamping surface and cut the tube to fit tightly against the machined edge of the clamp surface with the tube at the CG.


I only picked it up about 1/2" to see how it lifted and balanced and to my amazement, it went straight up with no tilt! I figured it might need to be trimmed to move it forward to get it to lift level but a level on the rim of the front tray was almost perfectly centered. As my old boss used to say, "Even a blind hog finds an acorn once in a while!"


Next, I'll set the base down on the hoist legs to see how it moves in that configuration and then lift it high enough (24") to get it on the trailer to see if I need any adjustments to my setup. I may even try a dry run putting it on the trailer, to see how it sits and, more important, how much counterweight I will need on the front of the trailer since the hoist can't reach far enough to put the base over, or in front of, the axle. I want to be all ready to "git-r-done" as soon as the ground is firm enough.

Small steps...
 
Back
Top