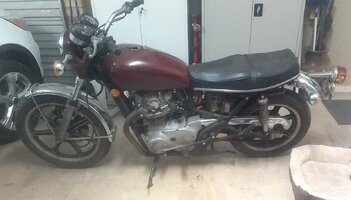
xs650b down under build thread

spresser

XS650 Member
Messages
16
Reaction score
65
Points
13
Location
Adelaide, South Australia
Hello all. Thought I'd finally introduce myself.

I'm from Adelaide, South Australia, a bit of a car guy and not spent any time on bikes, but I'm taking the plunge.

Picked up a 1975 basketcase a while back and have been working on it since. It's been slow going but every day it comes together piece by piece.

I've stalked a lot of threads here and used that knowledge along the way, so, thankyou for all of your expertise, even though you might not know it you've helped me immensely.

It's come a long way so far from these first few photos, so my first bunch of posts in this thread will be retrospective until I'm caught up to its current status.

received_1560487334383351.jpeg


IMG_20230103_223425.jpg
 
After digging through all of the parts that came with the bike, seems it is a 'bitsa' already, predominantly a 1975 xs650b frame, with a 1979 engine. No matching numbers unfortunately.

After getting the lowdown from the previous owner and having spoken to a mate whom says he's actually ridden this thing in its heyday, this has been sitting for years after being rebuilt several times in the past. It was a bullet back then apparently :D

Not one to stand around I found some room in the garage and got down to business.

IMG_20230207_192649.jpg
 
Top end stripped down pretty quickly, as I was interested to see how much abuse this motor had taken. Considering the condition of the outside, I wasn't holding my breath and had already decided early that this would be a full rebuild. I was surprised a lot by the good condition of some of the internals, but not so much by others.

Rockers looked ok, passable.

IMG_20230213_164434.jpg


Cam lobes all looked great. Cam bearings were all good too, but I will replace them anyway. Full bearing overhaul on this so that I know what I have when Im done.

IMG_20230213_164525.jpg


Valves and ports needed a good cleanup, but so far so good.

IMG_20230213_192132.jpg


Here is where things get interesting. While still moving in their bores, these pistons are no good. The rings were binding in their channels, they'd obviously hard a hard life.
This looks to have had some remedial work done to it as one cylinder was over-bored, whilst the other wasn't.

IMG_20230213_192208.jpg


IMG_20230213_195035.jpg


The cam chain guides were well worn, so I'll be replacing those.
Surprisingly every other mechanism, clutch, shift lever, etc.. all looked great with minimal wear.

.... to be continued
 
Onto the splitting the case. This was a total b**ch as you can imagine, and as many of you have found out the hard way.
But, I managed to create a tool to separate them without too much issue.
After a long time of whacking with a rubber mallet, and coming to the conclusion that the last person to have this apart likely used some type of adhesive on it (or maybe its like that from the factory) I went about looking for something like a reverse clamp to at least put a little more pressure on separating the two halves.

Little did I realise, these woodworking clamps can actually be reversed! And used as a spreader, rather than a clamp!

ce243255-61d6-438c-9f36-22d2fdffaaf9.jpeg


Placing these in a few different spots where I could actually get some leverage, giving it a couple of pumps of the trigger, and the halves gave way.
Beeyyoootiful! Now I could have a good look at everything.

IMG_20230312_160708.jpg


IMG_20230312_160705.jpg


Gears looked the goods, shifting levers are in good condition, even the bearings again, were ok.
What wasn't ok were the rods. Little ends to be exact. Pretty scored, and had worn away their copper lining.

IMG_20230313_114003.jpg

IMG_20230313_114010.jpg


So a full crank rebuild was in order. A little disappointing since the rest looked so good, but it gave me an excuse to spend more hard earned money, and don't we all love that.
I knew Geoff's XS here in Australia offered swapovers for rebuilt cranks, so I gave him a call and sent my crank and some cash for a swapover.

While I was waiting, I cleaned up the cases etc... Put in new oil seals, new bearings on the gearbox cams.

..... to be continued.
 
At this stage, I started looking over things a little more and discovered a few busted parts that needed replacing.

This little doohicky, and offset screw to set the gear change rod to the right position, had compressed threads and I could not turn it in the case any longer.

IMG_20230927_220857(2).jpg
IMG_20230315_192844.jpg


I also took apart the oil pump and found the outer star gear was broken.
( i didnt get a photo of it but it was cracked in two, stole this photo from someone elses post here)

18402D9F-933D-438E-9716-74A9D57A4EE4.jpeg


Put an ebay order in for both of those, and kept working during the long shipping from the states..

In the meantime, since my rotor was also broken, I placed an order with GeoffsXS for a bunch of other parts I'd need while assembling.
One piece push rod for the clutch, needle bearing, needle head stem bearings, new tank, tank cap, ordered a seat from texavina, brake parts, swingarm parts, and a tonne of other things, which I won't list all here.

.... to be continued....
 
Crank in hand, the motor went back together pretty quickly, since I'd already done the oil seals and bearings, and had everything I needed.

IMG_20231021_161545.jpg


IMG_20231206_201755.jpg


I had the cylinders bored out evenly to 3rd oversize each, and new pistons went in.

IMG_20231206_201807.jpg


IMG_20231206_203953.jpg


IMG_20231228_171454.jpg


Everything torqued down to specs, and I'm happy that it's all put together correctly. My main concern was getting the camshaft in and having the markings line up while at TDC, which to my surprise was actually really easy. Cam chain linked, and rocker box on, I decided it was now time to spend some time away from the engine, on the frame, so that I could get this engine off of my workbench, so that I could rebuild the forks, carbys, etc...

... to be continued...
 
looks like the brother to my POS, also bought in Adelaide, although I think it came from Melbourne. Mine had a stuffed crankcase. GeoffsXS is the place to go for parts, there are a couple of others, but they don't have a lot. Geoffs also has heaps of second hand parts if you ask.
 

Attachments

  • 1 (1).jpg
    1 (1).jpg
    246.7 KB · Views: 10
looks like the brother to my POS, also bought in Adelaide, although I think it came from Melbourne. Mine had a stuffed crankcase. GeoffsXS is the place to go for parts, there are a couple of others, but they don't have a lot. Geoffs also has heaps of second hand parts if you ask.
Geoff's has been a life saver a few times already, I've found yambits are ok too. Smaller orders without a lot of weight have reasonable shipping. But forget about it if your ordering large items.
Speaking of... I've gotta hit geoff up for a few more parts 😀 I'd better get on it.
 
My next job was to strip the frame so that I could get it prepared for new paint.


IMG_20231008_154617.jpg


Found the rear tank retainer missing, PO must have used brute force to get the tank off at some stage, not only tearing the mount off but twisting the metal somewhat. I cleaned it up and welded, and ground it to a nice clean finish. Will use a bolt with large washers either side, with a brand new standard tank rubber seat of course.

IMG_20231220_143422.jpg
IMG_20231228_171613.jpg


The paint stripper got most of the paint off, and a wire wheel was used all over before a clean with detergent, and then white spirits to make sure there was nothing to stop my etch primer from staying on.

Paint stripping (in process, this image is not fully stripped yet)

IMG_20231228_171419.jpg
IMG_20231228_171603.jpg


Preparation nearly all done, I wire wheeled it a lot more after this, to get a nice clean surface, and remove some of that surface rust.
I decided not to remove any of the mounting points for now, as I’m not quite sure exactly how ‘stock’ this bike will remain.

Primer done, next was the top coat with some 2pak cans. 2 cans for a total of about 3 coats, and we are done.
The swingarm was done also, no photos of that unfortunately.

IMG_20231230_164757.jpg
IMG_20231230_164810.jpg
IMG_20231230_164816.jpg


Pretty happy with the result, these spray max 2pak cans actually work really well, and spray a lovely even coat.

2K_Topcoat_Black_High_Gloss_3680222.png


... to be continued.
 
I desperately wanted to get this engine off of my bench, so laid the engine on a few cushioned rugs, and set the frame over it, a bit of jiggling and I managed to get the mounts set, and here we are.

IMG_20240117_131232(2).jpg
IMG_20240117_131242.jpg


Had to order some top engine mounts off of ebay, since this basketcase didn't come with any. Test fitted to make sure they were all good....
Not sure if I'm going to bother painting them up or anything, since they are fairly hidden under the tank in the end.

IMG_20240219_200323.jpg
IMG_20240219_200340.jpg


The next job was to replace the swingarm bushes etc.. Unfortunately I didn't get any photos of this, I'm actually surprised I've managed to take so many photos so far, as I'm not really one to get the camera out.

It was a giant pain in the arse job as I'm sure many have discovered before me. The nylon bushes were very certain that they wanted to stay in there, until I got the hacksaw blade out and cut a few slits in them, then prying with a seal puller eventually got them out bit by bit.

Cleaned up the swingarm, new paint and pressed the new copper bushes home, with great difficulty. These new bushes were of course a little large for the swingarm and the centers a little small for the swingarm rod, so some reaming with a small flapper drill bit was required.

In contrast to the swingarm, the new headstem needle bearings were a doddle.

IMG_20240221_194108.jpg
IMG_20240221_195916.jpg


Heres a couple of progress shots of the bike with the new tank and texavina seat temporarily fitted, for those who have read all of the way through my ramblings!!!

IMG_20240226_155521.jpg
IMG_20240226_155540.jpg


To be continued....
 
I desperately wanted to get this engine off of my bench, so laid the engine on a few cushioned rugs, and set the frame over it, a bit of jiggling and I managed to get the mounts set, and here we are.

View attachment 323054 View attachment 323055

Had to order some top engine mounts off of ebay, since this basketcase didn't come with any. Test fitted to make sure they were all good....
Not sure if I'm going to bother painting them up or anything, since they are fairly hidden under the tank in the end.

View attachment 323056 View attachment 323057

The next job was to replace the swingarm bushes etc.. Unfortunately I didn't get any photos of this, I'm actually surprised I've managed to take so many photos so far, as I'm not really one to get the camera out.

It was a giant pain in the arse job as I'm sure many have discovered before me. The nylon bushes were very certain that they wanted to stay in there, until I got the hacksaw blade out and cut a few slits in them, then prying with a seal puller eventually got them out bit by bit.

Cleaned up the swingarm, new paint and pressed the new copper bushes home, with great difficulty. These new bushes were of course a little large for the swingarm and the centers a little small for the swingarm rod, so some reaming with a small flapper drill bit was required.

In contrast to the swingarm, the new headstem needle bearings were a doddle.

View attachment 323059 View attachment 323060

Heres a couple of progress shots of the bike with the new tank and texavina seat temporarily fitted, for those who have read all of the way through my ramblings!!!

View attachment 323063 View attachment 323065

To be continued....
Nice work and good progress. You’ll be riding that bike in no time. Congrats!
 
Almost caught up to where I am at now... The next job was to get stuck into these dry forks and see what I could actually salvage.
As with everything so far, they were easy to take apart, I made a little cutout socket tool for the damper rod, which worked magnificently.
From memory I think it was a 12mm socket, whereas later forks you'd use a 17mm I believe.

IMG_20240127_145652 (2).jpg


And as always, I hit a snag. I noticed a few missing bits, and decided to take everything apart to inspect, and in a way, I'm lucky that I did, there was missing washers in the lowers, and one of these doohickies out of the bottom of the fork tube was broken.

received_359595140190563(2).jpeg


Anyway, fitted new seals and missing parts, also managed to get my hands on a replacement of one of those parts from the image above (thanks Geoffsxs) and got the lowers and uppers back together. Even gave the lowers a bit of a cleanup. Not as clean as some of you have polished yours up, but a noticeable improvement over what was already there.

IMG_20240407_163001.jpg


BTW those headers aren't staying, they are getting replaced by a full 2nd hand system I've got coming from OS. As well as new front fender, and chain guard.

I also played around with the aftermarket fuel cap that I purchased to go with my repro tank. For some reason the cap just would not close, and after having a better look at it from a different angle it wasn't hard to see what the problem was. The actual bar that the cap locks down to was a little off kilter.
Instead of beating the tank (which might risk a tear) I opted to operate on the cap a little.
Placing the washer 'under' the cap base in order to raise the cap a little at the back, and hitting the cap with the dremel allowed me to take enough out of the hinge, for it to be able to slide forward a little to better hook onto that retainer bar.
The cap stays closed now.

IMG_20240303_164152.jpg
IMG_20240407_161755 (2).jpg


... nearly caught up!
 
Well I'm mostly caught up here now, I may have forgotten about a few things and will swing back around, but this is where I'm at.

Have recently just redone all wheel bearings, and cleaned the wheels up a little. Its not perfect, but I will do a full clean up later once new tyres are on.

IMG_20240407_161820.jpg
IMG_20240407_161814.jpg


As far as I can see, this sprocket doesn't look too worn. (photo was from before I cleaned up the wheels)

IMG_20240306_140201.jpg
IMG_20240306_140206.jpg


This is going to get a new chain, so I am wondering if it is worth getting new front and rear sprockets, or is this fine?
 
It's false economy not to replace both sprockets and the chain all together. An old sprocket is always worn and will shag your new chain. Technical term there . . .

Good, thorough rebuild BTW.
 
Back
Top