You have a TX750 swingarm. They have the removable blocks so the rear wheel and axle comes off without removing a muffler.
-
Enjoy XS650.com? Consider making a donation to help support the site.
XS650.com receives a small share of sales from some links on this page, but direct donations have a much greater impact on keeping this site going.
You are using an out of date browser. It may not display this or other websites correctly.
You should upgrade or use an alternative browser.
You should upgrade or use an alternative browser.
1981 XS650 Special - Build Thread
- Thread starter ssjody
- Start date
I think maybe you replied to the wrong thread?You have a TX750 swingarm. They have the removable blocks so the rear wheel and axle comes off without removing a muffler.
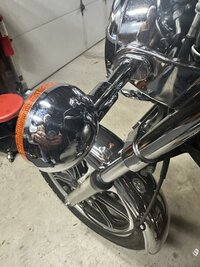
Day 22
Few more of my parts came in. Got a set of used Front Turn Signals that are in really good shape, used battery cover, used battery strap, the original security chain (I knew the key wouldn't fit but you know I had to try it anyway), and NOS rubber boot for the clutch cable.
It's getting pretty cold here and I don't have heat in the garage so I don't get to spend as much time working on the bike as I'd like. My wife and I are in the middle of building a new house and hope to be moving in the spring where I'll move my shop indoors to the basement where I'll have heat and a/c. Forecast says there's come warmer weather coming our way for the next few days so I hope to get a little more done on it.
I've pretty much got everything back on the bike that it was missing when I got it. I think my next steps will be to rebuild the caliper and master cylinder, check wheel bearings, chain, brake pads/shoes rubber, etc.. The PO said he cycled new fluid through the master cylinder and caliper but 42 year old bike is due for some new brake parts.
Come on springtime!
Attachments


The brake components on these bikes are pretty robust. I've renovated a few and didn't need to replace any of the rubber bits, just disassemble and thoroughly clean them out. Just flushing fresh fluid through the system won't do this, you need to take it apart. What you will want to replace are the brake lines. Most of us go with one long line to replace the two originals and the splitter block they connect to. The rubber lines go soft when they get old and no amount of bleeding will give you a nice hard lever feel. It's not air in the system that does this but rather the old line expanding or swelling under pressure.
You should also go through the rear drum brake. See post #3 here .....
https://www.xs650.com/threads/how-difficult-is-it-to-replace-the-rear-drum-brakes.25632/
You should also go through the rear drum brake. See post #3 here .....
https://www.xs650.com/threads/how-difficult-is-it-to-replace-the-rear-drum-brakes.25632/
That's a really good write up! Thank you!The brake components on these bikes are pretty robust. I've renovated a few and didn't need to replace any of the rubber bits, just disassemble and thoroughly clean them out. Just flushing fresh fluid through the system won't do this, you need to take it apart. What you will want to replace are the brake lines. Most of us go with one long line to replace the two originals and the splitter block they connect to. The rubber lines go soft when they get old and no amount of bleeding will give you a nice hard lever feel. It's not air in the system that does this but rather the old line expanding or swelling under pressure.
You should also go through the rear drum brake. See post #3 here .....
https://www.xs650.com/threads/how-difficult-is-it-to-replace-the-rear-drum-brakes.25632/
@5twins - Do you have a good source for the 1 piece front brake line?Most of us go with one long line to replace the two originals and the splitter block they connect to.
I just shop eBay for the best price (usually $10 -$15), there's a ton of sellers on there. I run lower bars so I get a 90cm long line (about 35.4"). If you're going to keep the original higher "buckhorn" bars, you'll need to measure to see what you need. A simple way to do that is to pull one strand of wire out of some house wiring, say 4 to 5 feet long. Wrap one end around the banjo bolt on the caliper then route the wire up to the MC, just like the one piece line will run. The solid copper house wire is nice because it bends easily but holds it's shape. Mark the top, pull the wire out and straighten it, then measure it's length. Most sellers offer the lines in 10cm increments. Run the new line just like the original, that is, in front of the lower triple tree. That way you can put a "guide" for it on the lower triple where the splitter block used to mount .....

I see your bike has the "beauty" plate across the lower triple tree, so you could do as I did on my '83, use a rather ugly clamp because it's hidden, lol. I got an assortment kit of these at HF ......


I see your bike has the "beauty" plate across the lower triple tree, so you could do as I did on my '83, use a rather ugly clamp because it's hidden, lol. I got an assortment kit of these at HF ......
Attached garage? Consider plumbing it for water and drain whether you use it or not. Consider 220AC also. Cheap to do those in the build end, tough/expensive afterwards. Good luck.Day 22
I . My wife and I are in the middle of building a new house and hope to be moving in the spring where I'll move my shop indoors to the basement where I'll have heat and a/c. Forecast says there's come warmer weather coming our way for the next few days so I hope to get a little more done on it.
Come on springtime!
Actually we’re downsizing. I’m tired of mowing and I want to retire. We’re building a 3 bdr ranch and I’m taking the basement for my shenanigans. I put a big door in the basement so I can get my stuff in and out. I’ll have a heated and cooled space year round!Attached garage? Consider plumbing it for water and drain whether you use it or not. Consider 220AC also. Cheap to do those in the build end, tough/expensive afterwards. Good luck.
We downsized in a major way 5 years ago. my shop is the third bay in the garage. Basement is mancave/grandkids play room. I decided to concentrate tools and projects to one area. My basement does open up to the back yard 6 steps up to my fire pit. The garage stays warm enough, above 40F and for projects with a small electric heater keeps it in the low 50s. Choices. Enjoy and embrace your downsizing. I assume all your facilities are on the main floor. CongratulationsActually we’re downsizing. I’m tired of mowing and I want to retire. We’re building a 3 bdr ranch and I’m taking the basement for my shenanigans. I put a big door in the basement so I can get my stuff in and out. I’ll have a heated and cooled space year round!
Last edited:
@Kevin Werner Nice! Looks really good!
Yep, it's a ranch we're building with a nice big walkout downstairs. I'll have my own crapper, lots of room for my projects, and I can mow it in less than an hour. I'm happy!
Yep, it's a ranch we're building with a nice big walkout downstairs. I'll have my own crapper, lots of room for my projects, and I can mow it in less than an hour. I'm happy!
Attachments
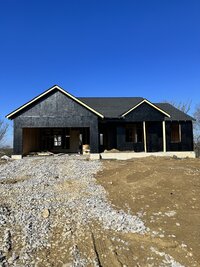
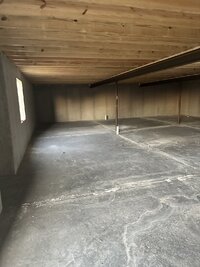
Blank slate is fun. Enjoy the planning and build out. Some thoughts. I wired all corners for speakers, 12 gauge, and CAT6 data cable, never sure why or when you will need it. My floor was not completely flat and level and I only noticed that after the floor installer laid the composite tiles down. If you are framing in any features, measure down from the ceiling, not up from the floor. Figure out how much light you need, then add 20 or 25%.@Kevin Werner Nice! Looks really good!
Yep, it's a ranch we're building with a nice big walkout downstairs. I'll have my own crapper, lots of room for my projects, and I can mow it in less than an hour. I'm happy!
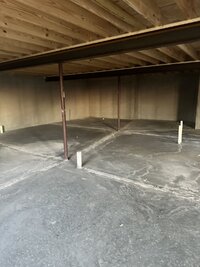
Insist that the heating contractor takes into account that the basement or part of it will be a living space needing adequate supply and returns.
Post pics.
You had me at "my own crapper"!@Kevin Werner Nice! Looks really good!
Yep, it's a ranch we're building with a nice big walkout downstairs. I'll have my own crapper, lots of room for my projects, and I can mow it in less than an hour. I'm happy!

At my age that's important!You had me at "my own crapper"!
Indeed!At my age that's important!

Nice!@Kevin Werner Nice! Looks really good!
Yep, it's a ranch we're building with a nice big walkout downstairs. I'll have my own crapper, lots of room for my projects, and I can mow it in less than an hour. I'm happy!
 Partition, firerock and tape that basement workshop BEFORE the tools migrate in, they're fast n sneaky.....
Money well spent. Best thing I did in my shop.I'll have my own crapper
You think so now just wait.lots of room for my projects,
One other thing is whatever you plan on doing to the floor do it before tools, benches and stuff find their way in.
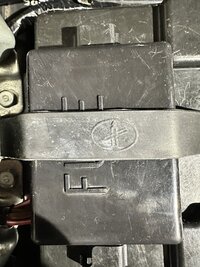
Day 24
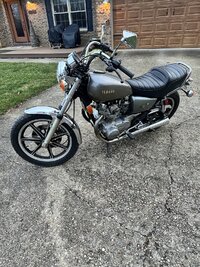
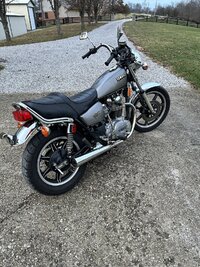
Today, I started buttoning up the area around the air boxes. There was a lot of parts that was missing in that area when I got the bike but I've rounded up everything I needed and she's complete again. Took it up the road today for a good bit to see how it ran and it did very well. Everything is working well. It was a good day.
Today, I started buttoning up the area around the air boxes. There was a lot of parts that was missing in that area when I got the bike but I've rounded up everything I needed and she's complete again. Took it up the road today for a good bit to see how it ran and it did very well. Everything is working well. It was a good day.
Attachments
Similar threads
- Replies
- 11
- Views
- 1K