AUS TX500 Resto

MVLUV

XS650 Enthusiast
Messages
52
Reaction score
57
Points
18
Location
Brisbane Australia
By way of introduction I thought i would start a build/restoration thread. Before anyone states the obvious yes it is a TX not an XS. However since they are very close cousins, and I spend more time on this forum than any other, I thought it would be the most appropriate home for a thread.

I bought it in March 2013 with the knowledge it was a non running, un registered and in Australian rules un roadworthy state.

The previous owner said it had sat for 8 years and the reason he stopped riding it was the oil leaks. So he parked it up and started to collect parts for a restoration that never eventuated.

A number of things sealed the deal for me.
1. Tank, side panels, headlight bucket and brackets already painted.
2. Good frame and unmolested wiring harness.
3. Great new parts including gasket kit, hagon shocks, wheel and head bearings, repro seat cover, second oversize piston and ring kit, indicators and a few more bits.

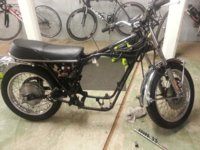
This is how it arrived home, parts just placed in position to get the general idea. 20130321_130348[1].jpg

The obvious issues were.
1. Oil leaks.
2. Rusty forks.
3. Seized front master and caliper.
4. PO could not get it to start for last 5 years.
5. Other cosmetic issues.

Summing up, for the money spent and the oddball factor I thought it was a good deal.
Will catch up on the last 12 or so months on what has happened in the next several posts.
Cheers
 
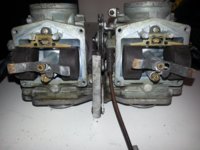
My plan was to get it running to see where the oil leaks were and any other obvious issues. So off with the carbs to clean jets and float bowls, which were not too bad.
20130406_210056.jpg

Hooked some leads up to a battery and turned it over.... Nothing.
Took out air filter which was in pretty ordinary shape, checked fuel lines, confirmed I had spark......Nothing.
Checked timing and it was spot on. Checked compression and things didn't look good. 90psi on left 110 on right dry. Wet test was not much better. So that indicated to me valve train was more than likely ok but there is an issue with rings and or bore.
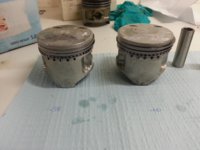
20130626_204814.jpg
Not good, but on the up side which you probably can't see in the pic is the lower compression ring siezed flush with the piston which would explain the very low compression on the left cylinder.

Since the compression wasn't that great on the right either, a rebore, new oversize piston and rings were in order.
 
While the engine was out I thought it would be a good opportunity for a clean up.
So after bore and hone engine and carb bodies were sent off for soda blasting.

While waiting I thought I would repaint the seat pan and re-cover the seat with a repro cover I recieved with the bike.
20130615_154921.jpg

With the engine back I started the assembly.
20130909_212436.jpg
20130912_094424.jpg
20130912_094441.jpg
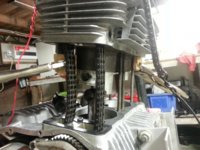
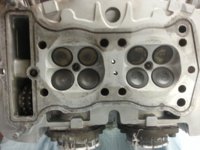
The 4V two piece head which was not cracked (apparantly common with this model).
20130914_104544.jpg

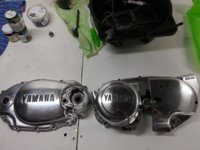
Took the opportunity to polish engine cases, carb bowls and vac chambers. Before
20130711_143729.jpg
After
20130726_151958.jpg
 
Once the engine was back together I contemplated what to do about paint. I would have preferred to leave the engine bare as the soda blasting does a great job. However years of oil stain have not been kind and have left almost a marble effect on the aluminium.

So I decided to have a go at painting it myself.
Several hours of cleaning and masking I was ready to go. I chose VHT cast aluminium.
20130925_050130-1.jpg

I was pretty happy with the end result.
20130928_135254_reduced.jpg

With the engine back in and some oil I thought I would do a compression test before trying to start.
20131017_145752.jpg
Much better 160 both sides.
Next test hook everything back up and see if she will fire.
 
Very cool. I like seeing any old bike come back to life. Thanks for sharing!

:thumbsup:
 
You did a great job. That's a really sharp bike. I see that you are also into bicycles. I restore vintage racing bikes as a hobby.
 
Thanks for the comments.
Once everything was hooked up and some fuel in the tank it fired up and even idled.

At this point in time we had sold our house and purchased another one. So the shed time was reduced to very little due to packing up and moving to the next house.
20131107_164004.jpg
It was a good time to plan for the rest of the work to be done. I came up with a short list of
1 Exhaust. Headers rechromed and mufflers ordered.
2 Forks hard chromed and rebuilt.
3 Wheels. Rims rechromed hubs powder coated and new spokes laced in.
4 Front brakes. Currently MC and caliper seized.
5 Lots of minor jobs such as switchblock restoration, re painting various bits such as horn, foot pegs etc. Sourcing an apropriate oil filter or adaptor as oil filters for these things are very scarce.
20140221_105056.jpg

This pretty much bring us up to date.

6 All the other things that come up during the journey.

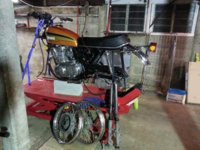
As wheels and forks will be done soon and to provide stability while the kids are crawling over it a hoist was purchased.
 
To make it run better and look better:
I have some NOS carb. holders (L + R ) for these bikes, all original Yamaha parts.

When your interested, send me a pm.
 
Have had a pretty productive week by my standards. Removed forks and wheels.20140305_204003.jpg
Also in this photo shows headers back from repair and re-chroming.
The bottom bends were badly rusted and needed attention.
20140105_121103.jpg
20140105_122645.jpg
Forks are away being hard chromed.
Rims are away being re-chromed.
Hubs are being dropped off tomorrow to be powder coated.
20140307_135730.jpg
20140308_212414.jpg
20140308_202750.jpg
Tyres were a challenge to remove. I checked the date stamp and they were both mid 80's vintage and rock hard.
A better plan would have been to attempt after a couple of hours in the sun.
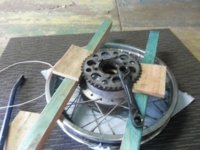
The other challenge was the sprocket carrier/cush drive removal from the rear hub. I remounted the sprocket with a couple of turns on the bolts, then packed underneath the sprocket and wound the cush drive up towards the sprocket. Pic displays it better.
20140309_103458.jpg
 
Great bike! Great post! I have a 73 TX750 that looks just like that.

There's a private facebook page in Aus for the TX750's, and TX500's. It's by invitation only. If you're interested pm me your name and I'll see if I can get you joined up. There's a lot of guy's there scattered all over Aus. And a lot of really cool custom bikes along with stockers.
 
I did try to cut through the bead with sidecutters as I don't have a set of bolt cutters.
Was going to take longer than with tyre levers.
 
Great bike! Great post! I have a 73 TX750 that looks just like that.

There's a private facebook page in Aus for the TX750's, and TX500's. It's by invitation only. If you're interested pm me your name and I'll see if I can get you joined up. There's a lot of guy's there scattered all over Aus. And a lot of really cool custom bikes along with stockers.

Great. PM sent.
Cheers Craig.
 
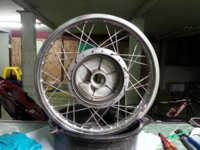
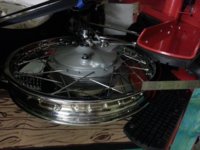
Much has happened since my last post. The forks have been hard chromed and lowers polished, hubs have been powder coated and rims have been chromed.
I thought I would have a go at lacing and trueing the rims myself which I am now glad I did.
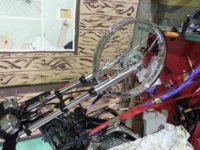
I found it a very relaxing and enjoyable experience. After loosely lacing the rims up I put the new bearings and seals in and mounted the wheels on the bike. Then clamped some pieces of wood to the hoist and set a steel rule to the wheel and that was my wheel trueing stand.
20140422_102306.jpg

20140413_212131.jpg

20140422_120758.jpg

20140415_105819.jpg

I also repainted the left switch block which was looking very sad.
20140320_205048.jpg
20140420_203947.jpg
20140421_163659.jpg
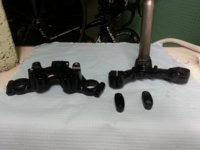
Blasted and painted triple clamps.
20140420_203923.jpg
Next is to get the front brakes sorted. The master cyl is seized and the caliper doesn't look much better. I plan to simplify the system by having one flexible line with the pressure switch at the banjo bolt at the master cyl.
I don't understand why Yamaha made it such a complicated system with two hard lines and two flexible lines.
Also on the list is get the headlight bucket on and start working through the wiring. As it was all disconnected when I purchased the bike I will be starting from scratch.
The ignition part works as I have connected that part to test run the bike, however lights, indicators, horn are all un tested as yet.
 
Nice work. Seems everyone made the brake lines that way in the early 70s. Hondas were kinda like that too. Hard line to caliper.

Posted via Mobile
 
A bike like that deserves a good restoration, and you da man! I'm pretty sure these were the 1st bikes that had 4 valve heads. You will find it very smooth for a twin, rivaling a four banger. Back in the 90's my old Yamaha dealer rode a nice TX500 everywhere, and he could ride whatever he pleased.
 
Back
Top