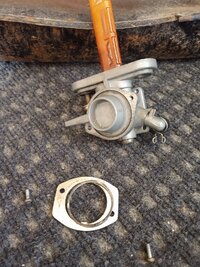
For the petcocks so equipped,
fit a new output pipe flange gasket,
And
install the output pipe flange;
Some styles of petcock have a non-removable outlet pipe; some of the "standard" petcocks have a drain screw rather than a removable pipe; a new gasket here would be a good idea (and a new screw if corroded.)
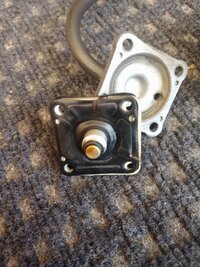
Now let's
install the valve body seal be sure to smear it
sparingly with silicone grease too:
The bigger petcock is the same; be sure you
install the new o-ring on the valve lever flange;
And go ahead and
install the lever (be sure you lubed the o-ring) by rotating it into place;
Don't forget the
wave washer on the front; then go ahead and
install the face plate as well.
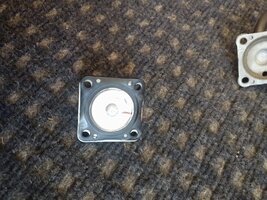
Now we need to
install the in-tank filter standpipe. The base flange of this part will need to be filed or ground down slightly to be able to fit flush. Once again, I enlisted the trusty Dremel:
This can be accomplished with a sharp fine flat file as well.
The
filter pipe MUST fit flush or even slightly below the surface of the petcock body, to avoid interfering with the installation of the petcock on the tank.
Place the petcock body on your bench and press the (now recontoured) standpipe down into the petcock by pressing on both sides of the oval; it will "seat" fully and fit as pictured.
COMPLETED.
Be sure to use new sealing washers (they are a special steel-mesh/composite) when refitting the petcock to the tank.
It's a good idea to fit an
in-line fuel filter ASAP, the in-tank unit you just replaced is only effective down to a certain size particle.
Chacal offers these fuel filters and clips; seeing your choices always helps decide what will fit your bike the best.
Different color fuel and vacuum lines are also available if you want to personalize your bike.
ALTERNATIVES TO REBUILDING: You can replace the petcock with a modern, vacuum operated unit (these are the same replacements offered by Yamaha) or eliminate it altogether by installing a simple on-off fuel valve:
L-R, BACK ROW: Stock valve (we just rebuilt
")
"short" Aftermarket/Yamaha unit HCP625; tall modern unit HCP626.
FRONT ROW: On/off replacement fuel valve kit contents; "tall" stock "drain plug style" unit for comparison.
I have the HCP625 on my Black '83 since I was not all that concerned about stock appearance but wanted to retain the vacuum-operated feature.
Side by side comparisons of the (non vacuum) simple ON/OFF replacement valve and the stock valve:
I'm not advocating replacing the vacuum operated petcock that came on your bike; I just wanted you to see the alternatives that are available.
AS ALWAYS, THIS POST IS A "WORK IN PROGRESS." Suggestions and comments are welcome; if there is anything you would like me to add or expand on please say so.
bigfitz52


 I would have thought they would have to be softer but yeah if they work they work