'71 xs1b conversion to cafe

You may need to cook-up some sort of wristpin pusher or puller, using PVC pipe, allthread, ...etc.

My impact driver has a 3/8" squaredrive end. Easy to add socket extensions to reach those screws...
 
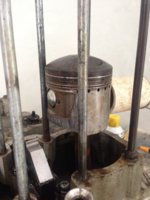
I extracted the piston pins using the same tools I used to force out the pistons, except I swapped in 5/16" bolts and used 3/4" washers which are slightly smaller than the circumferences of the pins. They came out without too much trouble.

extract.jpg extract2.jpg

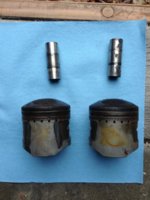
Here's how the pins look- are they usable?

pistons.jpg

In a flash of inspired improvisation, I realized that the top end of the screwdriver adapter that comes with the yamaha tool kit fits nicely inside a 16mm bit socket. Bang! Off to work, extracting the bottom stopper guide.

improv.jpg

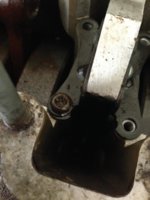
But of course, the motorcycle gods will not let me have it easy. While the two screws on the right came out easily, the other two are stripped, obviously by non-JIL screwdrivers. :banghead:

stripped.jpg

It just makes me nervous that PO stupidity extends this far into the motor. How much more should I expect?
 
Well done on the wristpin extraction.
Unfortunately, they look unuseable.

Nice flash of inspiration with the toolkit assemblage. The other 2 screws would need a hammer-type impact driver for removal. Sometimes they'll loosen if you hold pressure and torque on the screwdriver while hammering it like a chizel.

The condition of the crank is of utmost importance.
Rocking the rods side-to-side, should get less than 2mm movement as measured at the small ends.
The wristpin holes should be checked for excessive clearance. Using the best, clean, undamaged end of one of the wristpins as a gauge, slide it into a rod end. Should be a light drag slide-in fit, with no noticable looseness...

Using a metric ruler and one-eyeing it, (if that's an acceptable method of measurement), facing forward, the right rod has exactly 2mm movement, and the left has 1.5 mm. Are these acceptable? Service manual did say maximum allowable tolerance was 2mm on small end play.

Inserted the wristpin in both rods, appears to have snug fit, but while both had no horizontal looseness, they did have a little vertical looseness.
 
going to have to mike the small ends. The 70-73 22mm rod ends are prone to stretching!
 
going to have to mike the small ends. The 70-73 22mm rod ends are prone to stretching!

Mike? :confused:

Was looking into replacing them and getting quite the sinking feeling seeing "parts obsolete" instead of a price, for anything xs1b.
 
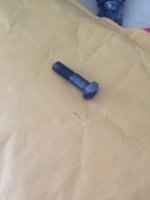
Been away on vacation and eager to get back to work. Still stuck with extracting the last two screws. Hammer-impact driving did nothing.

View attachment 62456

I'm at the point where I'm thinking of trying a screw extractor. Is that a good idea? Any other recourse I should try before resorting to destroying the screw head?
 
You "must" using a hand impact tool. If you don't own one about $10 will buy one. Those still look very removable and reusable to me. Do not destroy the screw head. When you use the hand impact; first set the bit firmly in the screw head with a hammer directly on the socket head, then attach the tool, try to loosen a smack or two then try to "tighten", alternate 'til it comes loose.
 
You "must" using a hand impact tool. If you don't own one about $10 will buy one. Those still look very removable and reusable to me. Do not destroy the screw head. When you use the hand impact; first set the bit firmly in the screw head with a hammer directly on the socket head, then attach the tool, try to loosen a smack or two then try to "tighten", alternate 'til it comes loose.

Couldn't I replace these screws with newer metric ones?
 
Been away on vacation and eager to get back to work. Still stuck with extracting the last two screws. Hammer-impact driving did nothing.

View attachment 62456

I'm at the point where I'm thinking of trying a screw extractor. Is that a good idea? Any other recourse I should try before resorting to destroying the screw head?

Hi DQG,
those tapered left-hand threaded things that you tap into a drilled hole?
Do NOT use them. They don't work to remove the fastener, the end snaps off inside the fastener and then you find the extractor's material is harder than any drill bit and the only fix is an EDM.
Gawd! I hate crosspoint headed fasteners!
If the percussion driver don't work, try setting up a crosspoint driver bit in a drill-press (it'd take a big drill press to fit a crankcase) or rig up something held by the head studs to keep the crosspoint driver bit forced down into the fastener head as you back it out by hand.
If all else fails, drill the head right off, remove the part that was held down and hope there's enough fastener sticking up to get a vise-grip on.
And yeah, the replacement screws better be Allen-heads, eh?
 
Thanks Fred and Gary, I borrowed a HIT and was able to get one more screw out, but the other screw was made worst- the head is now pretty much worn out. Should I try a vise grip on the head and see if I can loosen it that way?

lastscrew.jpg
 
Thanks Fred and Gary, I borrowed a HIT and was able to get one more screw out, but the other screw was made worst- the head is now pretty much worn out. Should I try a vise grip on the head and see if I can loosen it that way?

Hi DQG,
good luck with that, eh?
If you can get at that cratered out head with a Dremel tool or similar small grinding device, try making two flats on it for the vise-grip to grab or perhaps cutting a gash across the top to make a screwdriver slot.
 
IWF, dremel a cross slot first then If you have to start drilling; get a LEFT HAND drill bit most of the time the fastener will back out before the head has been drilled out. Note that there are 2 black and 2 silver screws used, they are different lengths and must be replaced in the correct locations.
 
In fact, I do have a dremel on hand and was able to grind that blasted screw into a square head and vise it out.

cutscrew.jpg

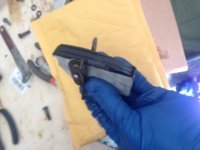
Finally, stopper is out- some damage to it- I have my eye on a NOS one on ebay that I'll grab.

stopper.jpg

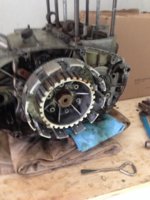
Removed clutch cover plate- everything looks ok- friction plates show signs of rust- probably a good idea to replace them?

clutch.jpg

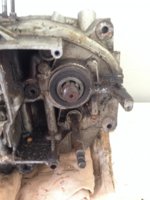
Kickstarter assembly popped out into my hand as soon as cover was removed- is it supposed to do that?

kicks.jpg
 
Spent a blissful afternoon working on the bike and got a lot done- was a warm 60 degree day. The motor is almost ready to turn upside down for the case split.

Removed the pressure and clutch plates and push rod, and was stunned to see two balls tumble out- I don't think this is correct. The clutch diagram in the xs1b service manual shows only one 5/16" ball. (#16)

Cbasket.jpg

Anyone have a clutch holding tool by any chance?

Also removed what I could of the alternator- waiting for the rotor puller, put my name in the floating tool section.

alt.jpg

Took off the drive sprocket- going to replace it.

drivegear.jpg

Also spent some time on the frame, removed both wheels, and swing arm- ready for detabbing and sandblasting:

frame.jpg

Some questions regarding the swingarm- I assume there is nothing to remove from inside the swingarm holes in the frame? Just clean out the grease in prepping for sandblasting/powdercoating?

SAhole.jpg

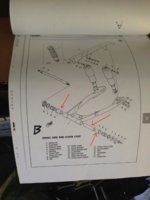
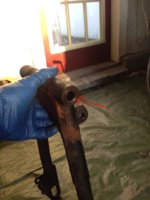
Also when removing the swingarm, one of the bushing slid out easily but the other one is pretty stuck- how do you remove the distance collar and swing bushing?

bushings.jpg swingarm.jpg
 
Back
Top