Now wasn’t that better than spending weeks trying to come up with a 2-1. Congrats.
-
Enjoy XS650.com? Consider making a donation to help support the site.
XS650.com receives a small share of sales from some links on this page, but direct donations have a much greater impact on keeping this site going.
You are using an out of date browser. It may not display this or other websites correctly.
You should upgrade or use an alternative browser.
You should upgrade or use an alternative browser.
Big TX500 project, any help appreciated!
- Thread starter Made2care
- Start date
Pretty neat! Thanks for steering me back on trackNow wasn’t that better than spending weeks trying to come up with a 2-1. Congrats.
")
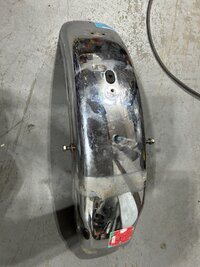
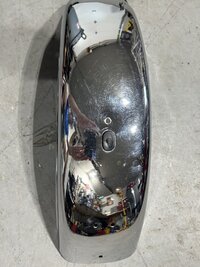
Here’s a side by side. Bike on left is non running parts bike. Bike on right is running and will be fully restored it’s a mix and match game. Notice the exhaust on left in near perfect condition compared to exhaust on right which is slightly beat up.
it’s a mix and match game. Notice the exhaust on left in near perfect condition compared to exhaust on right which is slightly beat up.Attachments
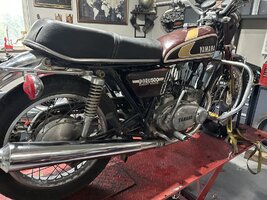
That’s the way to do it!Here’s a side by side. Bike on left is non running parts bike. Bike on right is running and will be fully restored
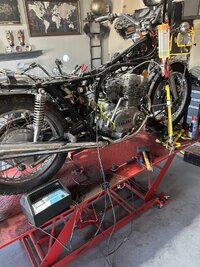
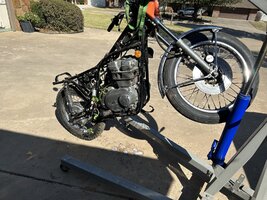
Tested the engine again but outside this time. You can clearly see the rust/soot on the ground coming from a rotted exhaust. Good thing I have a donor bike with a healthy exhaust I almost have the wiring harness removed. After that it will be time to remove the engine, clean frame and possibly get it powder coated.
Later.
I almost have the wiring harness removed. After that it will be time to remove the engine, clean frame and possibly get it powder coated.Later.
Attachments
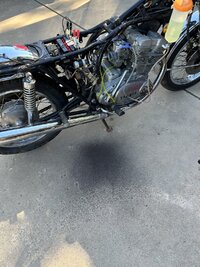
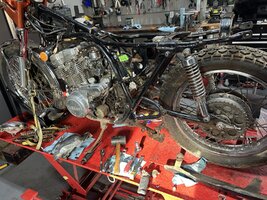
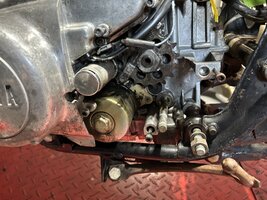
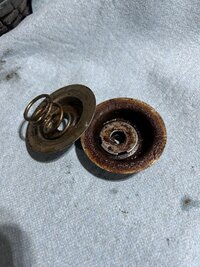
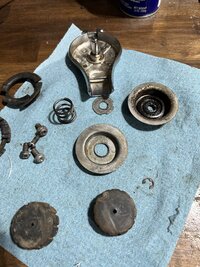
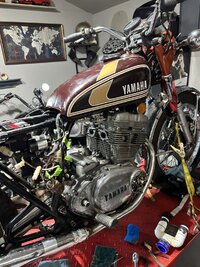
Been busy … whew!! Gave her a much needed bath and started on the easy parts first
Attachments
-
 IMG_5489.jpeg511.8 KB · Views: 46
 -
 IMG_5488.jpeg532.3 KB · Views: 50
 -
 IMG_5484.jpeg610.8 KB · Views: 47
 -
 IMG_5491.jpeg380.2 KB · Views: 45
 -
 IMG_5487.jpeg500.5 KB · Views: 45
 -
 IMG_5497.jpeg465.4 KB · Views: 46
 -
 IMG_5493.jpeg414.8 KB · Views: 42
 -
 IMG_5494.jpeg400.8 KB · Views: 43
 -
 IMG_5496.jpeg395.5 KB · Views: 45
Yea, some good progress. nice to see.Been busy … whew!! Gave her a much needed bath and started on the easy parts first
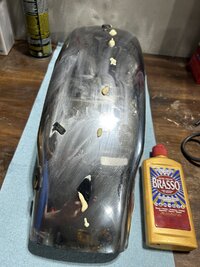
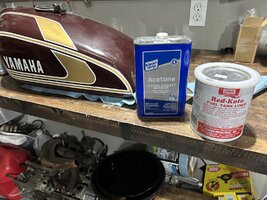
Gas tank attention. After restoring many over the years, here is my protocol:
Step 1- pressure wash inside with soap
Step 2- CLR inside for about 20 min
Step 3- rinse
Step 4- soak with Evapo-rust
Step 5- rinse
Step 6- acetone rinse
Final step- line with Red-Kote
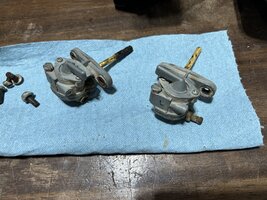
I’ve cleaned up some bits and waiting on fresh cap gasket
Step 1- pressure wash inside with soap
Step 2- CLR inside for about 20 min
Step 3- rinse
Step 4- soak with Evapo-rust
Step 5- rinse
Step 6- acetone rinse
Final step- line with Red-Kote
I’ve cleaned up some bits and waiting on fresh cap gasket
Attachments

Tease...Update coming soon!

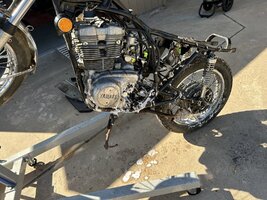
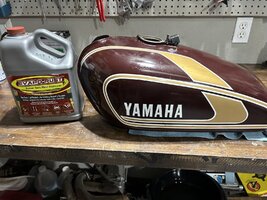
Well… the update is that I really have not had much time recently to do anything other than restore the gas tank and chain.
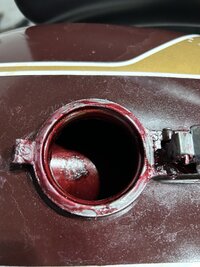
Gas tank was really stubborn with all the rust but managed to clear that out and put a nice liner in it.
Chain was also rusty …. Nice soak in Evaporust and it’s looking better. Just waiting on some lube.
That’s it for now. Will hopefully have more time this weekend to tackle her!
Oh shoot… almost forgot but I am going to try the single carb route again. I know some of you don’t like that but I’m not too pleased with original carbs. Will see what happens.
Attachments
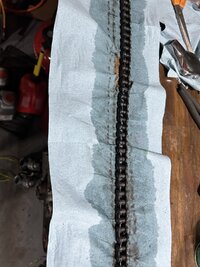
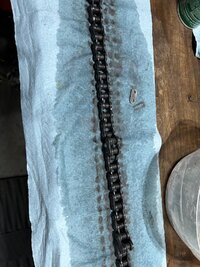
I'm not sure trying to save an old original chain like that is worth the time and effort. They weren't very high quality items to begin with. If you want a nice, quality regular chain, spring for a standard D.I.D., about $40.
Good point and I did think about that. I’m cheap thoughI'm not sure trying to save an old original chain like that is worth the time and effort. They weren't very high quality items to begin with. If you want a nice, quality regular chain, spring for a standard D.I.D., about $40.
Well…. I was just curious to see how/ if she would run on a single carb and no issues except she’s idling fast. I just purchased a cheap Chinese fake mikuni carb so did not expect it to run perfect.
I will keep tossing around my options with the carbs .
Anyhow… pushing forward, will purchase some new tires and continue to teardown and clean things. Engine runs strong which was my main concern.
I will keep tossing around my options with the carbs .
Anyhow… pushing forward, will purchase some new tires and continue to teardown and clean things. Engine runs strong which was my main concern.
Pics or it didn’t happen……
Lol….. yes, I will get pic’s tomorrow. I do have a high idle issue too , therefore suspecting air leak.Pics or it didn’t happen……
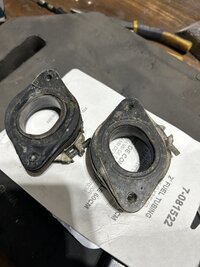
So….. this is just a prototype manifold using pvc. I have a welding shop making similar design using stainless pipe. Again…. Cheap Chinese carb but bike starts right up. Just tinkering around. The high idle could be the original intake boots that will need replacing.Lol….. yes, I will get pic’s tomorrow. I do have a high idle issue too , therefore suspecting air leak.
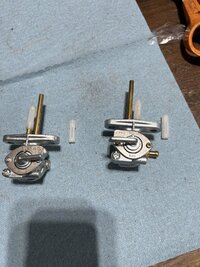
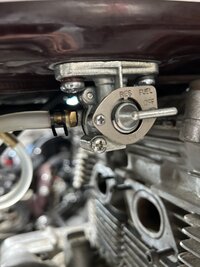
Tank is ready…. New petcocks bolted right on.
Attachments

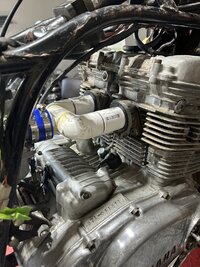
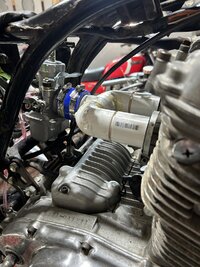
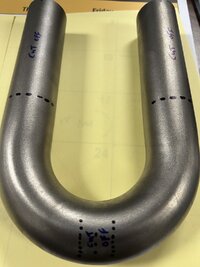
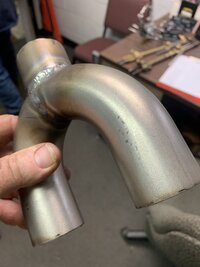
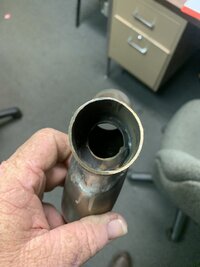
Here’s a pic of the stainless manifold sent by the welder. Nice work! The inner lip on the single pipe(carb) side will have to be reamed out. Other than that, this will be good. New tires are in. Taking a short vacation then when I return will definitely get back to restoring this beautiful bike
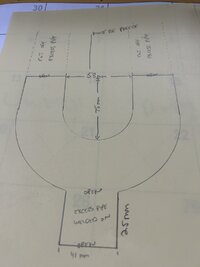
I have the precise specs I will post tomorrow, if you wanted to tackle building this. Of course it only applies to a tx500.
I have the precise specs I will post tomorrow, if you wanted to tackle building this. Of course it only applies to a tx500.
Attachments
Similar threads
- Replies
- 4
- Views
- 2K
- Replies
- 3K
- Views
- 413K
- Replies
- 438
- Views
- 52K