I’ve used VHT products before and have bern happy with their performance. As long as the surface had sufficient “tooth”, the paint should work work well for you.. I’m not sure if the product you are using needs to be “baked” on but I’m sure exhaust temps will take care of that.
-
Enjoy XS650.com? Consider making a donation to help support the site.
XS650.com receives a small share of sales from some links on this page, but direct donations have a much greater impact on keeping this site going.
You are using an out of date browser. It may not display this or other websites correctly.
You should upgrade or use an alternative browser.
You should upgrade or use an alternative browser.
Official CX Refurb Thread
- Thread starter Downeaster
- Start date
That came out really nice!
Could you maybe slip that muffler over the exhaust of say a tractor or some other engine to heat it up to bake the paint on? Have some old farm tractor sitting around?
Before
After.
Most of the chrome polished up...okay... Long way from perfect but good enough for who it's for. If/When I get the bike running right and road-worthy, I may look at an aftermarket exhaust.
Looks great! When Im working on my Shadow I try to keep in mind the bike will be a rider, or flipper, not a show piece, so it doesn’t need to be perfect. I really need to be careful on my project because the bike isn’t worth a lot, even in pristine condition, so every dollar I put into it will be difficult to recover when I sell it. I think you’ll have a blast riding that bike. A friend uses his as his daily rider with no regrets.View attachment 258305
Before
View attachment 258306
After.
Most of the chrome polished up...okay... Long way from perfect but good enough for who it's for. If/When I get the bike running right and road-worthy, I may look at an aftermarket exhaust.
I read that the reason for using pushrods was that it allowed the heads to be rotated a bit, so the carbs got more out of the way, compared to for example a Moto Guzzi.Honda was very clever with that bike. Push rod design and spins to 9500 (?)rpm. I seem to recall road tests back in the day reporting that it was a very quick bike.
Popcorn......
OHC or DOHC heads would have made that "twist" more complicated. So the CX is something as rare as a 4 valve head pushrod engine. The only other 2 cyl/ pushrod/ 4 valve engines of that period, would be Guzzi Lario and Rickman/ Weslake/ Nourish/ Triumph TSS "Bonneville" .
Possibly... The twist gets the carbs closer to center and out of the way for knees.I read that the reason for using pushrods was that it allowed the heads to be rotated a bit, so the carbs got more out of the way, compared to for example a Moto Guzzi.
OHC or DOHC heads would have made that "twist" more complicated. So the CX is something as rare as a 4 valve head pushrod engine. The only other 2 cyl/ pushrod/ 4 valve engines of that period, would be Guzzi Lario and Rickman/ Weslake/ Nourish/ Triumph TSS "Bonneville" .
Unexpectedly, the UNI filters showed up this evening. I popped one on to be sure it fit and two things became immediately apparent:
1. The coolant puke tube is going to have to be re-routed (not a huge issue...I think...) and;
b. The carbs (and therefore the filters...) are angled towards each other. Pretty sure the filters are going to interfere with each other at the outer ends. Seeing as they're foam, this shouldn't be a huge issue either.
I'll mount them tomorrow and if things work out, oil them up and see about sorting the carbs.
EDIT: Belated thought. The original air box had boots that straightened out the angle between the carbs and the air box. I wonder if it might be a good idea to make a coupler and use them between the carbs and the pods. It'd set the pods back further into the frame space where the air box used to live and possibly eliminate both 1. and b. above. Hmmmmmmm....
I think you idea of using the original air box boots is a good idea. Solves 2 problems and increases the volume of filtered air.
A preliminary perusal says it's possible but it won't be as easy as I envisioned due to the way the boots lock into the airbox.
Other things on the schedule at the moment, but I'll contemplate the idea for a while and if/when I come up with a method, I'll post it here. In fact, while typing this, I came up with the idea of printing a connector on my 3D printer. Just a little design exercise to create a prototype and test it out.
Other things on the schedule at the moment, but I'll contemplate the idea for a while and if/when I come up with a method, I'll post it here. In fact, while typing this, I came up with the idea of printing a connector on my 3D printer. Just a little design exercise to create a prototype and test it out.
How's relations with your ex?On small parts I use the VHT Engine Enamel 500°F, bake them in the oven at 400°F for about 30 minutes and it's as hard as powder coat
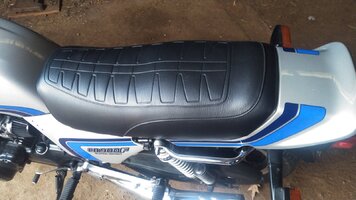
This is the seat foam off the CX. Looks crusty but actually in good shape, not crumbly at all. Seat base is plastic so that's in good shape as well.
I can get new seat covers off Fee Bay, but I'm hesitant about that because I've never stretched a seat cover before. If it was a flat seat, I'd go for it, but with the "butt bucket" shape, and the need to pull the cover down into the concave portion with buttons (or ???) I'm not at all sure I could do a decent job of it.
Anybody been there and done that? I hear rumors that an upholstery shop will charge out the ying-yang to do it.
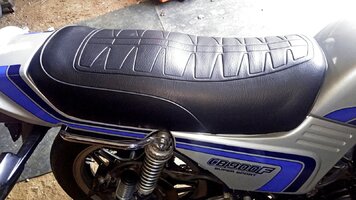
I did this one. The cover was good quality. It went on easily. It looks great.
The original air box had boots that straightened out the angle between the carbs and the air box. I wonder if it might be a good idea to make a coupler and use them between the carbs and the pods. It'd set the pods back further into the frame space where the air box used to live
In the 70’s I had a Honda XL250, it was a stripped down dirt bike when I bought it, the carburetor used to angle out from the head on the right side and it no longer had the airbox.

Instead it had an oiled foam filter, which did a great job of oiling my pant leg!
Put the foam into the cover 1st, then on the base. Took 20 min.
View attachment 258404
See, now I'd have never thought of that and it's so obvious it hurts...
Yes. Even if the cushion is glued to the base, that’s how it goes. I line it up and start securing at the nose. Tighten to the back, working around maintaining alignment.See, now I'd have never thought of that and it's so obvious it hurts...
.Put the foam into the cover 1st, then on the base. Took 20 min.
I've done maybe a half dozen seats over the years. Squeezing the foam into the cover first is by far the easiest way I've found.
I'd go for it DE. I'd bet you'll find it's a big nothingburger when it's all said and done.

 Just had a bud do a pit replica seat cover on a Honda for me. He cursed a blue streak getting that SOB fitted and it was just a simple "flat" seat.

