mouser
XS650 Addict
A recent post about TCI repair inspired me to dig out an old one and pry the lid off and have a look! I was shocked! I have a background in electronics I studied it in school and worked several years in the medical instrument field building heart monitors, defibrillators, and that sort of thing.
I removed the circuit board and dragged out a digital microscope to better examine it.
I didn't even to put my glasses on let alone turn on the scope to spot glaring irregularities. The board itself is of very low quality.
I spotted immediately many poor soldering connections. I would estimate a full 1/3 of the probably 100 connections would have failed inspection where I was employed. Most were cold joints, bubbles in the solder, from cooling too fast, not enough heat, or cooling by blowing on the joint to cool it.
The board itself after soldering was never cleaned to remove the residual resin and spatters of solder. It was coated by some sort of sealer over the dirt by spray. The edges of the board were never sealed. Any moisture and air was able to get under the varnish, react with the resin and corrode the conductors.
Actually I am surprised this thing actually ran my bike, which it did very well except whatever controls the auto advance. It started, ran perfectly, but no rpm...auto advance circuit....
I looked at the main 6 wire connections on the board. The orange wire which would be a coil output and the green white goes to the pickup are both very poor connections...??? hmmmm
here are a few illustrations to check out if this interests you.
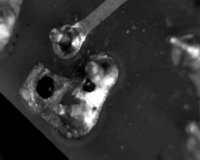
This is my main orange connection....

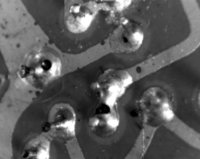
this is a favorite!!! 8 connections! ...all bad...and two "bridges"

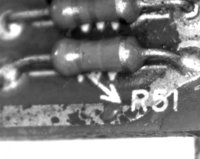
this is what happens if you don't wash resin off....then let air or water at it...in this case through the porous unvarnished edges......

I find it rather disturbing when I explored Hitachi and find they make aircraft components!!!!!!!
Tomorrow I have a meeting with an electrical guru to discuss re engineering the whole unit.....He is intrigued at this point....and knows his business...
I'll keep you updated...
Today I will re solder the whole board and melt the bridges!!!
I am convinced I can correct this one..
To test this board I need to repeatedly connect and reconnect the unit. I want to better know which of the many faults is the one that actually caused the malfunction.. Is there any precautions I should observe when I do the switches to protect the units? I am afraid of ruining the good one I am using..
I removed the circuit board and dragged out a digital microscope to better examine it.
I didn't even to put my glasses on let alone turn on the scope to spot glaring irregularities. The board itself is of very low quality.
I spotted immediately many poor soldering connections. I would estimate a full 1/3 of the probably 100 connections would have failed inspection where I was employed. Most were cold joints, bubbles in the solder, from cooling too fast, not enough heat, or cooling by blowing on the joint to cool it.
The board itself after soldering was never cleaned to remove the residual resin and spatters of solder. It was coated by some sort of sealer over the dirt by spray. The edges of the board were never sealed. Any moisture and air was able to get under the varnish, react with the resin and corrode the conductors.
Actually I am surprised this thing actually ran my bike, which it did very well except whatever controls the auto advance. It started, ran perfectly, but no rpm...auto advance circuit....
I looked at the main 6 wire connections on the board. The orange wire which would be a coil output and the green white goes to the pickup are both very poor connections...??? hmmmm

here are a few illustrations to check out if this interests you.
This is my main orange connection....

this is a favorite!!! 8 connections! ...all bad...and two "bridges"

this is what happens if you don't wash resin off....then let air or water at it...in this case through the porous unvarnished edges......

I find it rather disturbing when I explored Hitachi and find they make aircraft components!!!!!!!
Tomorrow I have a meeting with an electrical guru to discuss re engineering the whole unit.....He is intrigued at this point....and knows his business...
I'll keep you updated...
Today I will re solder the whole board and melt the bridges!!!
I am convinced I can correct this one..
To test this board I need to repeatedly connect and reconnect the unit. I want to better know which of the many faults is the one that actually caused the malfunction.. Is there any precautions I should observe when I do the switches to protect the units? I am afraid of ruining the good one I am using..


