WELSH FLAT TRACK REVIVAL

Adamc

XS650 MEDDLER
Top Contributor
XS650.com Supporter
Messages
2,479
Reaction score
10,929
Points
513
Location
Wales
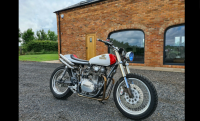
So the 'easy' refurbishment isn't so easy after all. My recently acquired machine (following a 15 year chase; see previous posts) needs more attention than originally thought. After many years of being a 'display' item in a man-cave all seals were shot; carbs are gunked, and electrical sparks are iffy!
XS1.PNG

A thorough service and look over has become a full refurbishment. So the build begins.
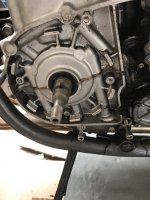
Already stripped down to a rolling chassis; I have replaced all the original left hand seals one of which was leaking (main crank). Engine oil replaced with classic 20/50 which is my preferred oil for older motors.
Image below is before seal were changed.
IMG_0978.JPEG

Cleaned up all the electrical parts on this side, also and fitted new brushes to specification.
I am having trouble tightening (to torque) the securing bolt on the end of the rotor however. Its well seated on the shaft with the wood-ruff key in the correct position. Any tips on that one would be welcome? Motor runs OK but a bit fluffy on idle.

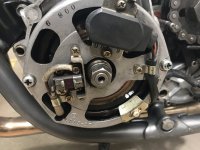
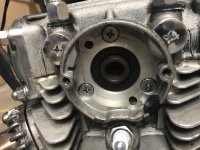
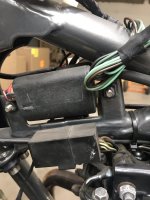
So to check the static timing. Crank marks are in place as required. I removed the points covers expecting to see 'points' or and electric ignition system on the end of the cam shaft but..... Nothing!
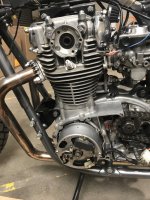
IMG_0995.JPEG IMG_0994.JPEG IMG_0996.JPEG

Whats going on?! Sparks is not my strong suit to be honest so any help with this would be grateful.
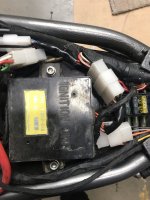
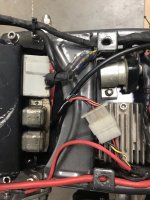
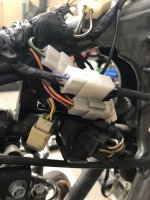
Below are the rest of the electrics on the bike:
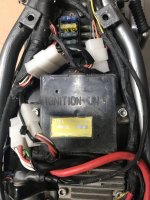
IMG_1001.JPEG IMG_1002.JPEG IMG_1003.JPEG IMG_1004.JPEG IMG_1005.JPEG

The bike seems to run OK when revved; but when idling is a bit lumpy.
I think the carbs need a full going over and setting up carefully.

Wheel bearings and all service areas have been lubricated, including cables.

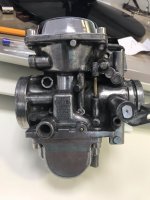
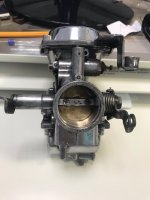
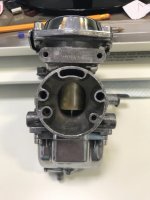
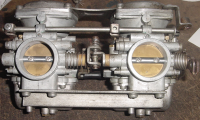
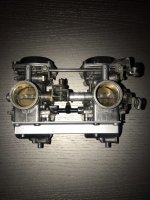
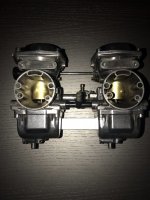
Finally the carburetors are off for a thorough clean and rebuild. Cleaning is going well, but I cannot identify which carb type I have to order the rebuild kits. There are no model marks on the bodies. Any spotters to help please?
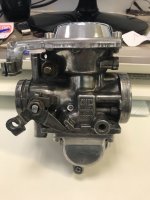
IMG_1006.JPEG IMG_1007.JPEG IMG_1008.JPEG IMG_1009.JPEG

I know there are a few questions contained here; but all help is willingly and gratefully received.

I will keep this post going as the build develops.

Cheers
Adam:cheers:
 
Whats going on?! Sparks is not my strong suit to be honest so any help with this would be grateful.
You have the '80 and newer factory TCI. It's a first generation electronic ignition. It's a good system.
Any spotters to help please?
'80 and up BS34's
 
Best of luck with the refurb. The photo you show is of the mechanical advance side of the cam, not the points side. I would guess however that someone has installed some type of pointless ignition trigger, either on the other end of the cam or attached to the gen set
 
Best of luck with the refurb. The photo you show is of the mechanical advance side of the cam, not the points side. I would guess however that someone has installed some type of pointless ignition trigger, either on the other end of the cam or attached to the gen set

Thanks for the response.
The main image shows the rotor / stator side; I expected the points to be above on that side... but nothing.
A
 
How do I fine tune the timing fire point on this?
It's basically a "set and forget" system. The crank sensor is held on with two screws. Depending on model, the top screw hole might be slotted... or not. Easy enough to file a slot into it if needed. You check the timing at idle. To the left of the "T" mark is a horseshoe mark. It should fire inside the horseshoe.

Some of us think these engines run a little better with the timing retarded slightly. There's a discussion here somewheres. I'll see if I can dig it up.
 
Re. tightening the crankshaft nut to torque, there are many ways to skin that cat, but here's an easy one. Set the bike on the side stand in 1st gear, run the rear brake adjuster in until the brake is on firmly, tie back the front brake lever hard, set a chock behind the rear wheel, and do the needful.
 
Re. tightening the crankshaft nut to torque, there are many ways to skin that cat, but here's an easy one. Set the bike on the side stand in 1st gear, run the rear brake adjuster in until the brake is on firmly, tie back the front brake lever hard, set a chock behind the rear wheel, and do the needful.
Thanks Grizld I will try that way.
A
 
NEXT INSTALLMENT:

As I was unhappy with the way the bike was running when revved and especially at idle; it was time to look at the fueling system.
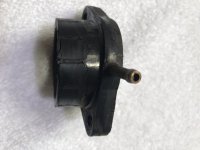
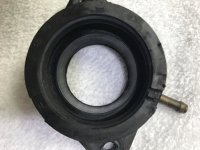
The carbs came off without to much hindrance, followed by the inlet rubbers. Carbs looked reasonably OK on the surface. All rubbers however were cracked and showed signs of splitting. No doubt due to years of non-use, and drying out, when on display in a previous owners 'Man-Cave'.

CARBS BEFORE CLEANING:
XS650 CARBS DIRTY.PNG
These aren't actually off my bike, but mine were in similar condition visually.
On closer inspection of mine many screws / jet heads were a bit mangled.
The coupling bar was also corroded; and the screws were a sod to get out!
Penetrating fluid, heat cycles, impact hammer, hacksaw, screw extractor and lots of swearing sorted it.

OLD RUBBER PARTS:
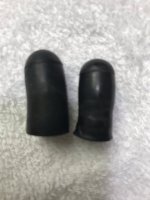
INTAKE RUBBER 1.JPEG INTAKE RUBBER 2.JPEG VAC TUBE COVERS.JPEG
After a clean you could see the cracks and splits in the rubber parts.
These will allow unwanted air to be sucked into the fuel mix, causing poor running issues.

CARB CLEANING:
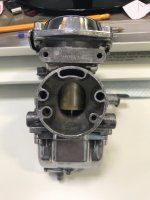
CARB SLIDE SIDE.JPEG
This image is halfway through the cleaning process.
I thought it best to remove as much dirt as possible before opening up the carbs.
Obviously you don't want unnecessary crap getting inside the delicate parts.
A few hours with the Dremel, wire brushes, carb cleaner & polishing tools helped.
I'm not going for a trailer queen / show finish. Just a decent looking and proud to ride machine.

THE OPERATING TABLE:
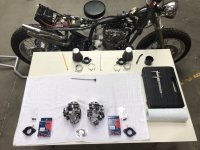
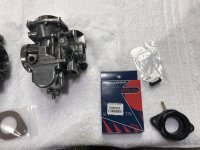
TABLE 1.JPEG TABLE 2.JPEG
Cleanliness is next to godliness, so my mother drummed into me!
Probably why I'm a failed guitarist turned drummer.
So a well scrubbed bench and brand new white towel; to catch any dropped parts.
Nothing worse than looking for little parts that bounce off the bench into workshop oblivion.
The towel helps trap them, and they are easier to see on the white towel.
Missus ain't happy about the towel though!

I also cleaned up the metal heat shield off the rubbers, and the mounting clips.
Primed and sprayed them with heat resistant silver paint; they look much better now.
And saved a few pounds / dollars at the parts depot. All screws are soaking in cleaner.
I will probably get all Allen head screws for the rebuild of these. It will make disassembly easier next time around.

BIG SHOUT OUT TO:
YAMBITS.CO.UK.PNG

YAMBITS.CO.UK
I have purchased most of my parts through this online dealer.
They answer my email questions with care and patience; thanks Hollie!
Well Priced and good quality products.
Super fast tracked delivery service; and they accept returns.
They hold stock of parts for most Yamaha machines, plus tools etc.....

Also much thanks so far to:
Jim, gggGary, Mailman,Grizld, RC4MAN & Raymond on this thread.
 
Re. carb work, you might want to replace the throttle shaft seals now rather than later. It's a slightly tricky job, but a quick search will turn up plenty of how-to. Pods and vacuum carbies aren't the best combination, but if you have to go that route, foam filters or the biggest untapered fabric filters you can fit will give you less grief than those cones; the more filter volume the better.
 
Last edited:
Yes, Adam, I've made extensive use of Yambits and have had excellent service. Bought a chain-splitter to join the new cam-chain and it was useless - bent on first use. Told Yambits and they refunded the price and told me not to bother returning the tool to them. Everything else I've bought has been good and they supply bits which are no longer available from Yamaha.
 
Re. carb work, you might want to replace the throttle shaft seals now rather than later. It's a slightly tricky job, but a quick search will turn up plenty of how-to. Pods and vacuum carbies aren't the best combination, but if you have to go that route, foam filters or the biggest untapered fabric filters you can fit will give you less grief than those cones; the more filter volume the better.
Hi Grizald
What problems do the pod cause?
I like the look of them but am willing to understand benefits of others.
My bike has no air box, so directly mounted filters are the option.
Cheers
Adam
 
Hi Grizald
What problems do the pod cause?
I like the look of them but am willing to understand benefits of others.
My bike has no air box, so directly mounted filters are the option.
Cheers
Adam
The top oval hole in the back is the primary air source to lift/regulate the slides. Anything that disrupts/disturbs the airflow or changes the pressure value there will affect the slide. Slide flutter... incorrect lift, or just generally hard to tune isn't uncommon with pleated and or restrictive filters. On some K&N's the rubber literally cover much of that hole. The pleated K&N's in your first pic are especially bad.


Untitled.png
 
I don't think the problem is so much the pleats in K&N filters as the small volume in the tapered and oval designs which provide very little still air. I've had as much success with large cylindrical K&N's on vacuum carbies as I've had with foam filters. K&N filters don't have the troublesome internal flanges; you find those on the cheap knockoffs with a thin layer of foam rather than fabric under the metal screen. Yours appear to be knockoffs, since the real thing would have the K&N logo stamped into the metal back. For performance, vacuum carbs do best with a still air box. If you must use pods the best option is carbs with mechanically lifted slides.
 
DEEPER & DEEPER

The deeper you go the more you find.
Disassembly of the carbs is fairly straight forward; especially with the help content available on this site.
I also checked YouTube:
Interesting helpful videos and worth a look.

Each Carb was dealt with individually and parts kept relevant to that unit only.
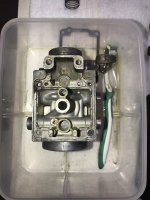
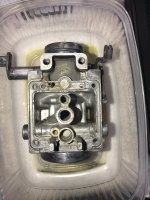
Initially the internals looked fairly good; I have seen a lot worse!
but there was still a sheen of fuel residue / varnish within.
This was thoroughly cleaned off with solvent & carb cleaner.
IMG_1038.JPEG IMG_1039.JPEGIMG_1040.JPEG
All jets & removable service elements were carefully taken out cleaned & safely stored.
Some items need to be reused as not all components are in the rebuild kits.
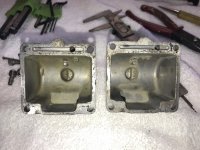
Carb internal surfaces were also cleaned thoroughly.

IMG_1041.JPEG
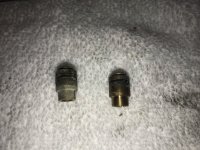
These jets above should have a small gauze filter at their base, mine are missing.
I will try and find some online /salvage. The bike did run without the filters; but better to have them in there.

Reassembly was fairly straight forward using new or reconditioned parts where needed.
Basic static set up has been done, before fine tuning when reinstalled on motor.
This is the end result ready for putting back on the bike
IMG_1042.JPEG IMG_1043.JPEG
Not super-shine clean like Bob's; but good enough for my regular Sunday ride.

Cheers A :devil:
 
Back
Top