Could a washer destroy a bike?

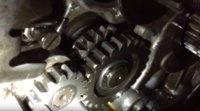
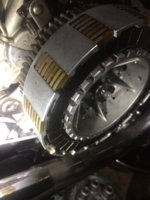
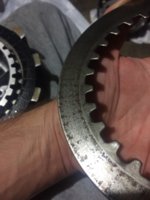
I can't get in the garage tonight but I did manage the below video showing what is behind the clutch basket. Maybe that is what is doing the damage, but what cause it to happen in the first place?

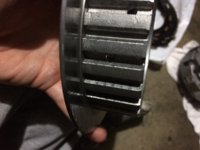
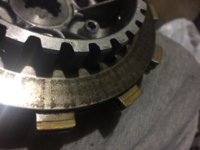
The Yamaha specs looks like mine, I can't do a proper check until tomorrow but I have all those parts (I believe) maybe they are in the wrong order?

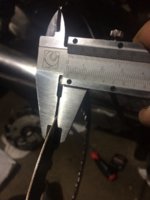
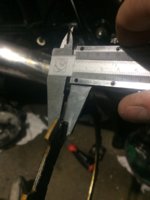
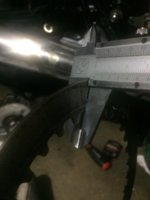
I do have to get some calipers!


https://drive.google.com/open?id=0B3tSQlhhBRz9d250U21DNDBocWc
 
There are two different methods to secure the clutch. One that peanut refers to and the one Skull posted.
 
There are two different methods to secure the clutch. One that peanut refers to and the one Skull posted.

Yes there is a diffence of opinion about the the placement of the tabbed locking washer and I did amend my original image,... although either method works just as effectively..

However .....the placement of the locking tab washer under the locknut and washer would not make not one single jot of difference to the operation of the clutch assembly as you are well aware .

Neither would it make any difference whatsoever to the overall combined thickness of all the washers shims bearing and clutch plates .

Lets stick to the essentials shall we and see if we can discover what installation sequence the op has used and why the clutch is projecting beyond the lip of the clutch basket fingers so that we can get his clutch working properly again:)
 
dunno mate the video is jumping around so much its hard for me to focus on anything.
I would say that the part you are referring to is the starter motor transfer shaft and associated cogs. Looks like the teeth have been chipped by something but its not likely to effect your starter operation. I'd focus on your clutch for now and get that working first.

Have you got hold of a vernier gauge yet and measured the thickness of the clutch components as requested ? Until you do that we can only speculate what the issue/s might be.
 
I can't view any of the videos... it starts out like it's loading and just keeps loading forever !
no errors or anything it just does nothing.....dunno what's up !
......
Bob..........
 
There are two different methods to secure the clutch. One that peanut refers to and the one Skull posted.

Yes there is a diffence of opinion about the the placement of the tabbed locking washer and I did amend my original image,... although either method works just as effectively..

However .....the placement of the locking tab washer under the locknut and washer would not make not one single jot of difference to the operation of the clutch assembly as you are well aware .

Neither would it make any difference whatsoever to the overall combined thickness of all the washers shims bearing and clutch plates .

Lets stick to the essentials shall we and see if we can discover what installation sequence the op has used and why the clutch is projecting beyond the lip of the clutch basket fingers so that we can get his clutch working properly again:)

peanut unbunch your panties. What you don't seem to be aware of is the fact two separate methods were used to serve as a locking mechanism.
One is the lock tab what you have.
The second is the use of a Belleville washer or conical spring which AussiXS shows and remarks that it is quite dented in.
So in fact he does have the correct washer in the correct spot and you learned something today.

@ AussiXS, the gear you are asking about is the number 4 starter gear. Put a screwdriver against it and you will see it slides in, to mesh with the crank and that is what spins the motor. You are this far in I would go ahead and tighten the wishbone clip spring on the number 4 gear. Too loose and your gear spins too fast trying to mesh with the crank. Behind that gear is a coil spring that returns the gear or helps with dis-engagement I like to give it a pull to stretch back out some. In the past some have removed this coil spring. 5twins or PamcoPete can comment more on this, maybe others.

This picture is the two different baskets one a 6 plate (on the right) the other a 7. The six plate is easily identified by the grove cut in the splines to retain the cushion plates and the raised lip at the bottom.
IMG_20140319_130133_552.jpg


And since it comes up now and again this foto is the stack up of the 3 plates under the wire. First on is the smaller OD solid ring, then the wavy washer ring (it does have a lip that centers it to the first plate that is what I'm trying to show by holding it) and then the splined metal plate. All held in place by the "spring wire" you see under them.
In carbon's video this is what he keeps reaching in to try to remove after he has removed the others. The "spring wire" retainer is why he couldn't pull them out.
IMG_20140421_132149_867.jpg


The raised lip is what is machined off if you did an Ippytattoo 8 plate conversion using a 6 plate clutch.
 
Ok, let's do that!

I will get the calipers today and measure them tonight and let you guys know. I'll also take a picture of my VIN plate and we can know where we stand.

I thought that behind cog would have something to do with the clutch, ignorance is not bliss! Attached is a picture of the cogs, rather than a video.

Cheers for the help guys, I cant wait to get her back on the road!
 

Attachments

  • Cogs.JPG
    Cogs.JPG
    85 KB · Views: 194
There is a tolerance of .4mm for wear on the friction plates. This can be done using a simple ruler or tape that has clear markings. ...............Yes vernier caliper will give an accurate reading, a tool worth having..............

Here is my list as off this point for the clutch basket.

Some of his is in your manual.

Check the plates for warp-age........lay them on a flat surface.......if more than a 0.02mm gap, (use feeler gauge), then they are damaged and need replacing..........If ok then it is a recommendation they be scuffed up before reinstalling. Different ways to do this. Rubbing lightly in a circle motion on a smooth concrete surface, (finishing trowel SMOOTH), or some wet and dry about 400 grit or higher............also a lite, (lite) file of the edges as mentioned in post #60 , When reinstalling have the rounded edge facing up, towards installer.

Check the friction plates for damage, obvious signs of slippage. usually some discoloring and obvious slipping marks, also check the tangs, sometimes they do chip, and some of the actual plate may disintegrate............may need a good wash if the clutch has been sitting for a length of time. If you do this make sure they are dry and then soak them in fresh correct oil for a day. If the plates are in spec and good condition they are good to be reused.

If all the washers and thrust bearing are there rebuild the clutch...........Your basket for a 78 should have 7 friction plates and look like the basket on the left in Wer's fist pic post #68.

From a mechanical point of view a tabbed lock washer needs to be against the intended part for proper use, having a washer between the lock tab and its intended part will mean the tabs won't be doing their job properly........possible failure..........

No need for the pressure plate screws just yet make sure the basket has gone back together and the pressure plate sits nicely with the Primary drive gear basket
 
...dunno mate the video is jumping around so much its hard for me to focus on anything...

*whew*, even I got airsick. But, was able to snap a couple of stills.
Several members have mentioned that your clutch worm (actuator) is setting too high. So, let's elaborate.

Sprocket/chain scratches on the clevis, setting too far out.
Seal cup is now bent, from jamming into the case protrusion.
Too much gap between the seal cup and the mount screws.
WormTooHigh01.jpg


When the seal cup hits that protrusion, clutch actuation gets jammed.
WormTooHigh02.jpg


When properly seated, the sealcup sets very close to the mount screws.
WormTooHigh04.jpg


And, on the outside, the worm threads will appear flush with the nylon body threads.
WormTooHigh03.jpg


Please revisit peanut's 2nd video in post #34. Especially about halfway thru, where he mentions clocking the lever arm at 3 O'clock during insertion.

More exhaustive info in here:

http://www.xs650.com/threads/xs650-clutch-worm-actuator-experiment-tidbits.31554/
 
Thanks for the post Toomany, I'll look at the worm tomorrow.

When it comes to the clutch, here are my pictures! The steel plates don't seemed warped, nor do the clutch plates. It does look like I need to file the inner splines of the basket that the steel plates run against (excuse incorrect terminology).

I will do some proper work this weekend to sand and the steel plates and file (lightly) the basket.
 

Attachments

  • IMG_4571.JPG
    IMG_4571.JPG
    144.7 KB · Views: 219
  • IMG_4570.JPG
    IMG_4570.JPG
    145.5 KB · Views: 201
  • IMG_4568.JPG
    IMG_4568.JPG
    137.7 KB · Views: 240
I have purchased my caliper and have measured them, great little device!
 

Attachments

  • IMG_4568.JPG
    IMG_4568.JPG
    137.7 KB · Views: 227
  • IMG_4567.JPG
    IMG_4567.JPG
    126.2 KB · Views: 199
  • IMG_4566.JPG
    IMG_4566.JPG
    125.8 KB · Views: 218
  • IMG_4566.JPG
    IMG_4566.JPG
    125.8 KB · Views: 201
  • IMG_4564.JPG
    IMG_4564.JPG
    120.4 KB · Views: 219
Please excuse the multi posts and repeat pictures, my phone is rubbish!

So I have 3mm on my clutch plates and my Steele plates are 1mm and a little bit, Hmmm.
 

Attachments

  • IMG_4563.JPG
    IMG_4563.JPG
    138.1 KB · Views: 181
Do you know how to read the vernier scale, for the fractions?
The steels should be 1.35mm (0.053"), your caliper shows that.
The frictions should be 3.0mm (0.118"), your caliper shows that.

Thicknesses look ok.
Your pic #1 of post #74, of the assembled (7) plate clutchpack, looks ok...
 
great posts 2M :thumbsup:
Aussi well done mate ...good to see you now have a vernier gauge, that will help us get to the bottom of this problem a lot quicker as we will be able to eliminate a lot of potential problem components.

You've got some of the foremost knowledgable and experienced forum members working with you now... (note : I don't include myself obviously :))
We should get this licked pdq and get you riding this bike soon.

One more little thing to check re the worm mechanism , make sure that it rotates really easily .I found with mine that over-tightening the 2x worm fixing screws into the cover caused the worm to bind badly due to distortion of the worm base.
 
Minor side track, I was brought up on vernier scales and slide rules but was never a machinist. Hand me a digital caliper please. I only grab the vernier when the others are a long walk away. Then I have to "relearn" reading it, each year that is more of an effort, With "works fine" digitals in the $10 USD range it's kinda hard to believe verniers are still sold.
 
Minor side track, I was brought up on vernier scales and slide rules but was never a machinist. Hand me a digital caliper please. I only grab the vernier when the others are a long walk away. Then I have to "relearn" reading it, each year that is more of an effort, With "works fine" digitals in the $10 USD range it's kinda hard to believe verniers are still sold.

Another minor side track, Gary I was searching info for my Honda Shadow the other day and as I was scrolling down I saw a shadow in front of a garage that looked VERY familiar. I thought to myself... Hey, I know that garage... Then looked who posted the photo... What would you know gggGary.... Giving me info somewhere else on another bike, unintentionally. The all seeing, all knowing eye.....:cheers:
 
Back
Top