Miss November XS2 tribute

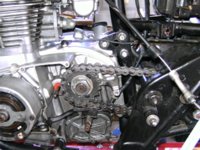
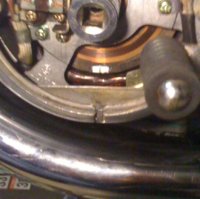
When I fitted a Boyer Bransden to my SH I manually added a full advance mark by doing some quick trig calculations and then stepping it off with a compass. Shortly after I saw an account by Pamcopete saying full advance coincides with the center of the marking on the alternator. I checked and so it did:
Full Advance2.jpg

Note: When checking the timing do not leave the socket and wrench attached to the crank. When you start the engine the wrench will fly off at considerable speed. Of course I am not stupid enough to have done that...:er:
 
When I fitted a Boyer Bransden to my SH I manually added a full advance mark by doing some quick trig calculations and then stepping it off with a compass. Shortly after I saw an account by Pamcopete saying full advance coincides with the center of the marking on the alternator.

Thank you for this - confirms what 5T said that the drain corresponds to Full advance. But expect I'll measure off and make a mark anyway, maybe a blob of paint.

However this morning's little job was fitting the regulator. Why is is that as soon as you step away from bog standard, life gets so much more interesting? The solution I came up with to 'house' the Fiat Uno regulator was to cut a piece of foam rubber shaped to be a squeeze fit in the tool box. Then, halved the piece and used a hot soldering iron to hollow out beds for the flasher unit and regulator. BTW, melted foam rubber stinks so it's a test of holding the breath. Cut the Fiat connector off, fitted some bullet-types, modified a tab washer, nut and bolt to affix an earth (ground) to the reg. And then stuffed the lot out of sight and hopefully out of mind.


PICT2132.JPG


It sure ain't purdy. But I feel this is one case where pretty is as pretty does.
 
Last edited:
Paul said:
Note: When checking the timing do not leave the socket and wrench attached to the crank. When you start the engine the wrench will fly off at considerable speed. Of course I am not stupid enough to have done that...:er:[/QUOTE]

Yeah! and if your using a box end wrench, it will come around and smash the Alt brush holder! Who did that?:whistle:
 
Gentlemen, thank you all for your continued interest in my bodging an old motorbike. And for giving me a few laughs along the way.

Progress today, not exactly lightning. Inchstones not milestones. This afternoon, wired the Neutral switch.

Which took all afternoon.

I blame the tiny, inaccessible screw, the stiffened-up rubber boot and the tired brass clip. Given that there's not enough room under the carburettor for a hand holding a screwdriver to start with, it is just about verging on bloody impossible to get access to the screw when the solidified boot refuses to budge. Eventually solved that one by immersing the assembly in a cup of boiling water till a confession was extracted.

Soon became cheesed off (British expression) trying to persuade the claw-shaped brass clip to stay in place long enough to secure the screw.
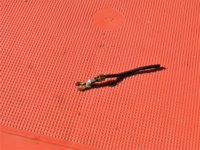

PICT2135.JPG


So decided after 42 years the poor thing really deserves retirement. New neutral cable with a terminal washer - at least that won't slide off. Rubber boot back in boiling water of course, but it's become used to my interrogation techniques and there is just no way it will slide over the tab washer.

It's resistance only lasts until I drill out it's orifice. Harsh but fair, I hope you will agree? One final waterboarding session and it fits in place. Still doesn't look quite right, but it probably never did even when new.
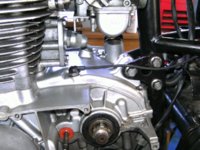

PICT2134.JPG


So there we are, armoured with heat shrink, nice new bullet to fit into the harness. And the good news it, the Neutral light illuminates.

Hoo-bloody-ray!

And I'm sorry but that was enough for today.
 
at Paul:
My incident was over 30 years ago when I was trying to see if I could get it started. It would only run on one. I was dicking with the points and good thing I only had the kick start. It would have been like knocking the froth off a beer. I relegated it to "Deep Corner". Hardly anything ever comes back from "Deep Corner". Everybody has one except, for maybe, Mailman! :wink2:
 
Yes, that rubber boot on the neutral switch is usually pretty hard and difficult to fit. Try it after a ride while it's hot (and softer). That's how I got mine to fit eventually. Get it on there while hot and once it cools, it should stay and now be "form fitted", taking the shape of the hex you've managed to fit it over.
 
Try it after a ride while it's hot (and softer).

Yes, that thought was one of the milder ones that passed through my mind while I was trying to get at that nigh inaccessible screw this afternoon.

BTW, anybody know size/designation of that screw?
 
I use my hot air gun for the neutral rubber boot and any other rubber or plastic fitting that give me trouble. When I worked on a building site in Australia in the early 80s the old foreman taught me a trick I still use today. When a power extension cable gets all twisted up just lay it outside in the sun to heat up. Then coil it up and it will be free from all those twists.
 
BTW, anybody know size/designation of that screw?

Yes - that little neutral switch screw on the XS650 is manufactured with the seldom used BUS head form. This screw head geometry is used sparingly by most motor vehicle brands - but nearly all of them do occasionally resort to it and unfortunately, some use it quite often (come on down General Motors!).

In fact, the Storage-battery Homologation and Installation Team at GM in Warren MI actually are the largest users of the BUS screw head form within the auto industry - with the 3.5 litre Eco-Boost Waterpump Design group at Ford running a close second.

OK - now everyone is wondering what the designator BUS stands for and for the record, let me tell you that it is not:
  • British Uniform Standard
  • Belgian Undigified Sonofab!tch
  • Byelorussian Unbelievably Stuffed-up
  • Botswana Unfortunately Silly
....it actually stands for Buggered Unreachable Strippable.

Knowledge is power my friends!
 
Now that you mention it, 5T, mine looked like it had been leaking. Plastic center was a bit loose in the metal. I cleaned it real good with carb cleaner and forced red high temp silicone "pookie" ( Technical name) around between plastic and metal with a tooth pick. It works and doesn't leak. Made sure I didn't over tighten it!
 
If it's one thing I've learned about these bikes, since June last year, there are a lot of cheap parts for these bikes but none are inexpensive.
 
In fact, the Storage-battery Homologation and Installation Team at GM in Warren MI actually are the largest users of the Buggered Unreachable Strippable screw head form within the auto industry - with the 3.5 litre Eco-Boost Waterpump Design group at Ford running a close second.

You got that right, Pete. Well, at least during yesterday's adventures I only dropped the little sucker on the garage floor just the once . . . all adds to the fun, doesn't it?

When the present restrictions are eased, might make an outing to John D Falla at Bonchester Bridge. I mentioned them once before in this thread. See if they can rise to the challenge with the wee screw.
 
Last edited:
Yesterday, tortured a poor old neutral switch fitting. Today, upped the ante.


PICT2136.JPG


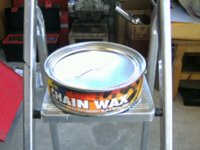
That chain has been boiled in oil. Literally.


PICT2137.JPG


Am I the only person who still uses one of those? Our village m/c engineer no longer stocks them because nobody has bought one for years and years. So I had to go on that internet to find one. Chain showing the effects of exposure to salt on the roads so I felt desperate measures were needed.

But I might have made a mistake because it clearly says not suitable for O-ring chains. Oops. Well, the chain looks as though it has survived . . .
 
I bought one of those cans of graphite grease for my RD250B in 1979 in NZ. I would clean the chain with petrol first, let it dry, coil the chain up and place it on the solid grease then heat on the gas stove. I always tied some wire to the chain end so I could get it out of the hot grease without burning my fingers. The brand on mine was Duckhams.
 
Back
Top