Cafe Racer build in Texas

Diebold2020

XS650 Member
Messages
24
Reaction score
66
Points
13
Location
Dallas, TX
Hi all,
I thought I'd start a post about my build since I have a ton of questions. I've always liked the cafe racers from the late 60's, British twin bikes stripped down to make the block before the jukebox stopped or finding enough road to "hit the ton." That's why I chose the Yamaha XS650. I bought my 1981 Special 2 in 2010. It wasn't running but it had a title and was only $800. I strapped in down to a trailer and got it home and after a few weeks of diagnosing I found the reason for no spark was the ignition box on the 80 model xs's. I put a Pamco ignition on it and it fired up! At that point I stripped it down and sent the frame and swing arm to be powder coated. I ended up buying a bunch of parts that I intended on using that just sat in boxes on my garage shelves for years. I admittedly had a problem of seeing project bikes for sale that I just couldn't pass up so my xs cafe project sat in the corner for some years. After getting married my wife cured me of my disease and I sold off all my project bikes except for the xs. This was the one that I really wanted to finish. I had put new swing arm bushings in and got the swing arm mounted, I put on new rear shocks, I rebuilt the front forks with new seals, rebuilt the front brake caliper, and managed to mount on some old Magura clip on handles that I acquired during the purchase of a 78 CB750. I bought new hoops, shined up the hubs, and laced the new wheels. Before I could get tires mounted I needed to get the wheels trued but couldn't find anyone local to do it. So again it sat for about two years. I recently got a fire under my ass and picked up the project again and found a local guy to true the wheels so I recently got tires mounted and on the bike so I have a rolling chassis now. The bike only had 6,000 miles on it when I got it but I wanted to rebuild the engine, at least the top end, and get it nice and shiny. That's when I started lurking around here and found the 750cc big bore kit. I pulled the plug and picked one up and now I'm getting ready to tear down the engine and get it running again. I'll post pics and updates as I go along, and I apologize if I ask redundant questions that have been answered a million times before but I really want to do this myself as I'm on a budget and I believe in "Built not Bought."
20230615_175852.jpg
IMG_1169.JPG
 
As you can see I ditched the original tank and picked up an old Triumph tank off eBay. I'm going to have to find a local guy that can help me fab up brackets or some way to mount it to the frame. I also upgraded the rear 16" wheel for the 18". My first question is about the drilled rotor from yamahaxs650.com. It came with two caliper spacers but when I installed them the rotor sat very far back to where it was rubbing the inner pad. I added some washer to shim it back and it works now but I was wondering if anyone else had this issue before.
20230617_112316.jpg
 
My next question: Is there a master list of parts I will need to do an engine overhaul? Gaskets, seals, etc? I wanted to just do the top half but do I need to go ahead and pull the bottom as well?
And as far as cams I've noticed there are a few performance cams available. Is there one that works best with the 750cc big bore kit?
 
Hi all,
I thought I'd start a post about my build since I have a ton of questions. I've always liked the cafe racers from the late 60's, British twin bikes stripped down to make the block before the jukebox stopped or finding enough road to "hit the ton." That's why I chose the Yamaha XS650. I bought my 1981 Special 2 in 2010. It wasn't running but it had a title and was only $800. I strapped in down to a trailer and got it home and after a few weeks of diagnosing I found the reason for no spark was the ignition box on the 80 model xs's. I put a Pamco ignition on it and it fired up! At that point I stripped it down and sent the frame and swing arm to be powder coated. I ended up buying a bunch of parts that I intended on using that just sat in boxes on my garage shelves for years. I admittedly had a problem of seeing project bikes for sale that I just couldn't pass up so my xs cafe project sat in the corner for some years. After getting married my wife cured me of my disease and I sold off all my project bikes except for the xs. This was the one that I really wanted to finish. I had put new swing arm bushings in and got the swing arm mounted, I put on new rear shocks, I rebuilt the front forks with new seals, rebuilt the front brake caliper, and managed to mount on some old Magura clip on handles that I acquired during the purchase of a 78 CB750. I bought new hoops, shined up the hubs, and laced the new wheels. Before I could get tires mounted I needed to get the wheels trued but couldn't find anyone local to do it. So again it sat for about two years. I recently got a fire under my ass and picked up the project again and found a local guy to true the wheels so I recently got tires mounted and on the bike so I have a rolling chassis now. The bike only had 6,000 miles on it when I got it but I wanted to rebuild the engine, at least the top end, and get it nice and shiny. That's when I started lurking around here and found the 750cc big bore kit. I pulled the plug and picked one up and now I'm getting ready to tear down the engine and get it running again. I'll post pics and updates as I go along, and I apologize if I ask redundant questions that have been answered a million times before but I really want to do this myself as I'm on a budget and I believe in "Built not Bought."View attachment 246040View attachment 246039
Welcome to the family.
great bones for the build too; which I looking forward to following.
Ads.
 
My next question: Is there a master list of parts I will need to do an engine overhaul? Gaskets, seals, etc? I wanted to just do the top half but do I need to go ahead and pull the bottom as well?
And as far as cams I've noticed there are a few performance cams available. Is there one that works best with the 750cc big bore kit?
Talk to Gary Hoos at Hoos Racing. He'll put you on the right path.
 
If you're doing the top end, why not do the bottom end too, then you'll have a new motor instead of a new top end on an old bottom end, makes sense to me. You'll have to pull the motor anyway.
You won't know what parts you'll need until you pull it apart and check. As a minimum requirement, however, you'll need a gasket set, a seal set and a couple of filters. Stainless Allen's would also be a good addition.
I'd replace the cam chain while you have it apart, also the guides as they tend to delaminate and regrind the valves.
The rest depends on what you find: Rebore, new pistons and rings, new valves, new mains, new big end bearings, new gearbox bearings, starter gear and spring - the sky's the limit.
Old bikes are a bucket of worms, you never know what you'll find. When in doubt, rip it apart, have some fun!

You laced the wheels but needed someone to true them??? That doesn't make a lot of sense!
 
Last edited:
Pulled the head today. Rocker arms looked good, no signs of any problems. Unfortunately I did bend one of the spacers between the lower and upper head so that will have to be replaced. The cam chain tensioner had a little of the plastic edge peeling off so I'm wondering if I can replace the plastic insert or if I'll have to replace the whole thing. How's the best way to polish these pieces? Do they need to be sandblasted first?
20230630_162411.jpg
20230630_162407.jpg
20230630_162301.jpg
20230630_162411.jpg
20230630_162407.jpg
20230630_162301.jpg
20230630_162249.jpg
20230630_161328.jpg
 
I'm not sure how or when I broke the end of my advance rod but I found the nut with the rod tip inside when I took off the cover.
20230630_180203.jpg
 
View attachment 246315That goes in the trash and replace with a new one.
View attachment 246316 How in heavenly days did you break that?
I broke it by not following the manuals direction of loosening order. I just took them off one at a time in no particular order. My 1980 Clymers will have to be replaced, also. It split in two today. 😞
 
I broke it by not following the manuals direction of loosening order. I just took them off one at a time in no particular order. My 1980 Clymers will have to be replaced, also. It split in two today. 😞
I've knocked down a few 650 motors and never worried about any order for loosening things. Has the motor been apart before?
 
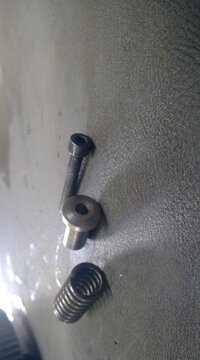
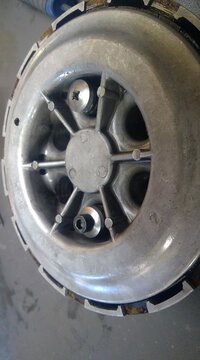
Placed a huge order for new parts this weekend (I hope my wife isn't reading this...) and popped off the right side cover on the engine. I'm not sure why the engineers at the factory thought it was a good idea to put phillip head bolts under so much torque but in order to get the clutch pack off I had to remove 6 phillip head bolts. My impact screwdriver took care of the first 5 with no problem but of course the last bolt stripped out. So I whipped out the dremmel and cut a slit in the head and was able to use the impact screwdriver to get it out. My next question is do they make a hex head replacement set?
20230704_144758.jpg
20230704_150539.jpg
 
Last edited:
The pressure plate screws aren't Philips heads, They are JIS heads, they look similar, but the slot angles and depth are different. You can use a JIS driver on philips heads, but not philips heads on JIS. That's why you see so many stripped heads on Japanese bikes, just about all Japanese manufacturers use JIS head screws. JIS screwdrivers are available from most tool shops, if you are intent on retaining JIS heads.

I also modified the pressure plate screws on the clutch basket on my lathe to take allen heads. Incidentally, you can modify the standard screws with a bench drill; Cut the thread off and mount the pressure plate screw in the bench drill chuck and place the 6mm drill bit in the vice, nice and upright, then drill through. If you try to drill through the pressure plate screw with a bit in the chuck and the screw in the vice, the hole will go off centre.

The pressure plate screws don't need to be counterbored to take the allen head, there is sufficient space between clutch basket and cover.

You can buy allen head pressure plate screws from most XSarts outlets though.
 

Attachments

  • 2.jpg
    2.jpg
    67.3 KB · Views: 46
  • 3.jpg
    3.jpg
    64.9 KB · Views: 47
I've never even heard of JIS screws!! Well thats good to know going forward. I'm just going to order a set of screws. I don't have a lathe so I'll go that route. Thanks for the info!
 
Like I said, you don't need a lathe, a drill press will suffice.

I don't see the point in replacing pressure plate screws with allen heads unless the originals are cactus. They are not an oft removed piece, however, outer case screws are a different matter, replacing the case screws with allen heads is always a good move.

Another incidental: if you have solid inlet needles in your carbs and they leak, you can reface them in the drill press. Just place the needle in the chuck and use a fine grit wet and dry to face them. Worked for me on different bikes for years.
I don't have a drill press either. 😞
 
Back
Top