Whatever the issue I seem to have it sorted out. Both sides running strong, idling and good throttle response. I have a buddy that has a color tune and is really good with Japanese carbs so maybe I’ll get him to take a look. Next up, the clutch plates I got from Gary. Clutch lever is almost all the way out when I get engagement So it can’t hurt to swap those fiber plates and springs out. Headed down to Texas at the end of the week but I’m sure everything will be waiting for my return….
-
Enjoy XS650.com? Consider making a donation to help support the site.
XS650.com receives a small share of sales from some links on this page, but direct donations have a much greater impact on keeping this site going.
You are using an out of date browser. It may not display this or other websites correctly.
You should upgrade or use an alternative browser.
You should upgrade or use an alternative browser.
Project Bobber X2.2 the rework.
- Thread starter Wingedwheel
- Start date
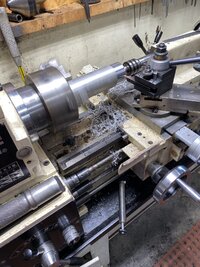
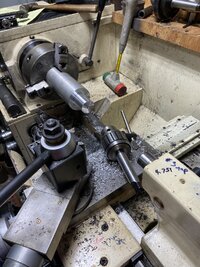
While I’m here I decided to take advantage of the BIL and use his lathe and pile of stock to make new rear wheel spacers for the TX Cush conversion. I had cut new spacers from an old one I had but I wanted one-piece ones, not several pieces like I had so I sketched up what I needed before I left.
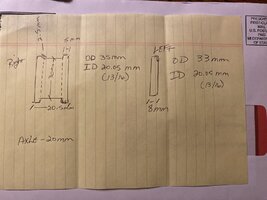 The only aluminum stock he had was 2” and I needed to turn it down to 35mm for the spacers. Once it was turned down we also had to bore the center because he didn’t have a 13/16”(20.05mm) bit for the ID. I like how they came out.
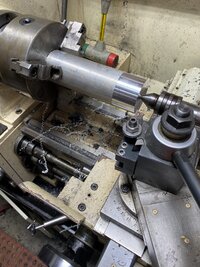
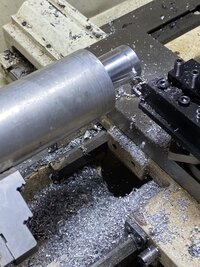
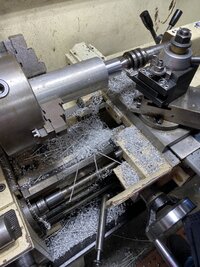
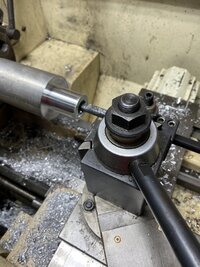
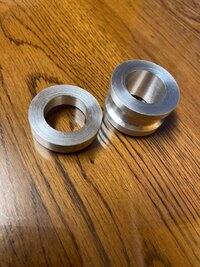
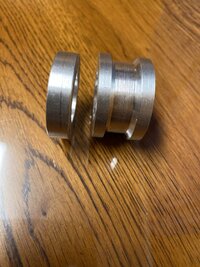
 The only aluminum stock he had was 2” and I needed to turn it down to 35mm for the spacers. Once it was turned down we also had to bore the center because he didn’t have a 13/16”(20.05mm) bit for the ID. I like how they came out.


Attachments
Last edited:
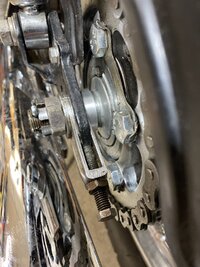
What a great day I had once I decided to quit procrastinating. The sun was shining for the first time in two weeks and it just helped me get going. I’ve been wanting to install the clutch plate I got from Gary and check a couple things while I was in there. I set a small space heater by the bike to warm the engine oil just a bit. I wasn’t too worried about it being a little thick as it was new anyway.while I was waiting on it to drain I figured since the right side exhaust was off I could pull the rear axle and install my new spacers. They fit beautifully!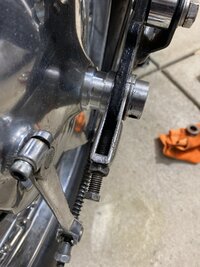
The clutch side cover came off so cleanly it was scary. Gasket stayed on the engine in one piece and was in good shape. Looking at the old plates I’m pretty sure they were OEM factory. Bike had 24,000 when I got it and nothing had been done but riding it hard.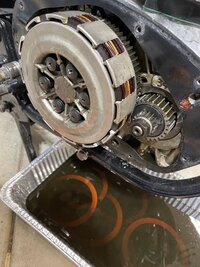 the pressure plate bolts had varying degrees of pressure on them which led me to think the springs were worn. Good thing I had a new set from 10 years ago that I never installed and the were visually taller or perhaps not worn out. I checked the old plates for wear and they were right on spec at 3.5 mm. That was odd but there was something going on. Once I installed the 7 new disks, one new metal plate and new springs I squeezed the clutch reached down and turned the back wheel and slowly let the clutch out.
 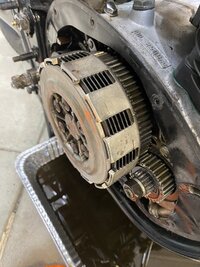 I could feel it entering the friction zone at about 1/4 out. Quite an improvement! I didn’t get a chance to start it today, but tomorrow is supposed to be sunny as well and I might get a little ride around the neighborhood in to check that clutch.


The clutch side cover came off so cleanly it was scary. Gasket stayed on the engine in one piece and was in good shape. Looking at the old plates I’m pretty sure they were OEM factory. Bike had 24,000 when I got it and nothing had been done but riding it hard.
 the pressure plate bolts had varying degrees of pressure on them which led me to think the springs were worn. Good thing I had a new set from 10 years ago that I never installed and the were visually taller or perhaps not worn out. I checked the old plates for wear and they were right on spec at 3.5 mm. That was odd but there was something going on. Once I installed the 7 new disks, one new metal plate and new springs I squeezed the clutch reached down and turned the back wheel and slowly let the clutch out.
  I could feel it entering the friction zone at about 1/4 out. Quite an improvement! I didn’t get a chance to start it today, but tomorrow is supposed to be sunny as well and I might get a little ride around the neighborhood in to check that clutch.
One thing I did check was to see if last time I had everything apart if I had put the small washer on the bottom of the Tach drive. Yep, it was on there.
Yeah? That's something I'm going to do one day.What a great day I had once I decided to quit procrastinating.
Alrighty we have a new issue. I swapped out the 6 plate clutch for the 7 plate. Everything seemed fine however now my kicker won’t engage fully. It feels like the clutch is too tight however adjustment was made and the lever feels great but it’s still too tight to allow the kick to engage. Am I gonna have to go back to a 6 plate since this is an X2? I can turn the adjuster all the way out until it’s loose and it still won’t engage. Hmmmmm I know there is a certain pattern for the OEM plates but the new ones are all the same AFAIK.
It’s not the kickstart mechanism. I knew to be careful pulling the cover and kept the mechanism in place. I’ve revisited some parts diagrams and I think my issue lies in the cushion rings(256-6367-00-00) used in the early 6 plate clutch. I see they don’t appear in the 7 plate clutch. I reused the ones that were in the old plates with the new, soooooo what I think is happening is the rubber rings are set up for the wider plates so they hold the friction plates out just enough that I’m not getting full engagement. Unless someone else has a theory that’s the best that I got lol. I’ll have to pull the cover and remove those and in any case at least I’ll know to check it before I button things up again….. Common denominator is me..
You do not want the rubber rings in your clutch.
Thanks Greg, that’s what I was thinking.
I'm using a clutch out of a 75 in my XS2. The clutch has also been converted to a 8 plate.Am I gonna have to go back to a 6 plate since this is an X2?
I think the 7 plates will work, math sez so, I just need to reinstall them without the rings.
Pulled it back apart and removed the rings. I can see where there was an issue with that however the kick still feels “mushy”. I checked and it is installed correctly and the gear is engaging properly but it still doesn’t feel right. it feels like trying to kick it with the clutch partially in. I’ll pull the plates completely out and see what I can find.
What I found is my math was off.lol if I measure the old stack of fiber plates I get 21.8mm which is correct (3.5mmx6=21mm). Without looking closely I thought that if a 7 plate clutch converted to 8, a 6 would be a 7 plate. Nope, new fiber plates are 2.5 so 8 would be 2.5mmx8=20+1.6mm friction plate=21.6. I didn’t have enough to put pressure on the kicker gear to fully engage it. I need to order and add another steel plate And that should solve the issue as I put the old clutch plates back in to check and everything worked like it was supposed to.
After another member mentioned that the later splined pressure plates(74 up?) helped with torque transfer and provided me with the later clutch boss and pressure plate I swapped them out. Tomorrow morning I’m headed over to a buddy’s house to glass bead blast the steel plates and she should be going back together. Fingers crossed this does the trick to increase my friction zone.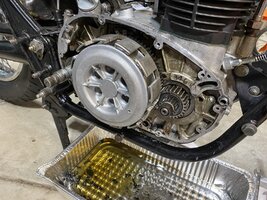 While under the cover I saw these numbers in marker. AFAIK I’m the only guy that’s been in there. Could that be factory markings? I’m pretty sure I didn’t write it last time I was in there but that was 10 yrs ago. Like I’m gonna remember doing that lol
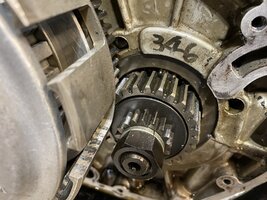
 While under the cover I saw these numbers in marker. AFAIK I’m the only guy that’s been in there. Could that be factory markings? I’m pretty sure I didn’t write it last time I was in there but that was 10 yrs ago. Like I’m gonna remember doing that lol
I was wondering about that but didnt recall seeing anywhere that was mentioned. If I do I’ll have to source a set.I'm not sure, but you may need to use the newer 1.4mm thick steel plates as well.
Yep, I just looked and you are correct. I am my own worst enemy sometimes…….
Done and done. Well I guess she’s gonna sit a couple more days. Set of 6 plates should be here by Fri. Thanks for mentioning that 5T. That’s what I like about the forum, other members keeping me straight…..

