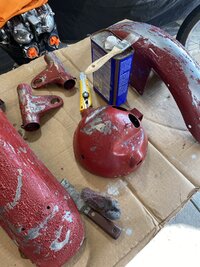
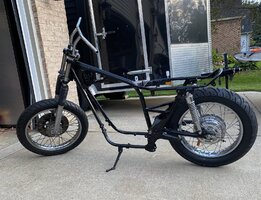
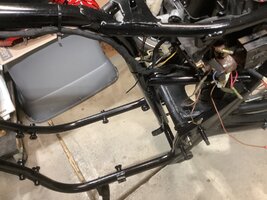
Don't know if you're planning to, but I'd highly recommend using plugs and rosette welds to join the two aft uprights. The shocks are tied to those tubes.new parts showed and I wanted to install the tire sprocket and set the wheel aside. I needed longer bolts so up to the hardware store and picked up 5mm longer bolts. They were a 10x1.25 and I took an original with me just to make sure. Went to install the sprocket and last two bolts don’t want to go in. Switched a couple around and the problem wasn’t the hub, two of the six bolts were a 1.50 thread so back up to the hardware to exchange. Luckily it’s close. Took out the grinder today as well because it’s time to get this back together the right way. I cut off the brat tail leaving just a bit so I could grind down to where I needed to be. No sense in trying to get too close with a cutting wheel because that never turns out good for me..I then cut the new frame section the same way, walking my grinds into the profile I needed. I still have just a fuzz of fitting to do and set a couple tack welds so I can go get this frame welded with a 220v machine.View attachment 251293View attachment 251294
-
Enjoy XS650.com? Consider making a donation to help support the site.
XS650.com receives a small share of sales from some links on this page, but direct donations have a much greater impact on keeping this site going.
You are using an out of date browser. It may not display this or other websites correctly.
You should upgrade or use an alternative browser.
You should upgrade or use an alternative browser.
Project Bobber X2.2 the rework.
- Thread starter Wingedwheel
- Start date
Yep, picked up plug material while at the Hardware and also ruined a cheap 13/16 bit drilling the ones from the brat tail out. I know it’s a critical area and that’s why I’m not doing it myself! LolDon't know if you're planning to, but I'd highly recommend using plugs and rosette welds to join the two aft uprights. The shocks are tied to those tubes.
You must live in Michigan, lol! FWIW, I used to have a mosquito issue. I live next to a river in N. Michigan and mosquitos would get so bad you'd literally have to run to your car and hope they don't follow you in when shutting the door. I bought a Stihl backpack sprayer and some bio/human/pet friendly chemicals from a DIY pesticide seller. Once a month treatment and we fully enjoy the outdoors again. Problem solved.Getting anything done outside right now is brutal due to clouds of marauding mosquitos.
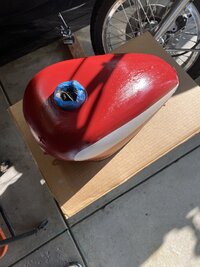
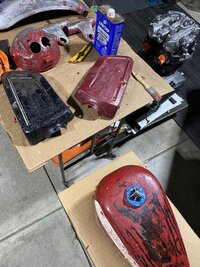
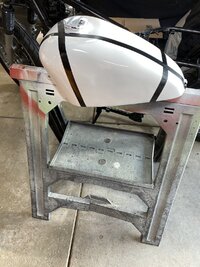
Strippers these days suck. That tank had 7 layers of paint, two were mine. I picked it up at a swap meet and it had a beautiful gloss black paint job. Underneath that was white and under that a cool looking candy sparkle red. I also found one tiny bondo spot thus the change from the red to the white. 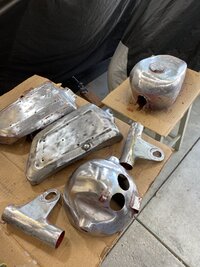 I still need a final sand and I won’t do the fenders until I figure out if I’m using them or not. Welding the frame in the morning.
 I still need a final sand and I won’t do the fenders until I figure out if I’m using them or not. Welding the frame in the morning.
Success today and I couldn’t be happier! Welding went well and that’s a huge thing done. Beags64 did his impression of Travis’s profile pic lol. Next up the wire wheel and some gloss black rustoleum. I want to get back to a roller so I can function in my garage again. I can give the paint a couple days to harden while I reinstall the starter and gears. 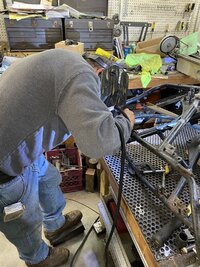
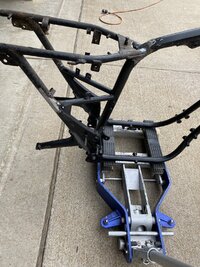


Last edited:
That Beags is pretty talented ain't he... 

I’ll also add that my last order from 650Direct included a set of their XS Performance tapered steering bearings. I’ve always used all ballz but saw the ones on the site and figured I’d give them a try. They were noticeably thinner IMHO so using the spacer helped.It was a little scary at first with spacers and no directions but I figured it out and we’ll see how these hold up.
Another great weather day! I prepped the tank and side covers and after shooting the first coat I went after the motor. I replaced a leaky clutch push rod seal, reinstalled the starter and gears and put the new front sprocket on. When I bent the retainer up the sprocket shaft nut was not tight! I have no clue how that happened but it did cause the sprocket to get chewed up. 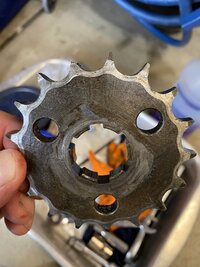 Tank and covers came out great now everything is ready for a clear coat of Spraymax 2K. I’ve been wanting to get to this point because I need to spray CC on the ‘75 tank and covers as well, more on that later.
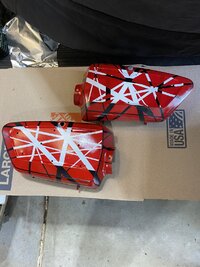
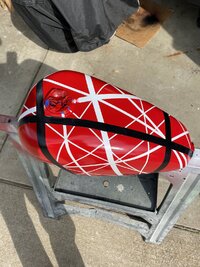
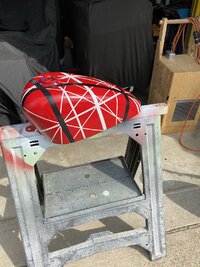
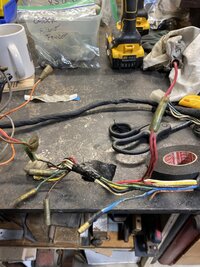
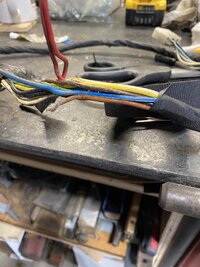
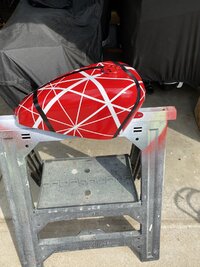 I also started re-wrapping my EBay harness and everything was looking good until right at the end and I ran across this bare wire. Judging from the location it’s possibly for the flasher relay but I can cheat and look at the other XS2. Lol
 Tank and covers came out great now everything is ready for a clear coat of Spraymax 2K. I’ve been wanting to get to this point because I need to spray CC on the ‘75 tank and covers as well, more on that later.


 I also started re-wrapping my EBay harness and everything was looking good until right at the end and I ran across this bare wire. Judging from the location it’s possibly for the flasher relay but I can cheat and look at the other XS2. Lol

Last edited:
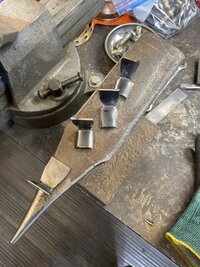
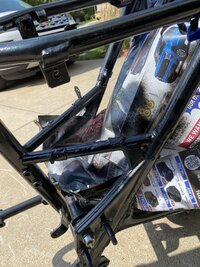
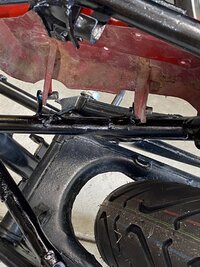
Today was something I had been kinda putting off but it needed to be done before the engine goes back in. One of the things I “trimmed” on the original frame were the side cover lower tabs. I had to put everything in the frame to make sure it was fitting correctly and I made my tabs out of some 18ga stock. I basically made the bracket and drilled and tapped a hole for an M6 bolt. Some locktite on the threads and a sleeve of 1/4” vinyl fuel line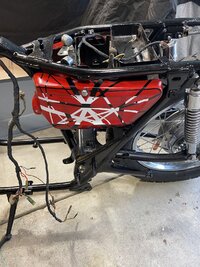
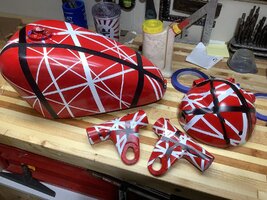
 . Finished the paint on my tins and just need a really nice day to Clear everything.
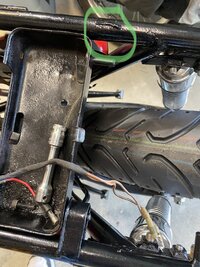
 I also had to add a new loop for the back battery box pin mount. I made it without the seat latch catch so we’ll see if that bites me.
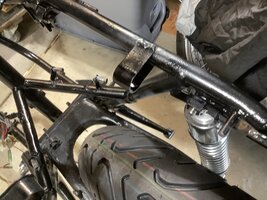 please do not look too closely at the welds. I really need to practice and buy a roll of smaller wire! Lol


 . Finished the paint on my tins and just need a really nice day to Clear everything.
 I also had to add a new loop for the back battery box pin mount. I made it without the seat latch catch so we’ll see if that bites me.
 please do not look too closely at the welds. I really need to practice and buy a roll of smaller wire! Lol
Last edited:
I had planned on using a later year control on the RH side to eliminate the starter lever but comparing them I realized the lighting controls were all in the LH side and are bundled in a plug so it would have taken a little reworking of the wires. The issue I ran into was not being able to find a decent LH control that would do what I wanted and still be of a little quality. I even looked ant other brands but after a lot of hmmmm and hawwwwwing. I just ordered two repops. Yea, I know. I took the easy way out…..
Got the wiring done for the ignition and charging circuits with everything tucked in real nice and tidy like it’s supposed to be and I’m happy with how the harness worked out(so far).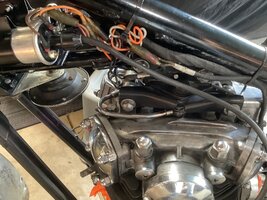
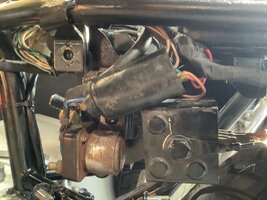 I only found two small potential issues, hopefully there won’t be more. The humidity and bug traffic was down and there was just a hint of a breeze in my paint booth lol so I got everything set up and broke the seal on the Spraymax.
 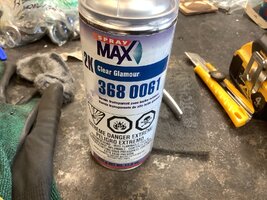 I also had the tank and side covers off my ‘75. I had spent hours shaving dead Clear off because any attempt to sand or remove resulted in getting into the base paint. I’ll post those pics in another thread but all the Bobber tins got finished as well.
 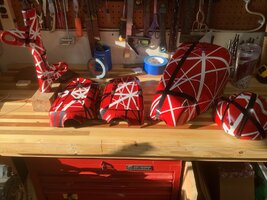 a 24 hr cure, a little hand polish and the headlight bucket and ears can go on and when my controls show this week I can complete the control wiring.

 I only found two small potential issues, hopefully there won’t be more. The humidity and bug traffic was down and there was just a hint of a breeze in my paint booth lol so I got everything set up and broke the seal on the Spraymax.
  I also had the tank and side covers off my ‘75. I had spent hours shaving dead Clear off because any attempt to sand or remove resulted in getting into the base paint. I’ll post those pics in another thread but all the Bobber tins got finished as well.
  a 24 hr cure, a little hand polish and the headlight bucket and ears can go on and when my controls show this week I can complete the control wiring.
That old rectifier still working, I assume? If you need one as an upgrade, I ordered two about three years ago and the shipper sent me like 20 by accident. They said to keep em. Be glad to send you one. Pic for reference.

edit...wrong pic. Here is a pic of the ones I received.


edit...wrong pic. Here is a pic of the ones I received.
Last edited:
It was working as far as I can remember but it doesn’t hurt to have a backup.

