Thank you, Gents.

@5twins: I appreciate the note to check the slide needle. All good, a 4M1, which looks to be correct from my quick research.

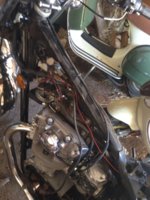
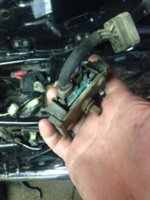
@5twins, @MaxPete: You have convinced me. I'll play around with the stock regulator to get the most out of it, but I'll also have my eye out for a deal on a VR-115. But that rat's nest, ugh. Electrical tape-wrapped Radio Shack butt connectors, dead ends (from the Boyer install?), 40yo wire and connectors. I'm a theatrical electrician, and I'm trained to run (and label) cable very neatly for ease in the inevitable last-minute troubleshooting. When I come across cabling this ugly, my instinct is to pull it all to start anew. Often faster than figuring out what's what in a rats' nest. For now, I'll clean and get the stock system up as much as I can, but I've got plans to rewire sometime soonish. No other systems are being addressed until the carbs and rear end are back together. I'm doing well keeping parts organized, but I know my limits. All fasteners begin to look alike.

It looks like there are all sorts of ways all y'all have mounted new reg/rect systems. All comes down to what materials and fabrication skills are available.

MaxPete, your story about the brush Samaritan conflicts greatly with the hundred or so cars which passed me pushing my bike. Not one slowed. A sport bike slowed as he gawked, but I heard his throttle roll on just as he passed. At least common courtesy and hospitality still exist here in this corner of the internet. I consider the passing on of your hard-gained knowledge to be one-in-the-same with passing on those brushes. Thank you.
 
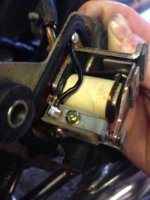
One additional suggestion: have a look under the stamped sheet metal cover of the voltage regulator. It is held on by two tiny little screws and it may be fine. However, on my '76, I had big starting issues until I looked under the cover of the Starter Safety Relay (SSR - looks quite a bit like the voltage regulator - but the SSR lives under the RH sidecover while the VR is under the LH cover).

My SSR actually looked quite OK externally - but under the cover it was an absolute mess of corrosion and stuff that looked a lot like bird feathers (???). I went at it with a toothbrush (gently) and a can of electrical contact cleaner - and wah-la! - everything worked like a charm after that. Your voltage regulator may be in the same shape (along with your starter safety relay).

Frankly, having gotten my bike running after several months of work, I think that many XS650 problems are caused by these two components (the SSR and the VR) and yet fixing both of them is extremely simple and takes only a few minutes for each.
 
Both the regulator and SSR look good under covers. Just a visual check, I have yet to check the regulator per 5Twins' earlier post.

Further visual digging found the battery box bottom burned through and green copper erosion all over the rectifier. Looks like there was some damage done before the PO put in the current sealed battery.

Reg/Rect/Battery upgrade moved up on the calendar. I still want to hold off on the wiring for now.
 
Replacing both the rectifier and voltage regulator with a modern solid state combo unit is cheap, easy and fun - and it should keep you off the shoulder of the road on some dark and stormy night....
 
Last edited:
DB - I should add that you should not neglect repairing the battery box. Batteries are fragile and they are heavy (duhhh - must be all that lead I guess) and all that bouncing around on the road could cut the thing completely adrift once you are up and running. If that were to happen, you might get away with just losing power when a battery connection breaks - or you might short the thing out and have a nice fire right under your @ss and just behind and below the fuel tank - in an area where the fuel lines run. The XS parts places sell nice OEM battery straps to lash the thing down and some bike wrecker in your area will have a decent battery box replacement to support the whole assembly - if yours is not repairable by welding/sandblasting and painting.
 
If you're going to renovate your battery box, you'll need to neutralize the battery acid on it before painting or it will just rust up again and come right through your new paint. A mix of baking soda and water will do the trick. It should get most of that green gunk off your rectifier too. When it hits battery acid, it will foam up like peroxide in a cut. Keep applying, rinsing, and applying until the foaming stops.

I beg to differ on those combo units. They are not cheap by a long shot, usually costing from $80 to $150. In my opinion, they are a total, blatant rip-off. You get the same results with an automotive regulator and a three phase rectifier from the electronics world, and it only costs you $20 to $30. All the money you save can be applied towards other things the bike might need, things like steering bearings, swingarm bushings, fork springs, better rear shocks, etc.
 
Hmmmm - well, perhaps, but the unit I got works well and IMHO is worth the extra few $$.

DB - I recommend that you do NOT do that battery box job in the kitchen sink or you'll find yourself a bachelor.
 
Thanks, I've read in other threads your respective opinions regarding combo units. This whole project is a balance of where to invest cash vs. effort. On this one, I'll go with 5Twins and the diy approach.

Better rear shocks, yes. The stocks are set at full preload as anything less bounces me all over. But I'm not thinking about it yet.

Good note on keeping the science experiments outside!

BTW, outdoor time was postponed until tomorrow. Today is cleaning house. I'd rather be cleaning battery acid, but relationships are like motorcycles and must be maintained.
 
Switches, rotor, brushes, regulator, SSR, battery & ground terminals cleaned, contacts greased. The battery box looks to be in decent shape, the rubber box took the brunt of the acid spill.

The regulator was found to be off spec. Both the core and point gaps were too large. Those have been reset and the adjusting screw awaits startup.

The rectifier is for the bin. I see no reason to clean that much corrosion when the better replacement is so inexpensive.

I'm putting together the reg/rect upgrade list tonight.
 
image.jpg image.jpg image.jpg image.jpg image.jpg image.jpg image.jpg image.jpg
 
I came home from the woods Wednesday to zero new parts. Should've put in a few more miles of trail.

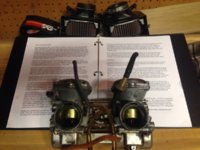
Yesterday, I came home from a 12hr workday and there were new throttle seals and jets on the step. All the parts needed to reassemble my carbs.
But with 16hr days today and tomorrow, Sunday's the day.

And by then I should have the lock tabs so the rear wheel can go back in and I can try to fit that 18T. I'm assuming my package from Mikes is delayed due to the weather in the Southeast.

I've been researching carb assembly and have outstanding questions about what grease/lube/if any to use where. Lots of "I've always done it this way" and lots of ways it has been done. Jets go in dry? A little silicone spray on the diaphragm and seals? A light film of of heavy grease on gaskets? A little anti-seize on fasteners?

Same goes for the rear end. Silicone sealant on the drive sprocket as we've already discussed. Heavy axle grease on the axle, spacers, and such? Anti-seize on the rear sprocket bolts?
 
On the carbs, I use anti-seize on all the external fasteners but not on any internal parts (like jet threads). I don't assemble dry though. All the internal parts get wet down with a light spray lube of some sort like WD40 or CRC556. Walmart and Pep Boys have their own brands of light spray lube that work fine. I carefully clean and treat the diaphragms with a product called the Tannery. It's a spray leather, vinyl, and rubber cleaner and preservative. It's a wonderful product and you will find multiple uses for it on a bike (tire side walls, seat, wiring). I wet down and soak all the gaskets with the light lube as well.

Yes, anti-seize the rear sprocket bolts. They can and do seize into the hub. They are a fine thread bolt threaded into a raw steel insert in the hub. Lightly grease the axles before installing. That's all you can do because any excess just gets pushed off when you insert them. But absolutely do not install them dry.

I notice you have K&N airbox filter elements. That may call for a slight bump up on your mains. Try the stock 122.5 first but a 125 or 127.5 may work better. Only testing will tell you for sure.
 
I haven't been following the threads for a while. Read through this thread and find it quite interesting. DanielBlack, you have a fine bike and it will just take a little time and work to sort it all out. Continue to follow advice from 5twins and you will have a really smooth running bike. I totally agree with 5twins about your charging system.

Avoid being drawn into the slick marketing hyperbole about PMAs. The stock alternators work very well. I find the brushes last about 7 years (averaging about 2000 kms per season) , and then only take about 10 to 15 minutes to replace. Clean the slip rings once per year. Yes, the stock rectifier, while OK for 20 or 30 years, its wise and inexpensive to simply replace it. I used 2 bridge rectifiers, but many others buy 3 phase rectifiers from E-bay, and both types work well.

The VR-115 is an inexpensive and excellent regulator. It will always keep the battery fully charged, without over charging. Did I mention the VR-115 has zero maintenance and zero adjustments required. Install a permanent voltmeter on your bike, and you will see it reading 14.0 to 14.2 volts as you drive down the highway. Another tip is to replace the stock bulb in the tail light with a LED type.

As 5twins mentioned, the combo rec/reg units are quite expensive, and work no different than using a VR-115 and a modern rectifier with a simple heat sink. I also prefer the rectifier and regulator to be separate, as its easier and cheaper to just replace one item if a failure ever occurs.

If you do mostly city type driving, a 17/33 or 17/34 gearing is the best way to go. I find the 17/33 works great in the city, and yet I also make long trips in the country with it.
 
Yes, I'm not a fan of the 18T front sprocket. I really see no need for it and it can present clearance issues under the front cover. There isn't much space between the bottom of the sprocket and the shift shaft. The shift shaft has a metal/rubber protection cover over it. You might have to run without that using an 18T sprocket. It's there for a reason, to stop a too loose chain from sawing into the shift shaft. Take a look at this gearing chart. In your case, you could achieve pretty much the same ratio using a 17-32 combo .....


I have a couple rear wheels I swap between, both 18". One has a 32T and the other a 33T sprocket. I much prefer the 33T. The 32T robs a lot more take-off power from the lower gears.
 
After a couple months WD40 turns into a gummy substance that reminds me of dried linseed oil. It's guaranteed to mess up something like a lock or a gun until you clean it out. A good alternative is Breakfree, which comes in bottle or spray can. It is slicker and migrates insanely -- you put one drop on something and it will end up on the other end of the thing a foot away too. It's a lubricant and also a cleaner.
 
Stellaaaaa! Stellaaaaa! Do you have your Marlon Brando movies confused?

For lubing cables I have taken those paper pour cones for oil they'll give you at quickie mart and sealed it around the cable with tape and poured oil in it. Pretty fast and more importantly totally automatic.

I just had this thought. I wonder if siphon cable oiling would work? Put a bottle of oil on a table and put one end of the cable in the bottle and let the other end hang toward the ground. Suck on it to get the oil going and...maybe somebody else should try.
 
Thank you all.

@retiredgentleman @xjwmx, welcome to the thread. Your input is much appreciated.

'Stella' comes from the model name of the 150cc scooter (my 1st motored 2 wheel veh) the 650 replaces. She never got her own name, but every bike I own will be 'Stella', much like every guitar BB King plays is 'Lucille'.

And it's fun to yell 'Stellaaaa!' When she doesn't start on the 6th or 7th kick. It works better than a kick to the side cover, I find.

I got to a pretty good stopping point yesterday.

I have the carbs assembled as much as possible, except the float bowls. My local hardware store which has been stellar with having all my fasteners carries orings only down to 1.5mm thick. Too thick for the needle jet. Trying to source a few without needing to buy 50+.

Re: gearing. I'm going to go ahead with the 18/34 I have on hand. My bike already had the shift shaft guard removed and there are marks on it from what looks to be a PO's attempt at a 18T. I plan to keep up on the chain tension, and if it becomes a problem I can easily go back to 17T. If I see any new rubbing, it will be on a shaft which is already not perfect. The sprocket set I pulled off was a 17/33, it wasn't bad, now I'd like to feel a slightly taller set up. If the history of this forum is a guide, in 6 months I'll end up being very happy with a final choice of 17/33. I'm ok with that.

Yes, most of my riding is city, but as soon as I enter a highway, cars and SUVs are flying by at 80. And I'm looking forward to some 75mph limit (cars regularly go 90) out-of-town excursions which were impossible on my 150cc scoot. Two wheels ready to go. One for in town commuting one for highway cruising. Hmm, that's a good idea. My routes are often very much one or the other.

I've been doing the drip by drip cable oiling since this teardown began 10 days ago. Do y'all start with some sort of solvent to clean out the cable first? Mine are now fully oiled, but mixed with whatever crap is in there, the oil's rather muddy.

My VR-115 came in, but the seller sent a single phase rectifier in lieu of the 3ph I ordered. Argh! Between mission creep, shipping delays, and vendor mistakes, it's a wonder any of these projects make their way back to the road.

Getting there slowly, riding the 150cc in the mean time. Very glad I upgraded.

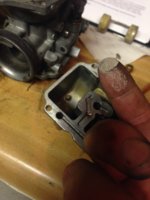
BTW, @5twins: you had suspected that my leak on one float bowl was due to a misadjusted float. Yup, 2.5mm out of spec.
 
Back
Top