Where the heck is the Oil Filter?!

Yes, that '83 sidestand with all the extra brackets on it for that silly sidestand safety switch makes sump plate removal more difficult. Why do you think I swapped mine out for an older "bare" stand? All the "junk" to the left of the spring was replaced by the small, simple bracket and stand on the right .....

View attachment 322541
I actually bought a new safety switch -- kinda liked that feature, cause I got no memory. ( I keep calling that thing a neutral Safety Switch for lack of a better name.) Do you know did the pre-safety switch frame mount by any chance have half as much in-the-way-ed-ness? The 82' used to just kinda drop into my hand by the time I got the bolts out, and all the bolts were accessable best as I can remember. Going to use the original plate and filter as a measure to grind the weld lump down till the clearances allow the filter to be removed without getting shredded. If the filter hadn't been on borrowed time already it was by the time I got the plate out.
 
Do you know did the pre-safety switch frame mount by any chance have half as much in-the-way-ed-ness?
On mine, the sump plate bolt at the left end has a socket head. It’s probably easier to get an allen wrench in there than a socket. I don’t remember changing it. Perhaps the dealer did it when I took it in for service. I have no recollection of servicing the bike myself for those first couple of years.

My SK sidestand is sloppy. I should probably follow the example of @5twins. Perhaps a brand new sidestand?
 
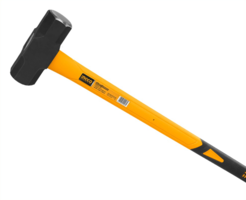
I don't have any BFHs, I'm not that rough, but I do have have a tack hammer. Great for tapping in tacks, although, fingers, hands and arms seem to get in the way a lot!
 

Attachments

  • s-l1600.png
    s-l1600.png
    104.6 KB · Views: 5
On mine, the sump plate bolt at the left end has a socket head. It’s probably easier to get an allen wrench in there than a socket. I don’t remember changing it. Perhaps the dealer did it when I took it in for service. I have no recollection of servicing the bike myself for those first couple of years.

My SK sidestand is sloppy. I should probably follow the example of @5twins. Perhaps a brand new sidestand?
Not bolted the plate back on yet, but I bought an open end ratchet set just for torture devices like that bolt.

Having taken my side stand on and off three times now in as many weeks I'm fairly confident saying if it's sloppy, you likely need to repack with cup grease and tighten it down an extra turn or two. (Wedged about 90¢ worth of nickles into the spring to get it back on. Thanks to whoever posted that trick.)

I don't remember ever taking the side stand off my original '82 Special, but then, the sump plate on her dropped with no issues. Interestingly enough, when I went back to grind off some of what I thought was a poor welding job, it turned out to be yet more road dredge, despite my previous cleanings. Practiced with the original plate and beat-to-hell sump filter until I'm fairly confident I can get a working filter in and out without damaging the filter.
Here's what I did recently. With the bike on the side stand and in gear, accessed from the right hand side, cleaned under the engine at the sump plate gasket surface. After cleaning the sump plate, I fitted the new gasket to the sump plate with a light coating of hylomar* to make sure the gasket didn't move while I was fitting the sump plate. I have a 1/4" drive socket set with a screwdriver handle driver. I used new 25mm x 6mm bolts lightly copperslipped and inserted the sump plate firstly at the sidestand side and then pushed it horizontal. I put one screw in the hardest to reach position by the side stand. The 1/4" drive screwdriver handle driver with a 10mm six sided socket is ideal as it's small enough to get in there and easy to start the screw tightening. Then added the other screws, tightened intially with the screwdriver handle and then with the 1/4" rachet. Using a 1/4" drive set with the bike in gear on the sidestand makes all the difference. And..... no leaks when I refilled with oil.

*usually I don't use any gasket compound. But I really wanted the gasket to stay in place on the sump plate while I was fitting it.
 
*usually I don't use any gasket compound. But I really wanted the gasket to stay in place on the sump plate while I was fitting it.
Many of us just use common automotive bearing grease to hold the gasket in place and to ensure that the gasket will come off easily, allowing us to reuse the gasket a few times. No gasket scraping in the future.


.
 
notes if not already covered
The original sump bolts have a skinny neck designed to break off before popeye strips the crankcase threads. That's a hint; do NOT over tighten.

When the cover is off and clean, doesn't hurt to run a fine flat file FLAT across the flange there is usually a slight raised "lip" around the bolt holes. Just enough to flatten the lip no more.

crankcase
grease
gasket
thin finger smear of hylomar
sump cover
all bolts in finger tight
tighten in an X pattern, center to ends with a short grip on a 1/4 ratchet. make a couple rounds. No Oooga Doogas here!
 
Many of us just use common automotive bearing grease to hold the gasket in place and to ensure that the gasket will come off easily, allowing us to reuse the gasket a few times. No gasket scraping in the future.
The point you make is absolutely correct and with the XS650 sump I've used grease to hold my (home-made) sump gasket in place, with bike on side-stand.

But the way @Its been a long time does it is fine too coz Hylomar doesn't set or turn into stuck-on rubbery mess, it stays fluid and you can wipe it off with a kerosene rag.

@gggGary and me crossed in the post.
Cool. However, a 1.5 oz tube of Hylomar blue will cost you about $19 + $6 shipping = $25

Dab of grease =1 cent


.
 
Last edited:
Many of us just use common automotive bearing grease to hold the gasket in place and to ensure that the gasket will come off easily, allowing us to reuse the gasket a few times. No gasket scraping in the future.


.
That would normally be my method too. With this one, I can't see me removing the sump plate again this decade. If the bike does a thousand miles in that time, I'll be surprised. But happy ;)
 
Here's what I did recently. With the bike on the side stand and in gear, accessed from the right hand side, cleaned under the engine at the sump plate gasket surface. After cleaning the sump plate, I fitted the new gasket to the sump plate with a light coating of hylomar* to make sure the gasket didn't move while I was fitting the sump plate. I have a 1/4" drive socket set with a screwdriver handle driver. I used new 25mm x 6mm bolts lightly copperslipped and inserted the sump plate firstly at the sidestand side and then pushed it horizontal. I put one screw in the hardest to reach position by the side stand. The 1/4" drive screwdriver handle driver with a 10mm six sided socket is ideal as it's small enough to get in there and easy to start the screw tightening. Then added the other screws, tightened intially with the screwdriver handle and then with the 1/4" rachet. Using a 1/4" drive set with the bike in gear on the sidestand makes all the difference. And..... no leaks when I refilled with oil.

*usually I don't use any gasket compound. But I really wanted the gasket to stay in place on the sump plate while I was fitting it.
Agreed. NOT a job I want to do again because the frigging gasket slipped. Or crimped. Or...
 
If you haven't reinforced your sump screen (with a metal plate or JB Weld) to protect it in the "critical spot" from the gushing of oil, then it is advised to keep your revs below 3K until the oil warms up, maybe 4 miles of driving.


.
 
If you haven't reinforced your sump screen (with a metal plate or JB Weld) to protect it in the "critical spot" from the gushing of oil, then it is advised to keep your revs below 3K until the oil warms up, maybe 4 miles of driving.
Haven't reinforced my sump screen, but it is brand new. One of the first things I ordered from Mike's. Backup on the way, with extra gaskets. I'll check regualrly for torn screen.

Really had no clue about the tear/reinforcing issues till I started reading this thread. Keep in mind I'm old. LOL. My mother was driving a Model A when my parents met, and Dad taught me anything with a choke doesn't move till you can cut the choke. Could be why I never blew holes in my original /82 and /83s?

I now have two backup plates -- after I bought the first one on Ebay I saw another one in the same "there's GOT to be something wrong with it at that price range" listing with a drain plug and bought it as well. Course it was supremely STUCK in the plate. Screwed the plate to the workbench, but the BFH didn't work. Neither did a length of pipe on the 27" Yamaha drain plug wrench. Dragged the workbench out about 6" from the wall before I gave up and borrowed a 27mm impact socket. (See, I DID learn something!)

Original filter bit the dust -- I might have lost my patience trying to get the plate out past the kickstand and whack-a-moled it. Put that one in the vice and squished it back into shape, saved that for fitment testing. After I got the not-really-a-weld trash off the kickstand mount I finally figured out the correct angle of reentry. For anyone else at this level of frustration, I had to slide the plate to the back about half an inch.
 
Back
Top