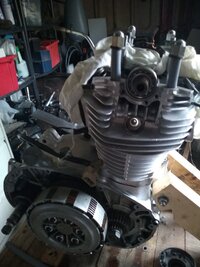
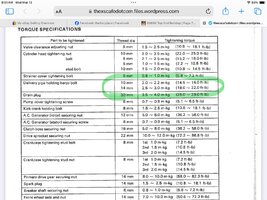
Before you torque the head down, you need to install the two covers where the points and advance mechanism go. The flanges on these are what centers the cam and cam bearings in the head. If you torque the head first, these covers probably won't seat properly and your cam and bearings won't be properly centered.
EDIT 2/3/19. For the most accurate cam centering, install the housings without the gaskets and o-rings and tighten. Once you're satisfied they're seated, take 'em back off and install them with the gaskets and o-rings.
END EDIT.
To replace the camshaft end seals, press them out and back in with a hyd. press if you have one and a socket just slightly smaller than the seal.
View attachment 118287
If you don't have access to a press, use your vise the same way using the socket and a piece of wood...
View attachment 118288
As you can see in the next pic, the Tour Max seal kit I used isn't quiet the same as the OEM seals. They're a little thinner.
View attachment 118289
New is on the left, OEM on the right. Where the OEM was flush on both sides when installed, the new one will be slightly recessed on the outside (red arrow). Just make sure the inside of the seal is flush with the inside flange after pressing in (red arrow in next pic.).
View attachment 118290
Install the gasket and O-ring.....
View attachment 118291
.....a drop of blue loctite on the 6 screws (3 per side), and torque the covers into place. Don't forget to add the cone shaped starloc washers to the screws. Not really sure why Yamaha saw fit to use a gasket
and O-ring on these...
View attachment 118292
If you had the rocker arm shafts out, don't forget to reinstall the plugs first. Now you can go ahead and torque the head as described previously.
The oil tube is next. The union/adapter has a crush washer that needs annealing or replacing.
View attachment 118643
You'll need a 22mm crows foot to properly torque this (a 7/8" SAE will also work). Don't forget to put the crows foot 90deg. to the torque wrench so the torque value doesn't change.
View attachment 118644
There's two copper crush washers for each banjo bolt.... one between the bolt head and the oil tube and another between the oil tube and the rocker box. Treat them as previously explained.
View attachment 118646
View attachment 118647
View attachment 118649
The cam chain tensioner is next. I back the tensioner all the way out and then thread it back in a turn or two.
View attachment 119383
A light coat of sealant on both sides of the gasket.
View attachment 119384
And install the tensioner assembly.
View attachment 119385
Once the tensioner is installed, I adjust it in until the pin is recessed about 1/16" to 1/8" (green arrow).
Note: This is just for the initial run. After I'm satisfied everything is good on the run, I'll readjust it per the book. Make sure the copper crush washer (red arrow) is either new or annealed and tighten the lock nut down while holding the adjuster. Install a new o-ring in the acorn cap (red arrow) and install it.
View attachment 119386
The next step (for me anyway) is to install the engine. Once installed I'll spin it over 'till I get good oil flow showing inside the valve covers. Once I'm happy with that I'll go ahead and adjust the valves and install the valve covers... then the carbs... exhaust.... well, you get the idea. Hope you guys found this helpful.
 .
.


 Important to use double wrenches when tightening the oil tube nut to the coupling, the crankcase threads are a bit fragile. Several have stripped them by over tightening.