Torque bolts???

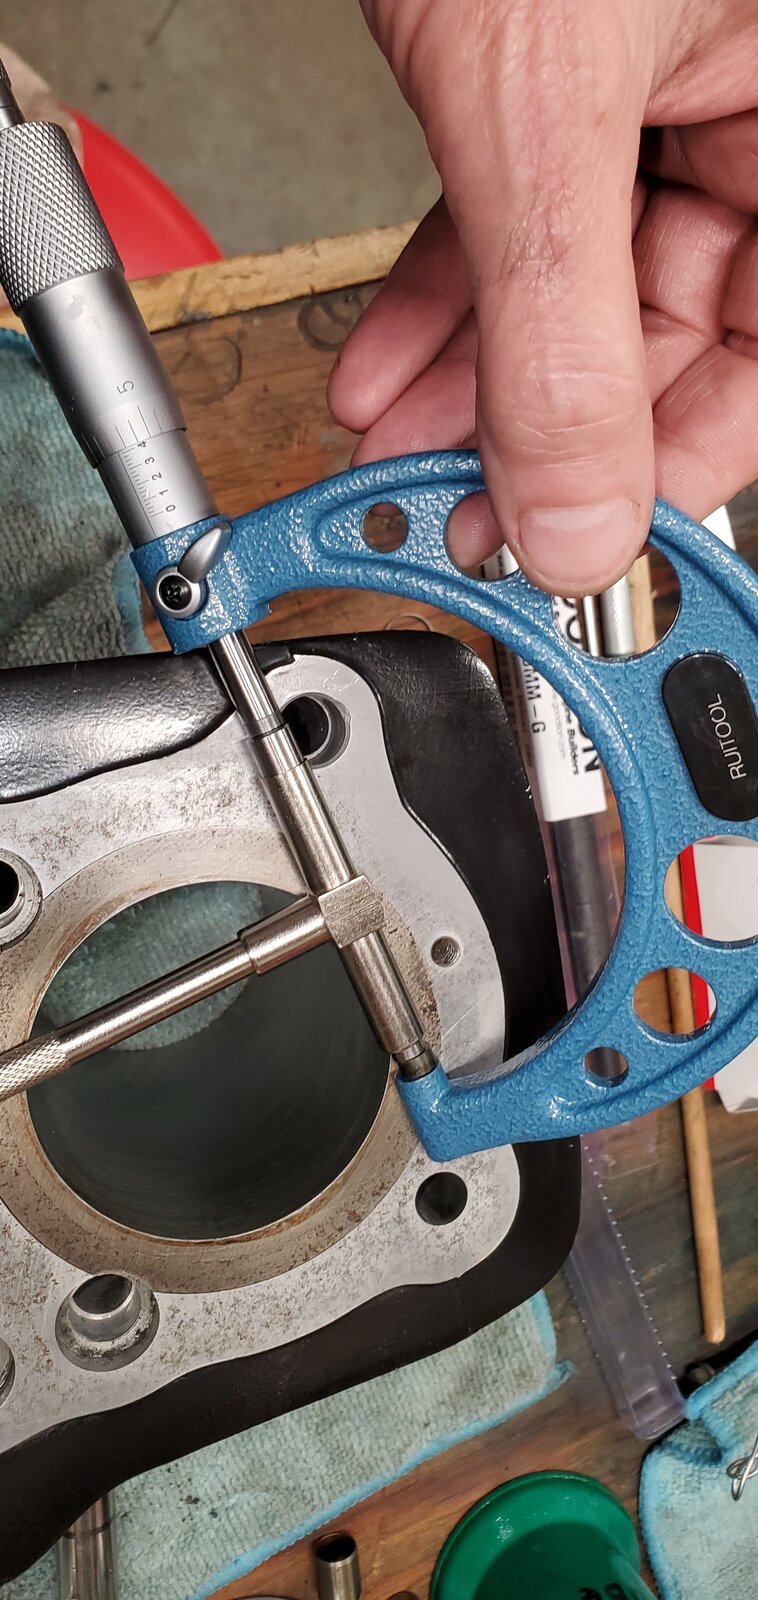
Not unless there is rust, etc. preventing an accurate measurement on clean cylinder walls. The basic drill is to use a dial bore gauge or an internal telescopic "snap gauge" and then transfer to a micrometer. Measure liners at 90 degrees at 3-4 depths to assess wear and compare to specs
1682881766242.jpeg
 
Honing is gonna remove just a little metal. I always hone then measure. No point in knowing what it is before you hone... is there...
 
Good digital vernier calipers are sufficient for determining existing bore size - 75mm or 75.25mm (1st over) etc - but the above is needed to determine wear (out of round, taper, etc)
 
Honing is gonna remove just a little metal. I always hone then measure. No point in knowing what it is before you hone... is there...
I reckon too it makes a difference if the honing capability is in-house or at the machine shop:shrug:
 
Thanks again. Once I get them back from blasting the crap off the outside, (PO thought it was a good idea to try and spray paint), Its off to my capable machine shop for honing/measurement/advice/expertise required. Appreciate the video in particular. Terrific stuff but for total accuracy I think Im going to consult. My shop/capabilities are good but I really want to get this right. Ill let you all know how I make out.

But I am going to get myself a set of T gauges and follow the process on my own.
 
Last edited:
JP and I are usually on the same page, so let's see if we can clean this up a bit....

The first thing you're gonna do is a visual inspection. Scrape some carbon off the top of the walls and see if there's a ridge there you can hang your fingernail on. If there is, you'll need to bore it... you're past the honing stage.
Scoring... if you can hang your fingernail on the lines, it'll need boring.

Provided those are good, then it's on to measuring. Here's where opinions and techniques vary. I like to hone the cylinders first, then measure. Some people will measure first, hone, then measure again. My theory is, if it looks good enough to hone... hone it and measure to see if it's in limits. The other way is to measure to see if it's in limits, hone it, then measure again to see if it's still in limits. 6 of one, half a dozen of the other I suppose.

The key is the visual inspection. That'll tell you where to go next.
 
Thats really helpful Jim. When I get them back from blasting I will follow your direction and if need be (likely) respond further. Best I recall the cylinders were pretty clean except for some light surface rust. Really regretting leaving them at the blaster now as I am really anxious to see exactly what I have according to your direction. Should have them back in 1-2 weeks.
 
JP and I are usually on the same page, so let's see if we can clean this up a bit....

The first thing you're gonna do is a visual inspection. Scrape some carbon off the top of the walls and see if there's a ridge there you can hang your fingernail on. If there is, you'll need to bore it... you're past the honing stage.
Scoring... if you can hang your fingernail on the lines, it'll need boring.

Provided those are good, then it's on to measuring. Here's where opinions and techniques vary. I like to hone the cylinders first, then measure. Some people will measure first, hone, then measure again. My theory is, if it looks good enough to hone... hone it and measure to see if it's in limits. The other way is to measure to see if it's in limits, hone it, then measure again to see if it's still in limits. 6 of one, half a dozen of the other I suppose.

The key is the visual inspection. That'll tell you where to go next.
:agree::laugh2:
 
Torquing a fastener to a specification is an indirect method of measuring spring tension in the fastener' The bolts and studs nearly always function as springs. In precise measurement the specification is measured with dial indicator - as in that's how the engineers calculate the torque specification. The gasket(s), if any, also function as elastic elements with the spring, er, bolt, er, stud. Using oscilloscope and motion transducer in the test stand engineers measure how far, for example, a cylinder head bobs up and down against the cylinder top-fire deck. Not far. But it moves, and gasket/stud pair probably has a fatigue-life.

Since we know the pitch, starting from "finger tight" (contact) we can count turns (usually flats) to achieve a given spring tension...this is, for example, how the studs that hold steam turbine "bonnet" to lower case are tightened, using a "striking wrench" and a 20# (or 50#!) single-jack hammer. These have no gasket, metal to metal with linseed oil, they seal >1000 psi steam, and can run for 20+ years. Said studs can be the size of your leg. The "classical" thread lubricant is usually given at 50/50 lube oil and graphite, but assume nothing.

In heat engines the initial "spring tensions" all change immediately upon the initiation of operation in combustion mode. That's why, for example, the old ford flat-head V8's had to be warmed up in icy weather. Loading them cold often resulted in a "blown" gasket.

This is especially true in alloy engines with long steel fasteners...everything changes really fast after the fires start. Alloys expand more than pure metals, as a rule. Over tensioning cold is a common error - it results quite often in the fastener pulling the threads out of the alloy casting when the fires are lit, shortly after, obviously.

The Stainless kit mentioned above, with the need for anti-seize. Nice to know...stainless galls and ruins itself really easily. Be superduper clean with stainless and use fresh anti-seize (dust and dirt find their way into the paste). I have personally phuckedup a lot stainless! Personally, I'd avoid the stainless, or be cautious at least.

Speaking of which "Bucannan's" in Southern Cal used to offer SS spokes and nipples, and did a great job of lacing and truing and so forth. Doan know if they're still going...

Best!
 
Back
Top