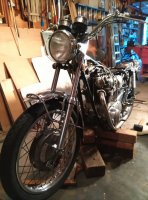
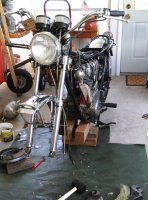
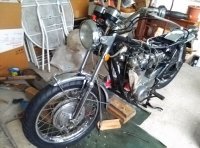
Putting my '71 together and it's been a hell of a ride. Thanks to everyone who has contributed to the threads I used to get this far and a lot of helpful advice in phone calls from my buddy, Marlin and knowledge gleaned online and some service done by pros. I'm hoping to keep one more XS alive. Here's what I have: 1) My bike sat in back of the garage covered with plastic for 27 years as I could no longer find parts
2) Cam shaft seals needed replacing before putting in points
3) Some ignition parts I had laying around from the Pleisticine Age and then I traced down a loose condenser wire as it was running on one cylinder
4) Then I replaced the fuel lines
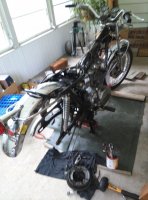
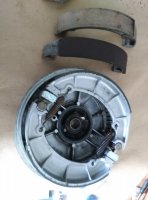
5) I pulled the back wheel off and the drum looked pretty good, and I put on a new drive chain
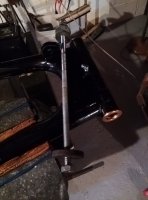
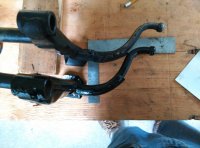
6) Then, according to the wonderful info you all gave me, Mailman, Gary, Tebo, to name a few, I rebuilt the swing arm, forcing the bushings in with a threaded rod as not to damage them and adding a third 45 degree fitting with my old Atlas drill press. Then I coated the swing arm the same way the ancient Mesopotamians coated theirs. I just slapped on two coats of Rustoleum.
")
7) I brought the back wheel to the shop to change the tire, tube and rim strip as that Goodyear Eagle was hard as a rock, and for good measure had them check the wheel bearings, balance and true the wheel, both laterally and vertically as per online and shop manual info I obtained. Marlin told me where
to get the best deal on a set of Avon Road Riders; from Dennis KIrk. The clearance between the tire and swing arm is a scary less than 3/16"
8) While the wheel was off, I replaced the rubber fender bracket bushing that bolts inside the fender and sits on top of it and under the bracket. That part was $15 and shipping was another $10. (I'm buying stock in Amazon...) Then, new brake shoes, not much adjustment left on the old ones.
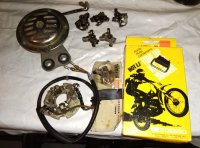
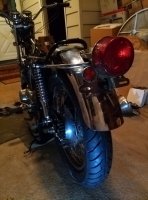
9) Next was a pair of shocks, w/o covers from Mike's for $45 which goes with the decor as I chromed the air filter housings, headlight shell and ears.
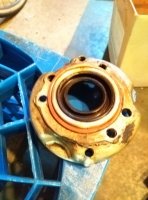
10) The front wheel came off and went to the shop for the same treatment. While I waited, I replaced fork seals, the brake cable and changed the grease in the speedometer gears in the hub, trying not to over grease them this time as I saw what that can do. The rear brake shoe in the front hub was soaked with grease. That's not good. It may have come from oiling the cable, diluting the gear grease. Interestingly, an online tutorial on lubricating cables showed a clean way to do it without buying what I'll call an oiler jig. This is too easy. Cut the corner off a plastic bag to form a 2 1/2" triangle. Snip off the point to make a large enough hole to slip the cable end through the hole and wrap a rubber band around the cable and bag
to make a tight seal. Pull the bag up to make a funnel. Oil the cable and slip the plastic funnel off with no machine oil running down the outside of the
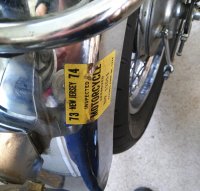
cable. With all, the bicycle cables I oil, that is nice to know. Last time I went to inspection was 1973. I guess I'm an outlaw biker...
11) I also replaced the key switch at this time as the key would fall out, so I had to remember to remove it before I took off. Then I found the thread about
Mailman fixing his. Oh, well, another $65 to Mike's.
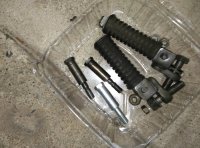
12) Marlin was nice enough to send me an extra center stand. Mine was rewelded after the tang broke off as I stepped on it. The angle was wrong after the weld and the pivot bolts were worn out. Put that together with a block of wood under the feet as I tried to raise it up and I partially ripped my bicept
tendon. The pain can be compared to cutting your balls off with a dull spoon. Live and learn. I remember the eloquent analogy about the angles and physics involved as explained by 2M. Threads on new pivot bolts didn't exactly mate to the original castle nuts, so I put cutting oil on the threads and ran the nuts over the threads until they spun easily.
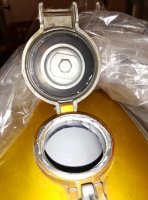
13) 2M also made his own neoprene gas tank cap gasket. Lesser mortals like me had to wait for Mike's to restock. I also had to deal with a tank which rusted after moving to my house which doesn't have a heated garage. That was fixed by using the Harley Davidson 3 part system of solvent mixed with nuts and bolts and rotated by hand for half an hour, dumped and flushed with more solvent, then pouring in a liquid plastic and activator. The fumes can take the paint off the tank. The composition must be dihydropolyphenemenemenemenenol or something to that nature. But I just noticed the coating coming off on the new gasket, so I'll be adding some inline filters to avoid clogging the needle jets.
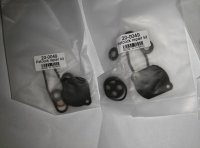
14) Then I had to rebuild the petcocks. As soon as I filled the tank, gas came out from everywhere and Marlin warned me that if all those little parts and the spring tensioner plate are not held together properly, the backing plate of the petcock will warp as you tighten the little screws and the petcock will continue to leak. The brass riser sock filter supplied with the kit did not fit through the hole in the tank.
15) After the tank got a rust film in it I kept the tank and seat in the heated, humidity controlled basement. I mounted the seat and started the bike. Then I removed the seat and noticed the foam was completely dried out and crumbs were all over the bike. Is there anything easy about this project? After reading threads from guys who attempted to reupholster and ripped the seat cover and cracked the pan I decided to bring it to an upholsterer, the only one willing to do it was 40 miles away and kept it for 4 months, before he admitted he didn't know how to deal with those long skinny bolts and how they attached to the pan. I got more advise from 2M and Marlin which I relayed to the upholsterer. But, I think it came out nice as he was able to recreate the shape using a sharp knife and a foam block. $100. And no, that seat was not polished or waxed. That would be dangerous.
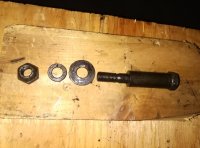
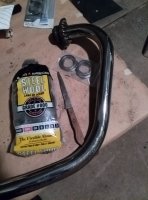
16) So I got to the exhaust and had to deal with the muffler nuts. There is nothing in my shop manual on mufflers, or exhaust pipes besides the picture of the complete bike. So, I went to the threads, what Gary and Jim and others said. I put penetrating oil on the threads for 2 days. Then I layed a 2x6 over the nut with the muffler standing upright on a thin piece of rubber and smacked it good with a hammer to jar the threads. Then I put it in the vice and heated it with a propane torch and proceeded to bend a cheesey nut wrench, then I heated it again and tried a pipe wrench. Then I brought it to the shop and the mechanic heated them up more than I dared to and got them off with only minor discoloration, which is what Gary said. To heat them up cherry red. Then I was advised to put anti seize compound on the nuts. 17) Next is the headers. Back wash from bad muffler nut gaskets coated and baked soot all over slightly blued header pipes. These pipes are thick, so they don't get as blue as some thinner pipes I've seen on other bikes from the same time period. I asked the bike mechanic how he deals with the
black baked on soot. He uses a razor blade or pocket knife and "0 0 0" steel wool. So I tried it and was good with that.
I'm not done, yet, but I'm seeing light at the end of the tunnel. I'm not a mechanic, but I hope to show you all how helpful you've been in my project. I'm just going where you've been. Thanks, guys!