That drawing will be a good reference for me. Thx.Nope, holes are always "as torqued." That is... you torque 'em, then figure out how to safety. Where those wound up isn't ideal, but workable (obviously).
Ideally you want the safety wire pulling the fasteners tight.
View attachment 322498
View attachment 322500
-
Enjoy XS650.com? Consider making a donation to help support the site.
XS650.com receives a small share of sales from some links on this page, but direct donations have a much greater impact on keeping this site going.
You are using an out of date browser. It may not display this or other websites correctly.
You should upgrade or use an alternative browser.
You should upgrade or use an alternative browser.
Getting the ‘57 beetle back on the road in 2024
- Thread starter bosco659
- Start date
The Germans install the bolts then drill the holes.No nut, the bolt goes into a threaded hole in the spindle.
Is it April 1stThe Germans install the bolts then drill the holes.
That is a good question! I find it questionable that any random group of three bolts if all tightened to the same torque they would end up in a nice neat alignment like those.In the posted photo, is it just by chance the safety wire holes lined up, or were the bolts tightened until they lined up? I noticed as I work on this car, the absence of torque specs that you’d normally see when working on more “modern” vehicles.
Thought I'd sneak this in here...

Flaking chrome, some brake asbestos, moly grease, heat til it smokes, breakfast of champions!
Flaking chrome, some brake asbestos, moly grease, heat til it smokes, breakfast of champions!
Last edited:
Pancakes and sauerkraut?Thought I'd sneak this in here...
View attachment 322538

Thought I'd sneak this in here...
View attachment 322538
Dangerous the cap can be plated with poisonous stuff
Illegal have the wrong metal here even i the fan hood above the stove -- galvanized
Trust me. I wouldn’t eat anything cooked in that wheel cover.Dangerous the cap can be plated with poisonous stuff
Illegal have the wrong metal here even i the fan hood above the stove -- galvanized
I think it was just posted as a joke.Dangerous the cap can be plated with poisonous stuff
Illegal have the wrong metal here even i the fan hood above the stove -- galvanized
Wire wheel it, run it through a couple heat, bacon grease, boiling water cycles and eating from that won't be what kills you.
Now back to Vic's steady and impressive progress on the sympathetic bug restoration.
Now back to Vic's steady and impressive progress on the sympathetic bug restoration.
We mechanics are indeed a hardy breed...Wire wheel it, run it through a couple heat, bacon grease, boiling water cycles and eating from that won't be what kills you.
Now back to Vic's steady and impressive progress on the sympathetic bug restoration.

With @gggGary ‘s suggestion I made my own hub cap fry pan - a pair of vise grips worked well for the handle. Eggs were a bugger to remove as they stuck to the rust. Lots of bacon fat and I was able to deep fry the eggs. Polished and first hub cap and is back on the car. Brake fluid reservoir is back to the car, coated with POR15 which should be brake fluid resistant. First backing plate ready to go back on. Issues encountered on the install with clearance problems between the back of the drum and mounting bolt heads. Safety wire may be an issue too. Stay tuned.


Last edited:
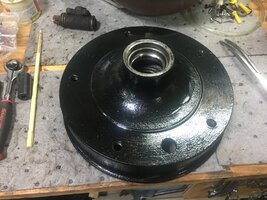
Front brake drum cleaning day. On the rears I used wire brushing, electrolysis and Evaporust. The fronts still had the bearing races in them so I needed to be careful I didn’t mess them up with one or more of my processes. I got my angle grinder and a couple of twisted wire, wire wheels and removed rust that way. They came out pretty good. The rust inside the drum will have to stay. I’ll visit my friend this week to get the drum friction surfaces cleaned up.
Both drums appear to be OEM VW parts but I was surprised how “rough” the surfaces were. It looks like they were cast and roughly ground to shape.
I attempted to safety wire the one side too. Doesn’t look real nice but should do the job. There’s red Loctite on them too.


Both drums appear to be OEM VW parts but I was surprised how “rough” the surfaces were. It looks like they were cast and roughly ground to shape.
I attempted to safety wire the one side too. Doesn’t look real nice but should do the job. There’s red Loctite on them too.
Last edited:
More beetle porn.
- brake drums painted with POR15
- repacked bearings and new grease seal
- removed RF fender to install new beading (rubber trim gasket between body and fender)
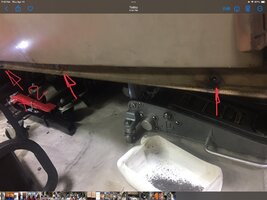
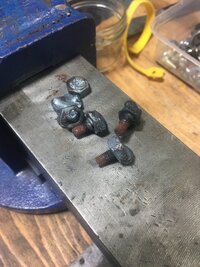
- removed 4 broken (rusted in) 6mm running board mounting screws (welded nuts to broken bolts)
- “painted” bare metal fasteners with ACF50
- torqued all fasteners on RF suspension
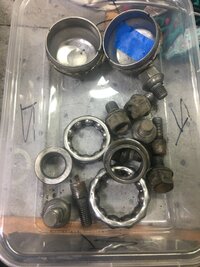
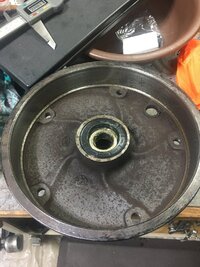
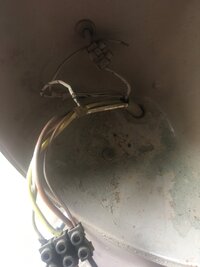
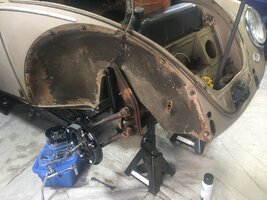


Nice!!
What seemed like a simple task, turned out to be hours of work. The factory jack for the car was rusted to the point that it was inoperative. I thought s simple disassembly and cleaning was in order. Although thr mechanism looks quite simple, it wad s real pita to take apart and getting it back together again. Here’s the finished product.


What seemed like a simple task, turned out to be hours of work. The factory jack for the car was rusted to the point that it was inoperative. I thought s simple disassembly and cleaning was in order. Although thr mechanism looks quite simple, it wad s real pita to take apart and getting it back together again. Here’s the finished product.
View attachment 324025View attachment 324026
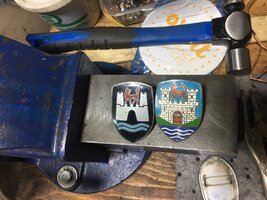
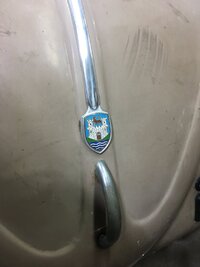
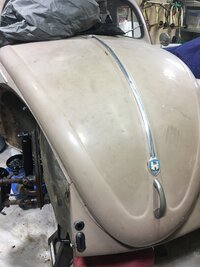
It’s nice you saved that original equipment, and those new emblems you got from @kshansen are the icing on the cake!
Glad to see it where it belongs instead on the shelf in my basement!Thanks to @kshansen, I now have the period correct hood emblem on the car.
View attachment 324019View attachment 324021View attachment 324022
Similar threads
- Replies
- 8
- Views
- 290

