AUTOMAN
XS650 Addict
My last purchase was $279/gal
cliff
cliff
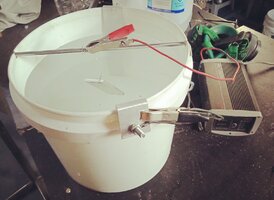
 ..... AHA! grabbed the brake bleeding vacuum pump,


DIY anodizing is pretty easy. With a billet, not cast, aluminum part start by cleaning it well, then into distilled water with lye(4l water 40 grams lye) for 3-5 minutes. Rinse in distilled water. Next is 4:3 ratio water and battery acid, you'll need either aluminum or lead in it hooked to the negative side of a DC power source, the part will be on titanium or aluminum wire and hooked to the positive side, adjustable is best but the 2a setting on a charger will work, time varies on part size and amps. Rinse then neutralize in baking soda/water for a few minutes, rinse again. Next is to suspend the part in 1l water per oz of rit dye at 140*f, 5-15 minutes to get desired darkness. Finally boil for 20 minutes in distilled water to seal in dye. Here's a steering damper mount I made for my DRZ, pics are before/during/after.View attachment 247885View attachment 247886View attachment 247887
Interesting!DIY anodizing is pretty easy. With a billet, not cast, aluminum part start by cleaning it well, then into distilled water with lye(4l water 40 grams lye) for 3-5 minutes. Rinse in distilled water. Next is 4:3 ratio water and battery acid, you'll need either aluminum or lead in it hooked to the negative side of a DC power source, the part will be on titanium or aluminum wire and hooked to the positive side, adjustable is best but the 2a setting on a charger will work, time varies on part size and amps. Rinse then neutralize in baking soda/water for a few minutes, rinse again. Next is to suspend the part in 1l water per oz of rit dye at 140*f, 5-15 minutes to get desired darkness. Finally boil for 20 minutes in distilled water to seal in dye.
Here's a steering damper mount I made for my DRZ, pics are before/during/after.View attachment 247885View attachment 247886View attachment 247887

Yeah, for some stuff I want to look into the difference between hard and regular anodizing. I know it used to be limited to certain colors for hard.I did some anodising on my 74 TX650. I have a 10 litre bucket filled with watered down sulphuric acid, I used a 10 amp battery charger, set on power supply first off, but then bought a dedicated power supply. I leftt mine silver to blend in with the polished aluminium parts. It does a good job but it is easily scratched.
Just saw this. Where did you get the M12 battery adaptor? Was that parts of the wideband kit?I made a wideband probe so that I can do some tuning without welding a bung on everything. I've had the innovate mtx-l wideband for years just sitting in a box. So now I'm making use of it.View attachment 244291View attachment 244292
Just saw this. Where did you get the M12 battery adaptor? Was that parts of the wideband kit?
Thanks! Looked it up and ordered one. This will be handy for bench testing and I can use it to keep the ecu powered up if I remove s battery from one of my cars.I just bought a generic one from amazon. I didn't want to permanently wire it to the bike.
https://www.amazon.com/Milwaukee-Converter-Terminals-Connector-Robotics/dp/B0BK88BXZ5/ref=mp_s_a_1_3_pp?crid=1XX74AU0RIU76&keywords=m12+adapter+with+switch&qid=1702822427&sprefix=m12+adapter,aps,143&sr=8-3
I used to run a portable unit to measure AFR’s on multiple vehicles. Some vehicles had bungs welded into the exhaust and others I clipped onto the tailpipe. I know the O2 sensor had a heater, but the unit itself controlled power to the heater, so I can’t say for sure if it was continuously in heat mode.Will a Lambda probe work close to the exhaust outlet? I somehow have it in my head that they need a high temperature to operate, or is the built in heater sufficient?
Can the electric heater on a Lambda probe be run continuously?
Can a Voltmeter be used to read the A/F Ratio?
Thank you for any feedback.