Thanks for your reply Van Islander. Unfortunately I don't have the original master cylinder any longer. Do you have any idea what the bore diameter might be for the original?I should think that the one with the bore closest in diameter to the original would work, however I am not certain and look forward to the response from those with more knowledge and experience than me.
-
Enjoy XS650.com? Consider making a donation to help support the site.
XS650.com receives a small share of sales from some links on this page, but direct donations have a much greater impact on keeping this site going.
You are using an out of date browser. It may not display this or other websites correctly.
You should upgrade or use an alternative browser.
You should upgrade or use an alternative browser.
Crabby's Build
- Thread starter CrabbyCustoms
- Start date
Which means both of the sizes you quoted are on the large size. Better to look for a 1/2" maybe? Fitting a master cylinder with smaller than standard piston bore transformed the front brake on my XS - loads more 'feel'.
Thank you all for the great info, I know exactly what i'm looking for now.
Late stock MC is 14mm and yes, it's a bit too large for best "feel". Most of us downsize it to something in the 11-13mm range.
Hi 5T,
there's some of us that kept the stock M/C and added the left-side caliper and brake disk the stock M/C was sized to operate.
A dual-disk conversion should include swapping to wire-braided brake hoses or you'll lose most of the fluid to line-bulge
Euro- and Asian-market XS650s come with dual front disks but use the smaller brake disks that XS650's use on the rear.
Mind you, the extra disk & caliper's added un-sprung weight does show up in the bike's solo handling
but it's added braking power really helps in slowing down a sidecar rig.
Last edited:
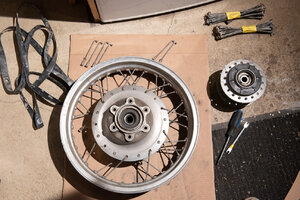
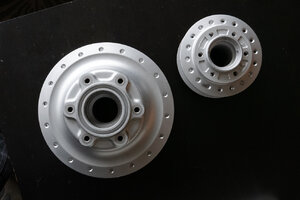
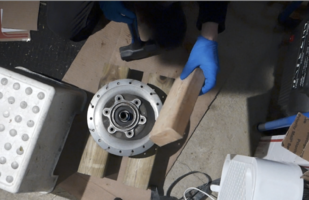
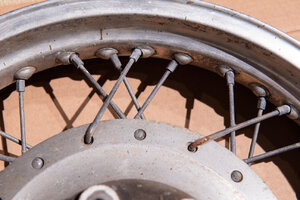
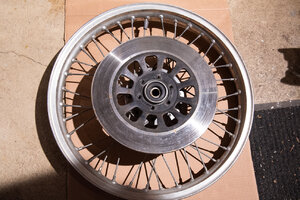
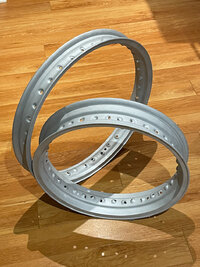
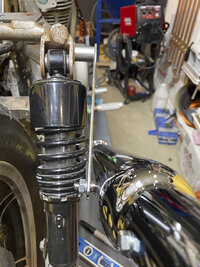
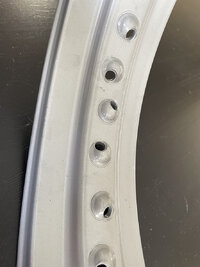
Started working on the wheels. Removed the spokes and blasted the rims with medium abrasive glass. I'm going to powder coat them silver this weekend. Removed the wheel bearings next. Started with the rear hub brake side, using a 17in socket and 4lb hammer the bearing came out easily, the other side was a different story! I wailed on a piece of pvc until it disintegrated, the bearing didn't budge moved onto a metal pipe and finally got it. Completely rusted. I put the front hub in the over at 350f for 30 min. and the bearings basically fell out. Definitely heat the hub!
Glass blasted the hubs with medium abrasive and then medium glass bead, they cleaned them nicely but they still have dents and imperfections but I'm not polishing any further. Also blasted the front disc, I might paint the center later to match the frame colour. Ordering bearings and seals next.
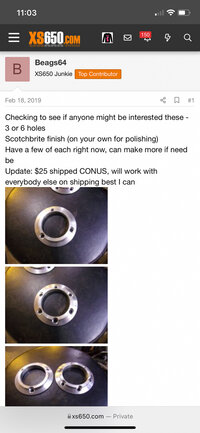
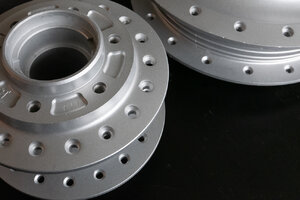
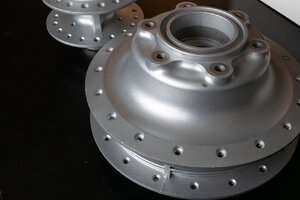
I also ordered the front hub cover from Beags64 which I will finish to match the hub.
Glass blasted the hubs with medium abrasive and then medium glass bead, they cleaned them nicely but they still have dents and imperfections but I'm not polishing any further. Also blasted the front disc, I might paint the center later to match the frame colour. Ordering bearings and seals next.
I also ordered the front hub cover from Beags64 which I will finish to match the hub.
Attachments
-
 December 21, 2021-3241.jpg1.1 MB · Views: 109
 -
 January 02, 2022-3191.jpg322.3 KB · Views: 113
 -
 January 06, 2022-3182.jpg713.8 KB · Views: 115
 -
 January 06, 2022-3180.jpg687.9 KB · Views: 121
 -
 January 06, 2022-3177.jpg658.7 KB · Views: 107
 -
 January 06, 2022-3176.jpg609.6 KB · Views: 103
 -
 January 02, 2022-3180.jpg979 KB · Views: 116
 -
 Screen Shot 2022-01-06 at 1.49.52 PM.png1.7 MB · Views: 102
 -
 January 03, 2022-3194.jpg995.2 KB · Views: 106
 -
 December 20, 2021-3177.jpg812 KB · Views: 106
 -
 December 20, 2021-3193.jpg1 MB · Views: 103
 -
 December 21, 2021-3233.jpg635.9 KB · Views: 108
 -
 December 26, 2021-3177.jpg692.5 KB · Views: 105
 -
 December 26, 2021-3180.jpg929.1 KB · Views: 109
 -
 January 03, 2022-3192.jpg1 MB · Views: 107
Hi Crabby,- - - Also blasted the front disc, I might paint the center later to match the frame colour. Ordering bearings and seals next.
think about polishing the front brake disk's braking surfaces, eh? That, or be prepared for one extremely quick first stop.
And while the disk is off, drill it full of holes. there's various theories about why that improves braking but it really does.
Last edited:
Good know! I'll hit with some 400 grit. Thanks!think about polishing the front brake disk's braking surfaces, eh? That, or be prepared for one extremely quick first stop.
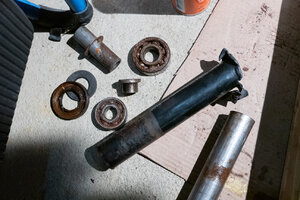
i have a couple of stubborn rocker arm shafts, tried with 6mm bolt as described in the workshop manual, however no luck there. Can you tell me what puller tool you used ? i have search the net but seem not to be able to find any with 6mm tread on the bolt/screw.I had a productive 2 days. I removed the rocker arm shafts with a puller tool and cleaned out the last of the media. I managed to eradicate it. I know for the next engine the proper way to approach it. From the start tear the whole engine apart then blast the individual parts. I know where all of the oil passages are now and I can pretty much block them all plus cleaning them was easy. All hail brake cleaner. The shafts were really tough to get out and in.
- I cleaned the shafts and arms.
-I measured the specs on them
-installed the rocker arms with the puller tool and it really helped to line up and get started into the bore, as well I used a hammer on it, great tool but a piece of 6mm rod and a nut would do the same thing. The shafts were really tough to get out and in so I'm glad I bought it.
I lapped the valves. I found some paste that worked well, it had a multiple grits.
My palms were so sore by the 4th valve that i could only use my fingers to spin it.
I never figured out if i had a push rod bushing or not? so I'm saving the seal, I put in a one piece rod, it seems to have almost no movement side to side so I'll save the bushing till next time.
I'll also put on my foot controls. I still have to tweek the rear brake and make a shifter.
Tomorrow i'm installing the valves.
Enjoy your evening.
thanks / Niels
well, I managed to get the shafts out, little bit of heat and penetrating oil, cleaned and measured - the look great and the measurements show as little as 0.05 mm between shaft and rocker inside diameter. what i noticed is that one of them has more endplay than the other 3, wonder if anyone use shims between the rocker arm and the head to reduce endplay and possible unwanted wear on the head itself, no drawing indicate that as an option and i can't find any topic about the endplay.i have a couple of stubborn rocker arm shafts, tried with 6mm bolt as described in the workshop manual, however no luck there. Can you tell me what puller tool you used ? i have search the net but seem not to be able to find any with 6mm tread on the bolt/screw.
thanks / Niels
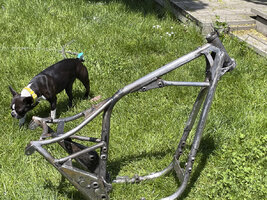
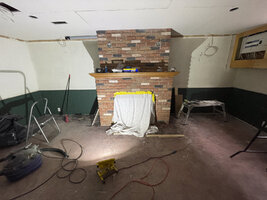
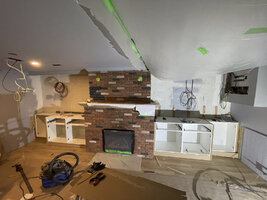
Wow it's been 18 months since i've posted although I have accomplished some. My wife had told me that until I finally renovated the basement I couldn't spend my time working on the bike, seemed fair as I'd been promising for several years and it was in rough shape. I spent 8 months working on it full time and was finally able to return to the bike in Jan. '23.
The first thing I had done was powder coat the rims and hubs in a clear coat. The results were terrible, the person who did it was careless, dirty fingerprints all over, bearing surfaces coated. I had to remove all of it.
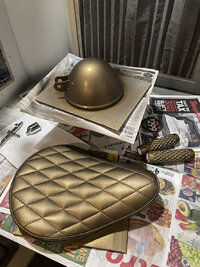
Next I started painting smaller items. I've decided to paint certain pieces a bronze colour to add a 3rd colour to my scheme. I used Angelis brand leather paint for it's flex. Metallic Bronze is the colour.
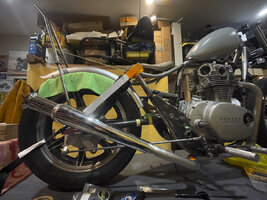
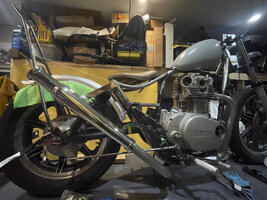
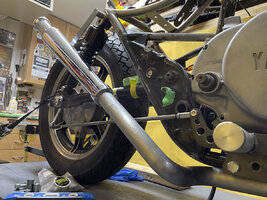
I also started working on the 2nd exhaust (as my first attempt didn't consider the kickstand placement). I'm running it under my frame and popping out near the rear. I want to use cocktail shaker headers but because the bikes not a hardtail I don't really have anywhere to secure them so I had to make a brace (which I'm not crazy about the look). At first I had made the angle too extreme so I had to lower the angle. The finished pipes are not perfect but it's better than my first attempt and it's time to move on.
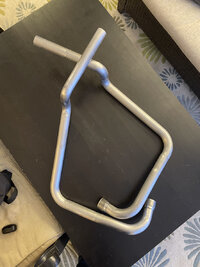
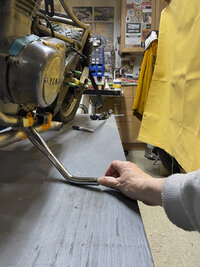
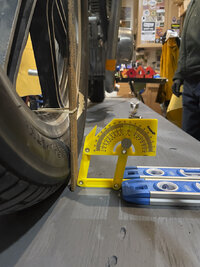
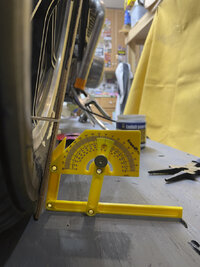
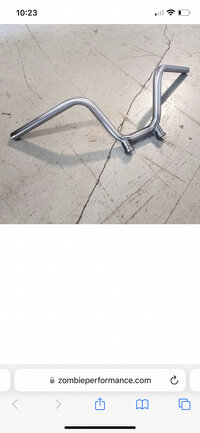
Kickstand is now on. I tried for an 11 degree angle. Also decided to change the handlebars, I was never sure about the Panzer bars, now going with mini apes, Zombie Performance.
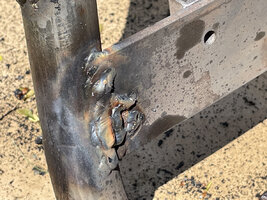
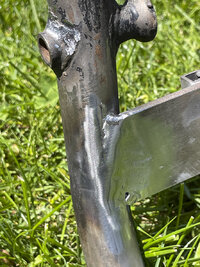
On to fabbing the frame. Welded on the rear bake stay, replaced the cross bar, made a mount for the reg/rec, put on gussets. My welding is brutal, I seem to be getting worse at it! the frame will have waves and the moulding will be tough.
And that's where it stands. I'm about to send the headers to be ceracoted. I will blast the frame for the final time and epoxy prime. Moulding's next.
The first thing I had done was powder coat the rims and hubs in a clear coat. The results were terrible, the person who did it was careless, dirty fingerprints all over, bearing surfaces coated. I had to remove all of it.
Next I started painting smaller items. I've decided to paint certain pieces a bronze colour to add a 3rd colour to my scheme. I used Angelis brand leather paint for it's flex. Metallic Bronze is the colour.
I also started working on the 2nd exhaust (as my first attempt didn't consider the kickstand placement). I'm running it under my frame and popping out near the rear. I want to use cocktail shaker headers but because the bikes not a hardtail I don't really have anywhere to secure them so I had to make a brace (which I'm not crazy about the look). At first I had made the angle too extreme so I had to lower the angle. The finished pipes are not perfect but it's better than my first attempt and it's time to move on.
Kickstand is now on. I tried for an 11 degree angle. Also decided to change the handlebars, I was never sure about the Panzer bars, now going with mini apes, Zombie Performance.
On to fabbing the frame. Welded on the rear bake stay, replaced the cross bar, made a mount for the reg/rec, put on gussets. My welding is brutal, I seem to be getting worse at it! the frame will have waves and the moulding will be tough.
And that's where it stands. I'm about to send the headers to be ceracoted. I will blast the frame for the final time and epoxy prime. Moulding's next.
Attachments
-
 February 20, 2023-20.jpg765.2 KB · Views: 59
 -
 February 27, 2023-176.jpg688.3 KB · Views: 61
 -
 February 10, 2023-75.jpg811.5 KB · Views: 58
 -
 February 09, 2023-84.jpg745.3 KB · Views: 54
 -
 February 09, 2023-87.jpg713.9 KB · Views: 53
 -
 February 08, 2023-80.jpg972.9 KB · Views: 50
 -
 February 11, 2023-99.jpg294.3 KB · Views: 57
 -
 May 18, 2023-265.jpg817.5 KB · Views: 50
 -
 May 18, 2023-267.jpg940 KB · Views: 50
 -
 May 18, 2023-272.jpg1.3 MB · Views: 61
 -
 February 20, 2023-3.jpg763.9 KB · Views: 59
 -
 February 19, 2023-124.jpg784.4 KB · Views: 52
 -
 February 19, 2023-1.jpg840.5 KB · Views: 50
 -
 January 31, 2022-44.jpg326.1 KB · Views: 55
 -
 February 15, 2022-3269.jpg396.4 KB · Views: 50
 -
 April 16, 2022-133.jpg317 KB · Views: 50
 -
 October 31, 2022-15.jpg598.9 KB · Views: 52
 -
 October 31, 2022-20.jpg622.9 KB · Views: 49
 -
 October 31, 2022-29.jpg447.6 KB · Views: 49
 -
 January 3, 2023-3616.jpg580.7 KB · Views: 48
 -
 January 3, 2023-362.jpg628.6 KB · Views: 50
 -
 January 09, 2023-2.jpg957.4 KB · Views: 47
 -
 February 1, 2023-171.jpg855.4 KB · Views: 60
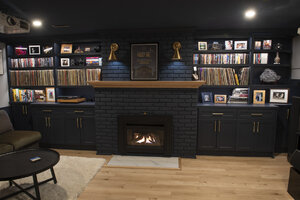
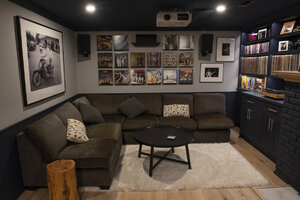
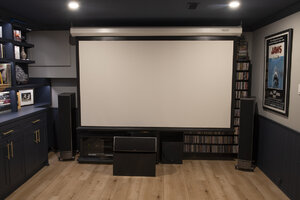
Cool basement, cool bike & Cool Dog.Wow it's been 18 months since i've posted although I have accomplished some. My wife had told me that until I finally renovated the basement I couldn't spend my time working on the bike, seemed fair as I'd been promising for several years and it was in rough shape. I spent 8 months working on it full time and was finally able to return to the bike in Jan. '23.
The first thing I had done was powder coat the rims and hubs in a clear coat. The results were terrible, the person who did it was careless, dirty fingerprints all over, bearing surfaces coated. I had to remove all of it.
Next I started painting smaller items. I've decided to paint certain pieces a bronze colour to add a 3rd colour to my scheme. I used Angelis brand leather paint for it's flex. Metallic Bronze is the colour.
I also started working on the 2nd exhaust (as my first attempt didn't consider the kickstand placement). I'm running it under my frame and popping out near the rear. I want to use cocktail shaker headers but because the bikes not a hardtail I don't really have anywhere to secure them so I had to make a brace (which I'm not crazy about the look). At first I had made the angle too extreme so I had to lower the angle. The finished pipes are not perfect but it's better than my first attempt and it's time to move on.
Kickstand is now on. I tried for an 11 degree angle. Also decided to change the handlebars, I was never sure about the Panzer bars, now going with mini apes, Zombie Performance.
On to fabbing the frame. Welded on the rear bake stay, replaced the cross bar, made a mount for the reg/rec, put on gussets. My welding is brutal, I seem to be getting worse at it! the frame will have waves and the moulding will be tough.
And that's where it stands. I'm about to send the headers to be ceracoted. I will blast the frame for the final time and epoxy prime. Moulding's next.
Appreciate it.Cool basement, cool bike & Cool Dog.
I'm about to paint my top and bottom triple trees. I'm wondering if anyone knows how to deal with the holes for the handle bar bushings and front forks?
Can I paint inside them or do they have to be masked and left unpainted in order for proper fitment?
Thanks!
Can I paint inside them or do they have to be masked and left unpainted in order for proper fitment?
Thanks!
Attachments

Tape 'em up. You'll hate yourself if you don't.I'm about to paint my top and bottom triple trees. I'm wondering if anyone knows how to deal with the holes for the handle bar bushings and front forks?
Can I paint inside them or do they have to be masked and left unpainted in order for proper fitment?
Thanks!

Hi There!
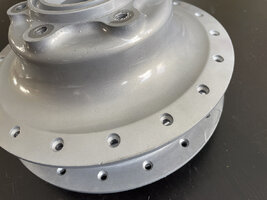
I'm in the midst of installing new wheel bearings and everything was going smoothly, I started with the front wheel, using a bearing driver I installed the first bearing, then the proper spacer then the 2nd bearing, everything lined up nicely except i guess i hit the bearing one too many times as the spacer has no play. The inner races won't spin.
I put the axle in but it's not spinning the bearing?
Any way of fixing this?
Thanks!
Attachments
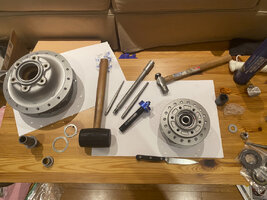
Did you use a bearing drive set that match the size of the bearing ? There shouldn’t be anything restricting the inner racer from turning as only the outside rest on the seat, my guess is it’s a crabby bearing that somehow couldn’t handle the impact when being installed. I do not use the hammer concept anymore but a hydraulic press. The hammer give you more feeing though, however never had a problem using to much force on the hydraulic causing any issues. I would take it back out and see if it can turn or have gotten some sidewise movement.
Thanks for the reply. I did use the correct driver size (47mm). You mention that there shouldn't be anything restricting the inner race but the spacer is seated right on the inner race so much so that i can't even remove the bearings again as the spacer won't move to allow me to use a drift and knock out the first bearing? is there another method i can use in this situation?Did you use a bearing drive set that match the size of the bearing ? There shouldn’t be anything restricting the inner racer from turning as only the outside rest on the seat, my guess is it’s a crabby bearing that somehow couldn’t handle the impact when being installed. I do not use the hammer concept anymore but a hydraulic press. The hammer give you more feeing though, however never had a problem using to much force on the hydraulic causing any issues. I would take it back out and see if it can turn or have gotten some sidewise movement.
I appreciate your help!
Sounds odd - can you send a better picture ? Could try a little heat if that’s an option. Don’t think I ever had a spacer stuck
Similar threads
- Replies
- 20
- Views
- 611