All balls is what I plan on using however different suppliers list different years for the same set. I believe the one I want is a 22-1015
-
Enjoy XS650.com? Consider making a donation to help support the site.
XS650.com receives a small share of sales from some links on this page, but direct donations have a much greater impact on keeping this site going.
You are using an out of date browser. It may not display this or other websites correctly.
You should upgrade or use an alternative browser.
You should upgrade or use an alternative browser.
Project XS2
- Thread starter Wingedwheel
- Start date
I expected no less.


I actually used a shop vac and flat blade to loosen it and it came right out. Less crap to deal with when I bench clean it
I ordered my tires and tubes and went with Kenda this time. I’ve pretty much used Shinko for my last few projects but wasn’t thrilled with how they seated on the rim. Took several tries before I could get the bead to set all the way around the rim and had to put 120 lbs of air in them. Because of the rust on these rims I have thought about using the rear wheel off XS2.2(Bobber) since I have a Cush wheel off a TX500 I wanted to use on her and I have a front wheel off a ‘73 TX/XS650 that I can swap the hubs when I do the spokes. I guess I need to order another set of spokes……..I just got a front and rear set last week in anticipation of the other XS2 plan but picking up New Girl sure changed my plans. Question, is there a set pattern are will any Yamaha 19” rim from that era work or does it have to be specific for this bike? I also have a rim off the TX 500 with no hub. Could I just lace that one up? Rough measurements show same width and spoke hole spacing.
Due to availability issues I will be using POR15, No Caswell to be found. Kit is supposed to come today so I poured out all but about a half gallon and added my drywall screws I’ve learned whenever I try and pour something through a funnel and don’t have a third hand, secondary containment helps keep me from making a mess. Shaka Shaka Shaka. I did re add and pour out after shaking about a half dozen times. More came out each time.


Rinsed it with water till everything was clear and set up a drying station. no flashing and the tunnel and front looked superb but I could see something over the seams. Took a wire and checked and it was varnish

Did another shake with screws and denatured alcohol.. got 99% and since the POR kit comes with prep I think I’m good for now.

I’ve learned whenever I try and pour something through a funnel and don’t have a third hand, secondary containment helps keep me from making a mess. Shaka Shaka Shaka. I did re add and pour out after shaking about a half dozen times. More came out each time.Rinsed it with water till everything was clear and set up a drying station.
no flashing and the tunnel and front looked superb but I could see something over the seams. Took a wire and checked and it was varnishDid another shake with screws and denatured alcohol.. got 99% and since the POR kit comes with prep I think I’m good for now.
POR15 has a distinct advantage over Caswell.
If it fails, or you screw it up, it can be removed with acetone. I’m not aware of anything that will remove Caswell.
If it fails, or you screw it up, it can be removed with acetone. I’m not aware of anything that will remove Caswell.
Hopefully I fit neither category. I’m trying to be super anal. I remember when I first got into bikes in the 70’s lining the tank was encouraged.If it fails, or you screw it up
Kit showed up so last night I did the degreaser/cleaner. Wrapped a couple turns of shrink wrap for protection and today I’ll do the acid prep. No hurrying the drying before coating. It looks dry and clean but I can wait a day or so to make sure.
A thought just occurred to me. I know right? Scary stuff.... ") Anyway...
Anyway...
Way back in the 70's I worked on Hiller helicopters. Their main rotor blades were made of wood. Whenever we reconditioned the blades, we'd have to restore the epoxy coating. The epoxy was a 2 part (50/50) grey epoxy. I want to say it was Hysol brand but I cant be certain. It looked, felt and acted just like J B Weld original formula epoxy. How did we apply it you ask? Glad you asked...
We mixed the two parts, then mixed in acetone or MEK.. either was acceptable, until we got the consistency of paint. We then shot it out of a spray gun. Within minutes the solvent (acetone/MEK) would evaporate out of it, leaving the pure epoxy to cure up overnight. Made for a damn hard, durable finish, it did.
Where am I going with this you ask? Glad you asked.
Seems to me you could mix up some J B Weld, which is fuel proof, cut it, pour it in, slosh it around and have a nice, inexpensive tank liner. The only caveat is the solvent needs airflow to evaporate... otherwise the vapors stagnate. Go ahead, ask me how I know?
Thoughts?
Anyway...Way back in the 70's I worked on Hiller helicopters. Their main rotor blades were made of wood. Whenever we reconditioned the blades, we'd have to restore the epoxy coating. The epoxy was a 2 part (50/50) grey epoxy. I want to say it was Hysol brand but I cant be certain. It looked, felt and acted just like J B Weld original formula epoxy. How did we apply it you ask? Glad you asked...
We mixed the two parts, then mixed in acetone or MEK.. either was acceptable, until we got the consistency of paint. We then shot it out of a spray gun. Within minutes the solvent (acetone/MEK) would evaporate out of it, leaving the pure epoxy to cure up overnight. Made for a damn hard, durable finish, it did.
Where am I going with this you ask? Glad you asked.
Seems to me you could mix up some J B Weld, which is fuel proof, cut it, pour it in, slosh it around and have a nice, inexpensive tank liner. The only caveat is the solvent needs airflow to evaporate... otherwise the vapors stagnate. Go ahead, ask me how I know?
Thoughts?
Yep, we used Hysol and MEK a lot in aviation too.A thought just occurred to me. I know right? Scary stuff....
Way back in the 70's I worked on Hiller helicopters. Their main rotor blades were made of wood. Whenever we reconditioned the blades, we'd have to restore the epoxy coating. The epoxy was a 2 part (50/50) grey epoxy. I want to say it was Hysol brand but I cant be certain. It looked, felt and acted just like J B Weld original formula epoxy. How did we apply it you ask? Glad you asked...
We mixed the two parts, then mixed in acetone or MEK.. either was acceptable, until we got the consistency of paint. We then shot it out of a spray gun. Within minutes the solvent (acetone/MEK) would evaporate out of it, leaving the pure epoxy to cure up overnight. Made for a damn hard, durable finish, it did.
Where am I going with this you ask? Glad you asked.
Seems to me you could mix up some J B Weld, which is fuel proof, cut it, pour it in, slosh it around and have a nice, inexpensive tank liner. The only caveat is the solvent needs airflow to evaporate... otherwise the vapors stagnate. Go ahead, ask me how I know?
Thoughts?
I think you're on to something, especially with the current resin shortage going on...
That being said...you go first.

Aww... why do I always gotta go first.... 

I just learned that Matt Walksler uses Caswell if he uses anything. For those who don't know, he took over at Wheels Through Time.
Yeah, I just saw that recent video too. Man he has some cool toys to play with.
Hey Jim I'll help, you can try it on a tank I supply.
Pick one out. I'll get up there eventually.... I think.... 
I'd be interested on Matt's take on proper prep prior to Caswell treatment.I just learned that Matt Walksler uses Caswell if he uses anything. For those who don't know, he took over at Wheels Through Time.
He had one of the best tutors a guy could ever ask for.

I saw that video as well, good stuff but he probably has a stock on the shelf. Liner looks good just gotta wait 4 days before putting gas in so I rebuilt the petcocks.

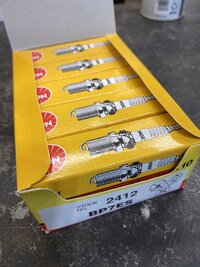
 They looked really clean inside and installed the new latch. I’ll leave the cap open for a few more days but the fumes are non-existent so not worried about the petcocks being on. While I was working on it these showed up.
They looked really clean inside and installed the new latch. I’ll leave the cap open for a few more days but the fumes are non-existent so not worried about the petcocks being on. While I was working on it these showed up.Attachments
Hey Jim, I have a TX tank with a seam leak I can de-rust it and send to you. May as well do my part lol. Somehow my key got left on(somehow) and ran my battery down to a point the charger thinks it’s bad and won’t charge it. I’m trying the jumper method to fool the charger. Hopefully it works.think....
 . I also made some gaskets for the next stage but I have a spare sump filter just in case but one of them probably needs the tear mod before it happens.
Changing oil today. Plugs were stuck good so a little heat gun action and they busted loose. Oil was a little runny for my liking but didn’t smell like it had gas in it. I believe the PO must have put an additive in for storage? Possibly MMO but not sure. There is just a faint scent of something besides motor oil. First torn sump filter I’ve come across believe it or not! 
Even my 75 that was so abused had an intact filter.
This filter got the JB Weld fix.
Even my 75 that was so abused had an intact filter.
This filter got the JB Weld fix.
Last edited:
Similar threads
- Replies
- 65
- Views
- 3K