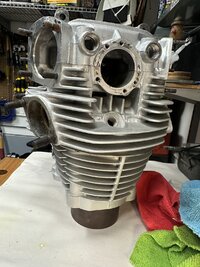
Got motivated to get cracking on another ‘78, first the breakdown then we take a look at what’s needed. Doubt it will be as original as my last few bikes - missing a few parts here and there - oh well engine first !
-
Enjoy XS650.com? Consider making a donation to help support the site.
XS650.com receives a small share of sales from some links on this page, but direct donations have a much greater impact on keeping this site going.
You are using an out of date browser. It may not display this or other websites correctly.
You should upgrade or use an alternative browser.
You should upgrade or use an alternative browser.
Starting another ‘78 XS650E rebuild
- Thread starter Niels B
- Start date
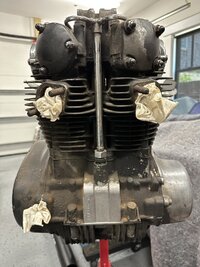
You gonna' have that engine ready when I bring you that frame?Got motivated to get cracking on another ‘78, first the breakdown then we take a look at what’s needed. Doubt it will be as original as my last few bikes - missing a few parts here and there - oh well engine first !
One way to get motivatedYou gonna' have that engine ready when I bring you that frame?
") you can pick up my Honda cb750f2 frame next time haha - don’t think you can retire buddy!
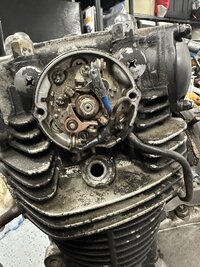
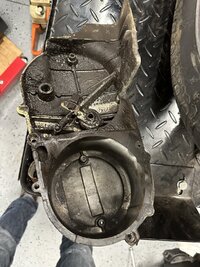
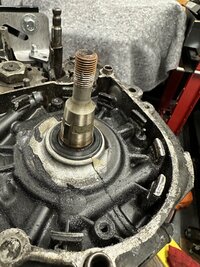
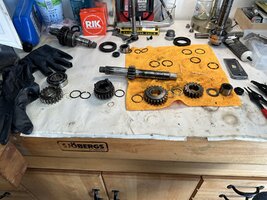
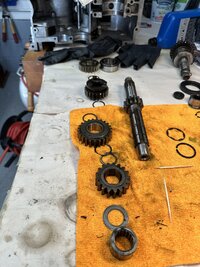
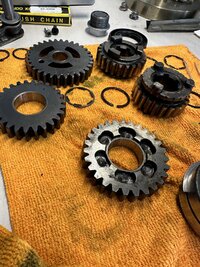
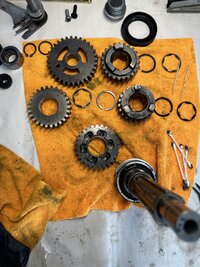
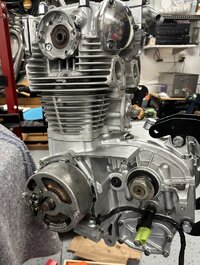
you can pick up my Honda cb750f2 frame next time haha - don’t think you can retire buddy!Well time flies and I’ve been off track for a while, however, getting ready to start the assembly now. One of my boys have shown interest so he has been out getting the parts ready for assembly. Tonight we will finish the transmission. Anyone happens to have a starter stay? Had to drill one out when I dismantled the engine see pic
Attachments
-
 IMG_3112.jpeg367.3 KB · Views: 32
 -
 IMG_3156.jpeg371.6 KB · Views: 36
 -
 IMG_3155.jpeg495.7 KB · Views: 36
 -
 IMG_3154.jpeg327.2 KB · Views: 37
 -
 IMG_3153.jpeg428.5 KB · Views: 37
 -
 IMG_3152.jpeg394.5 KB · Views: 31
 -
 IMG_3151.jpeg540 KB · Views: 31
 -
 IMG_3150.jpeg576 KB · Views: 31
 -
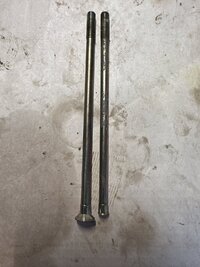 image.jpg347.4 KB · Views: 31
Is that the one I have the frame for?Well time flies and I’ve been off track for a while, however, getting ready to start the assembly now. One of my boys have shown interest so he has been out getting the parts ready for assembly. Tonight we will finish the transmission. Anyone happens to have a starter stay? Had to drill one out when I dismantled the engine see pic
Looking good so far. With regard to the starter screws, I had to drill both out, to replace I used cap screws and turned tapered collars to fit the starter end cap. Does not look stock but anyone looking under the bike that far is too nosey for their own good.
Yes sir - don’t worry I’m in no particular hurryIs that the one I have the frame for?
Thought about that option too, but would check first if anyone had them laying around. It happened to the previous rebuild too ( both screws), somehow had a couple with a bunch of odd ends I got on the net.Looking good so far. With regard to the starter screws, I had to drill both out, to replace I used cap screws and turned tapered collars to fit the starter end cap. Does not look stock but anyone looking under the bike that far is too nosey for their own good.
Yes sir - don’t worry I’m in no particular hurry
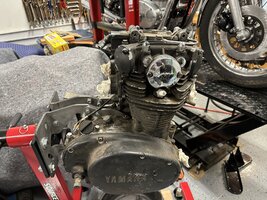
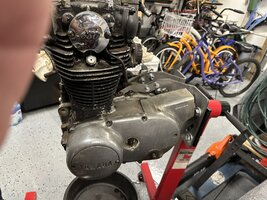
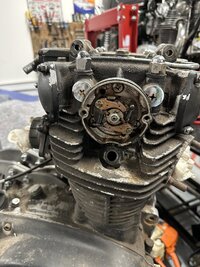
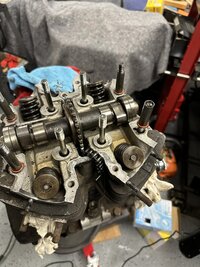
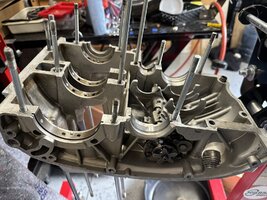
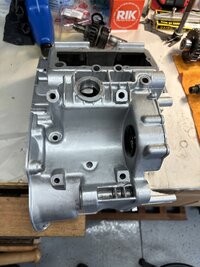
Well, slowly but surely this engine is coming together. It was a bi@$#, to get cleaned and ready for assembly. I think the previous owner painted the engine and everything else without dismantling anything, it was a mess! Some paint peeled of easily other parts was a pain. Secondly, whoever put this one together did no trust gaskets, consequently it was all glued together with some obscure material + the gasket - never have I scrubbed and cleaned that much! That being said - getting ready to install the contact breaker and give or assembly. I think I’ll turn my engine stand in to a test stand so I can try to fire up before I get to install engine in a frame. Have a couple of BS 38 carbs but would prefer to find a couple of BS34 from the year of the bike
Attachments
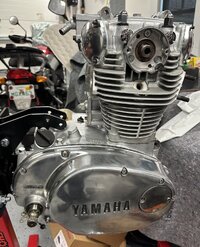
BS38’s were original equipment for the 78E
The set I have does not have the single throttle action - they are from a ‘75. Maybe I got the 38 confused with 34 and it’s the other way around that the ‘75 ran the BS34BS38’s were original equipment for the 78E
Engine looks Great! How are your intake manifolds?
‘75 was 38. ‘78 was 38. 34 showed up for ‘80. I believe the single throttle started with ‘76.The set I have does not have the single throttle action - they are from a ‘75. Maybe I got the 38 confused with 34 and it’s the other way around that the ‘75 ran the BS34
I need new intake manifold - the ones I took off were splitting apart. Have a set but without the air barb - I prefer to get a set with air barb so I can sync the carbs. Also will work with original petcockEngine looks Great! How are your intake manifolds?
Get the proper manifolds for the carburetors to be used. The original steel cage will likely only fit BS38 manifolds. Vacuum barb or not. Original air box? Seems wise to hunt down a 78 / 79 set of BS38’s
I got several original air-boxes - some I already refurbished - some in need of a little TLC. The tank have some tiny pinholes on the left bottom close to the tunnel edge, not sure how to fix it without damaging the paint - maybe jb weld if it can be trusted with gasoline, alternative welding - but that would require a repaint which I would like to avoid.
Speaking for myself, I would trust that to a Caswell epoxy liner.The tank have some tiny pinholes on the left bottom close to the tunnel edge, not sure how to fix it without damaging the paint
I have not studied the liner possibility - but I have heard of a lot of issues of liner failure causing the carb to get f'ed up. Would this be the type you pour into the tank and slur it around ? and does it actually cover small holes? if not what prep do you suggest for the holes ?Speaking for myself, I would trust that to a Caswell epoxy liner.
As well as feeding the engine, the tank's a containment vessel that needs to maintain it's integrity in the event of a crash... even minor spills... no pun intended.
Jus' speakin' for myself, I'd be leery of a tank with pinholes. Where they are, the metal's eaten away and weakened. I know people JB Weld and/or slosh the tank so it doesn't leak, but that doesn't restore it's "deformation without failure" integrity.
Jus' sayin'....
Jus' speakin' for myself, I'd be leery of a tank with pinholes. Where they are, the metal's eaten away and weakened. I know people JB Weld and/or slosh the tank so it doesn't leak, but that doesn't restore it's "deformation without failure" integrity.
Jus' sayin'....
Jim, I tend to agree - pinhole caused by rust, metal is thin already. I would normally think a cut out and replacement steel sheet would be the right way to go - that's unfortunately beyond my skills. My back-up is to use, either a nice special tank I have or an old, decent '75 tank. Both of the latter are with no damages, the special is already painted bright yellow including side covers, maybe I'll bump into a '78 tank some dayAs well as feeding the engine, the tank's a containment vessel that needs to maintain it's integrity in the event of a crash... even minor spills... no pun intended.
Jus' speakin' for myself, I'd be leery of a tank with pinholes. Where they are, the metal's eaten away and weakened. I know people JB Weld and/or slosh the tank so it doesn't leak, but that doesn't restore it's "deformation without failure" integrity.
Jus' sayin'....
it' s an easy swap!