74 TX650A Project – AKA “The Parts Bike”

I made a little progress this week. I pressure washed and degreased the frame and scuffed the original paint with some scotch-brite prior to rattle canning. A few spots had rust I couldn't completely get rid of, either because of pits or difficult to reach into brackets so I put some rust converter on those before painting. Only thing I didn't like about that was the Permatex converter I used left bubbles I couldn't brush or dab out so they made the paint look a little rough in spots. I used some Rust-Oleum all in one primer/paint that mentioned multiple times in the description about adhesion so we'll see, figured it was worth a try. It's far from show quality but it's an improvement. I still have to paint the swingarm, brake stay, center stand, side stand, and foot peg mounts before I can start putting things back together but I'm getting closer.

full


I also forgot to sand and polish the rear brake plate when I was doing the other aluminum bits, I think I'm done cleaning aluminum now. No before picture but it looked about as bad as the rest of the aluminum did.

full
 
I used some Rust-Oleum all in one primer/paint that mentioned multiple times in the description about adhesion so we'll see, figured it was worth a try.

When I built my XS2, the only thing I had powder coated was the frame, all other black parts were cleaned and sprayed with Rustoleum Professional gloss black. Those parts still look as good as the powder coated frame.
 
I haven't worked on the bike in a while due to some life changes. The first change was the end of the year long Covid induced work from home this April. This brought the TX project to a screeching halt because of hating the long drive and the resulting lack of ambition, The second change was brought on by the first. After going back to work for a while I decided the two hour drive was just not going to cut it so I retired!

I have been working on some other projects and enjoying the slower pace of life and just got back to working on the TX and did some painting on frame parts today.

full


It's not much but it's progress.
 
Bloody hell, I retired at 55 and started a new business at 55 and a bit. There is only so much daytime tv you can stomach!!!!
I still find time for the bikes much the the dismay of 'er-in-doors.
 
Today I took care of one of those issues that I've been procrastinating on but wasn't holding anything up. Now that I'm getting closer to putting the engine back in the frame I figured I might as well get it done.

When removing the engine I removed the breather box from the back of the head to give more room if needed. As usual three of the four bolts came out and the fourth came part-way out and then snapped off in the head.(Drat !) Fortunately, there was about 3\8" of the bolt sticking out so it could have been worse.

My first attempt was to heat the bolt stub red-hot a couple of times to see if that would release it enough to take out with needle nose vise-grips.(It didn't) Next I tried heating the aluminum around the bolt to see if that would loosen it up.(It didn't ) Finally I welded a nut on the end of the stub and BINGO, it backed right out.


full


full


Check another one off the (long) list.
 
A little more progress to report..

I disassembled and cleaned the forks a while ago.

full


I cleaned up the legs and sliders, amazingly the sliders looked pretty pitted but cleaned up nice and the pits are above where the seals ride. I installed new genuine Yamaha seals and dust boots and added Daystars shock boots from Summit Racing - after 5twins helped me figure out they would fit the 34mm fork legs. They definitely aren't too snug, I will need to get everything together and see how they work "going down the road" but worst case I will need some zip ties or find some nice looking clamps to get them to work properly. Seems to me I saw a post where 5twins (or GGGary? don't remember who...) found some thin stainless clamps that looked good. I'll have to go do some searching. In any case they are assembled and just need some oil to be done.

full


I'm getting closer to putting things back on the frame...

Thanks again to MaxPete for his thread on the early forks, made things a lot easier.
 
Last edited:
Next I took the E-lectrical bits off the battery box so I could get the battery box out of the frame.

full


The battery box looks about like you'd expect with the breather tube AWOL and being surrounded by acid vapor, bit it's still solid.

full


A little clean-up and the some Rustoleum (same as on the rest of the bike) and...it's not perfect but it's presentable.

full


I also painted the side stand that came with the frame, looks like a 76 stand after doing some searching on the forum.

full


The stand that came with "The Parts Bike" was bent-up enough that while it's salvageable it would take some torch bending and finagling to to get back into shape. The frame came with this stand so I'll start with that and see how I like it. I can always go put the work into the original stand if I don't like it.
 
I got the wiring harness and battery box installed today including the attendant E-lectrical bits and bobs that are attached to the battery box. I took pictures of the wire routing before removing that stuff which made putting it back in quick and easy.

full


I did find one area of the harness on the left hand side under the front battery box mount that had worn through the wrapping and was beginning to wear away the insulation on one of the wires. I re-wrapped the area with loom tape and put a piece of vinyl tube split lengthwise over it to provide more protection in that area. Should be good for another forty-seven years or so.

full


It seemed like as good a time as any to put the engine back in. I used the same ratchet strap method to install that I used to remove the engine, it actually went easier installing the engine than removing which I wasn't expecting.

full


It took about an hour and a half doing it solo. The nice thing about the straps is I can tilt the engine forward and back and side to side independently while lifting\lowering the frame with the motorcycle jack.
 
After working on various other projects (and recovering from a partially torn hip muscle) I finally got back to working on the Parts Bike this week. I decided to tackle putting on the new tires and the first task was to remove the nearly 50 year old tires. Being hard as a rock the old ones put up a pretty good fight but finally came off.


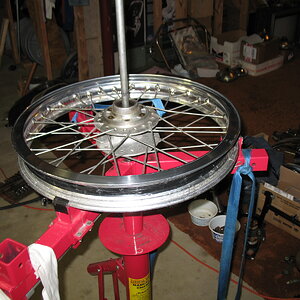
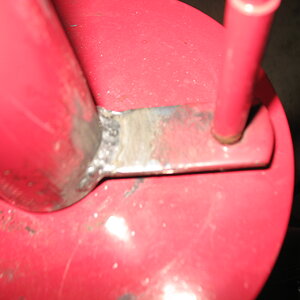
Putting the new tire on the rear was difficult but no worse than others I’ve done in the past. The front however was an entirely different story. It was the hardest tire install, car or bike, I have ever done! I was pulling so hard on the bar it broke the bracket at the bottom of the motorcycle adapter on the HF tire changer. Time to break out the welder and fix that before continuing.


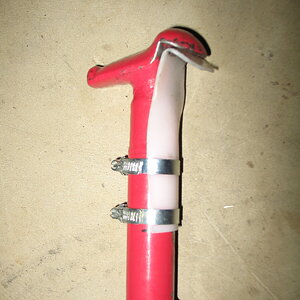
The install bar just would not work so I had to resort to tire irons. The tire was so stiff it required pulling on the irons so hard they were visibly bowing and I managed to pinch two tubes. (Grrrrrrr) I picked up a new tube (and a spare, just in case) and pondered how to get that SOB on. I figured that the only way to avoid pinching another tube was to figure out how get the install bar to work as that can’t pinch a tube. I already had a piece of plastic on the install end of the bar but the force was so high it was cutting through and making it harder to slide the bar around the rim. McMaster has plenty of choices for HDPE sheet so I got some 1/16” thick material and formed a piece hopefully thick enough to do the job.


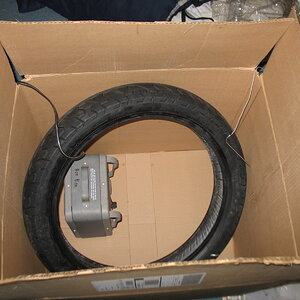
Many others over the years have mentioned how much setting the tire in the sun to warm it up helps the tire stretch. The only problem is it’s in the 40’s here lately and not much sun so that’s not an option. Instead I found a cardboard box just big enough to hold the tire and placed an electric space heater inside set to the highest setting and put a kitchen thermometer probe inside to monitor the temperature. With a doubled-up sleeping bag on top the inside of the box would vary between 160 and 180 degrees as the heater cycled on and off.


I got everything all set up and let the tire heat soak for two hours and said a little prayer to the tire gods and dove-in. Between using copious amounts of Ru-Glyde tire lube, the “slidier”(???) mounting bar and the tire being noticeably easier to stretch I got it done but it was still fairly difficult.


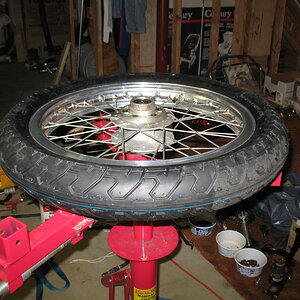
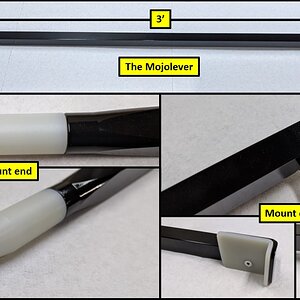
Either the shoulders on the rims are a bit bigger than usual, the tire bead diameter is a little smaller or both but I hope I don’t have to do one this tough again for a while. In any case it’s done and I can continue with reassembly. I keep hearing how much better the Mojolever works so I think after I’m done with this project that fabricating a similar unit will be my next project.

 
Back
Top