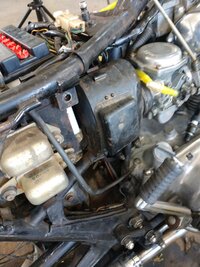
Spent all day tracking down an electrical problem. To start with the new wiring harness was pinned wrong on the main switch connector. The next problem was the left handlebar switch. Is there any wright up about restoring the switch? I put a new switch that was made for the XS2 and everything worked. The switch is black and not polished. This is why I am going to take the switch apart tomorrow. I tried two other old switches and they both were bad.
-
Enjoy XS650.com? Consider making a donation to help support the site.
XS650.com receives a small share of sales from some links on this page, but direct donations have a much greater impact on keeping this site going.
You are using an out of date browser. It may not display this or other websites correctly.
You should upgrade or use an alternative browser.
You should upgrade or use an alternative browser.
We're off to see the Wizard!
- Thread starter gggGary
- Start date
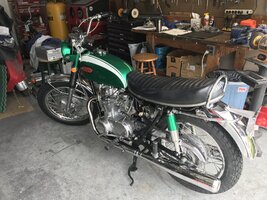
Got the bike running today. Took it up the street. It runs great. I still have two problems. One is the left handle bar switch, soaking right now. Horn not working. The second problem is the right carb choke is not returning. It is returning but not all the way. I replaced the spring and plunger. Put a little WD on it.
Attachments
Last edited:
Really nice work SS.
Especially in such a short time frame.
Congratulations on a job well done.
Now on to the other 47 gggGary brought you.
Especially in such a short time frame.
Congratulations on a job well done.
Now on to the other 47 gggGary brought you.

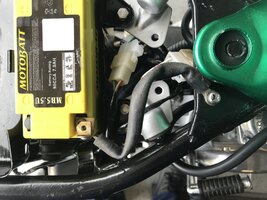
does it ground the rectifier?
the NOS one thanx
see if any of the other 70's have that ground wire yet?
Grounds the battery.does it ground the rectifier?
None of them have this ground. Most of them have nothing.see if any of the other 70's have that ground wire yet?
Some Honda's had that extra ground just hanging there. The general thought is that it could have been used with a three connection flasher instead of using the two connection flasher.
Scott
Scott
Last edited:
My 73 has 1 grd straight to the engine caseSome Honda's had that extra ground just hanging there. The general thought is that it could be used with a three connection blinker instead of using the two connection one.
Scott
Don't know if thats stock but the bike is almost completely stock even the airboxes and filters
Attachments
WIRE, MINUS LEAD 256-82116-00-00 could it be this one |
Minus Lead, translate, Negative Lead?
Mentioned this to Bill;
I went right by the Carlisle Spring Antique car show yesterday, it was going gangbusters. My quick thought was that I couldn't trust myself there with an empty van and trailer.......
Even from the freeway I saw bikes and parts................
I went right by the Carlisle Spring Antique car show yesterday, it was going gangbusters. My quick thought was that I couldn't trust myself there with an empty van and trailer.......
Even from the freeway I saw bikes and parts................
Dangerous situation but if you got more room now .....
From a conservative point of economy, you know that was a mistake. Better loaded than empty!My quick thought was that I couldn't trust myself there with an empty van and trailer.......
'TT'
Had to order air cleaners for the 70.
Only one shock had the plastic and paper inserts between the spring and body/cover, cut some for the second shock out of some plastic bottles.
View attachment 211793
Gotta admit was real happy with the Mark 1A shock rebuilder.
View attachment 211792
A fin on the bottom lets me clamp it in the bench vice to hold it. Turning the long nut on right (the big washer is welded to it) drives the body to the left pushing the rod out/left allowing you to fit a wrench on the jam nut to free/unthread the top clevis. Used a long bolt through the lower eye, stops the shock from turning as you thread the tool's rod in.
Notes; The shock shaft is slotted on the end to keep it from spinning while removing or adjusting the jam nut. The jam nut is directional, one side is bored to shaft size for about 5/16" so it threads on BEYOND the shaft's thread a bit. that side goes on the shaft first.
I swear 5twins fancy/pretty shopmade tools forced me to up my game from my usual crude rough unpainted "home made" tools.
No parts were purchased to build the tool, everything scrounged from bins in the shed of ill repute.
key words;
rear shock absorber absorbers shocks early shroud painted xs1 xs1b disassemble remove cover paint assemble clean adjust repair collar clevis eyelet rod bushing spring clamp fix remove restore repaint tool special compressor compression. how to shop clamp holder assembly
Missed that … but bang up job!
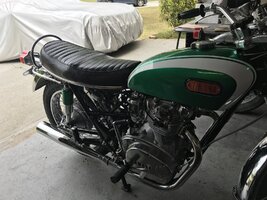
Fixed the switch today. Got the right filter boxes installed. Now all I need is the filters and then a good test ride. Everything is working great.
You think it will be up for 500 miles of spirited riding at the Ozarks rally?Fixed the switch today. Got the right filter boxes installed. Now all I need is the filters and then a good test ride. Everything is working great.
Similar threads
- Replies
- 11
- Views
- 1K