I have the same style of lift. I have used it on my XS as well as my Harley. They work quite well but you do need to be mindful of the weight distribution. One of the problems i run into is the kickstand mount getting in the way of the lift hitting both frame rails equally. I have in the past used wood to shim it evenly. A lot of the placement under the frame depends on what I plan on doing to the bike (ie.. front or back end of bike). I always lift it up until it passes one of the three safety stops, then release the pressure until it locks against the safety stops. Being a hydraulic unit, there is always the chance of it leaking down while unattended. Last thing you want to find when you come to the garage is to see it leaked down and the bike fell over.
-
Enjoy XS650.com? Consider making a donation to help support the site.
XS650.com receives a small share of sales from some links on this page, but direct donations have a much greater impact on keeping this site going.
You are using an out of date browser. It may not display this or other websites correctly.
You should upgrade or use an alternative browser.
You should upgrade or use an alternative browser.
The reconstruction begins 1977 (Surprise)
- Thread starter Mikey
- Start date
Thanks the book really glosses over a lot of thisWell, since this is all new to you, let me explain some things about that axle clamp. It is directional. If you look on the bottom you will see an arrow and it should point forward. Also, if you look closely at the clamp, you'll notice the front section is thicker than the rear. This is by design. To install it properly, tighten the front nut until the clamp hits the fork lower, then tighten the rear nut. You should end up with no space at the front and a small gap at the rear .....
View attachment 248041
I see in one of your earlier pics (post #20) that it was installed correctly.
Then, when you're ready to put the front wheel back on, I can walk you through that procedure. There is a proper sequence to follow so that the forks don't bind.
I finally got back to the bike today
Got the wheel off and fender
Started to pull off the left fork tube and as I was pulling it off it came all the way off
I took a few pictures of how I think the rubber washers should go back on top and bottom of the ear but since it dropped before I had a chance to see in what order it came apart I'm a bit puzzeled in the order
I'm going to also add a Partzilla diagram of the area but it really doesn't show where those spacers (rubber / metal washers go )
Attachments


These were from my reference photos, when I took things apart, I usually laid them out in the sequence they went together and photographed it. It’s the best photos I’ve got of it, hope it helps.


looks like the pieces on top and bottom of the ear both have the metal portion on the bottoms
That should do it thanks !!
Time to celebrate 36 years of wedded bliss with the misses
For lunch I got takeout Chinese and for dinner were making Broccoli and cream soup with the broccoli fresh from the garden
were such old romantics the 2 of us and tommorow we make split pea soup too
We love homemade soup
One more look guys when I have the parts in order on the ear that ear it won't fit between the upper and lower triple trees (if thats what they both are called upper and lower)
It's like that lower metal washer is making the assembly to tall to fit between the 2 trees and I'm pretty sure it's the correct order of assembly on the top and bottom of the ear
It's like that lower metal washer is making the assembly to tall to fit between the 2 trees and I'm pretty sure it's the correct order of assembly on the top and bottom of the ear
Attachments


IIRC the bottom should be rubber, metal ring, shroud, ear.
Both legs should easily slide up into the top triples without a fight or twisting a triple to align it, If they don't..............
Am I confused? Is there left on right and vice versa?View attachment 248726
IIRC the bottom should be rubber, metal ring, shroud, ear.
Both legs should easily slide up into the top triples without a fight or twisting a triple to align it, If they don't..............
My question, Are the ears upside down?Should of known, the @Mailman had it right.
A RATTY special but order's the same.
View attachment 248756
My bad... recollection...
Let me try thatView attachment 248726
IIRC the bottom should be rubber, metal ring, shroud, ear.
Both legs should easily slide up into the top triples without a fight or twisting a triple to align it, If they don't..............
I finally got the left ear on ( thanks @gary for the part ) at first it didn't want to fit in there
After struggling with it for awhile I took the old one and i t fit right in I then put both ears side by side and the new to me one way 3/16 to long
After consulting with Gary about the differences in lenghts he figured that a headlight ear from a 750 must have slipped into the the local SOIR /it's easier to cut off too much than trying to stretch to short
Of to a friends house cut off the excess with a metal cutting band saw , deburred it and tadaaa it fits just like a 5 finger condom
It's hard to see in the photo but ones 6 and 15/32" and the old one was 6 and 9/32"
Attachments

Now that the ear is sorted out and the fender is back on
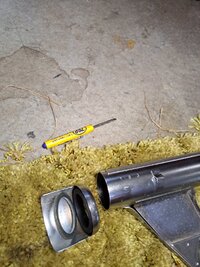
I slid in the fork tube in went smoothly and in goes the axle
I've got it part of the way in but it seemed like it threaded in to a certain point then it doesn't want to go any further and I know I shouldn't try and tap it in at least not without asking here first )
I have the nuts holding the left side of the axle loose right now
Any suggestions
I'll post a few pics
Attachments


try twisting or lifting the front wheel a bit. There's no threads. Just have to get everything lined up right.
I'll give it a try I just didn't want to use brute force
Thanks !!
Thanks !!
Worked like a charm time to dig out the torque spec sheet and tighten things up
One more question my ratchet wrench / torque gauge are 3/8" but I have to adapt it up to a 1/2" socket
That shouldn't give me a wrong reading on the torque guage ?
I just to had to ask the more I ask hopfully the more I learn
Thanks
One more question my ratchet wrench / torque gauge are 3/8" but I have to adapt it up to a 1/2" socket
That shouldn't give me a wrong reading on the torque guage ?
I just to had to ask the more I ask hopfully the more I learn
Thanks
